
The smell hit first – warm butter, sweet sugar, and that soft vanilla note rising out of the oven before I even set the timer. I had barely wiped flour off my hands and already knew this one was going to be good.
I don’t rush cakes anymore. I used to. That’s how I ended up with dense centers and cracked tops. Now I slow down just enough to let things come together properly, especially with a simple vanilla cake like this.
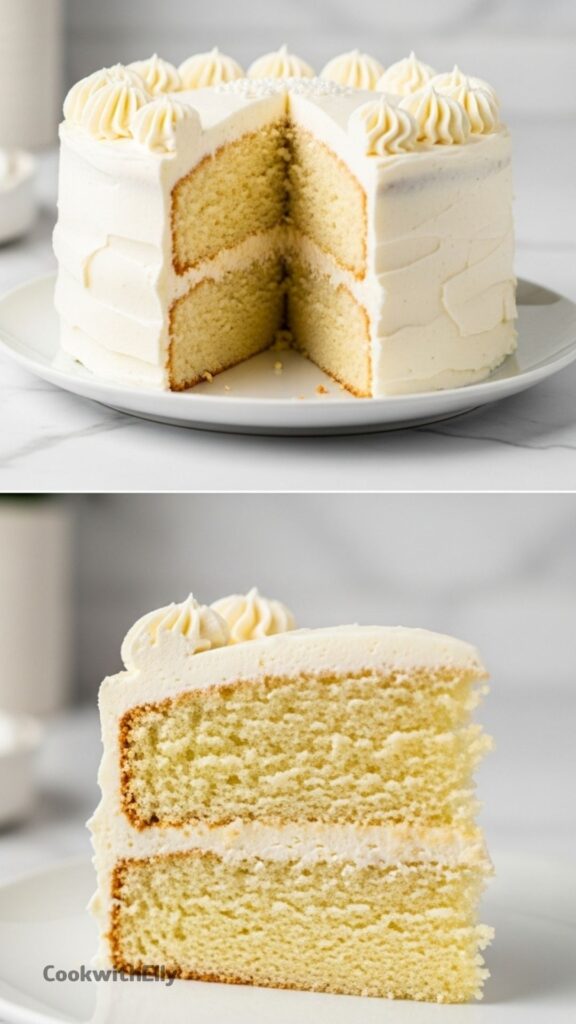
This one sticks around in my kitchen. Birthdays, random Sundays, those days when I just want something soft and familiar. It’s fluffy, light, not overly sweet, and the buttercream feels silky instead of heavy.
Most of the cakes I make actually start from this base. I tweak things here and there, but when I want something dependable, I come right back to this exact version.
A small moment before it all started
I almost skipped baking that day. The butter was still in the fridge, and I didn’t feel like waiting. But I left it out anyway while making tea, and that small decision changed everything.
Room temperature butter makes a difference you can actually see. It creams better, traps air, and gives the cake that soft lift instead of a tight crumb. I’ve learned not to fight that step.
Ingredients Needed for the Recipe
- 2 1/4 cups all-purpose flour – gives structure to the cake
- 2 1/4 tsp baking powder – helps the cake rise evenly
- 3/4 tsp salt – balances the sweetness
- 3/4 cup unsalted butter (room temperature) – adds richness and softness
- 1 1/2 cups granulated sugar – sweetens and helps with texture
- 3 large eggs (room temperature) – bind everything together
- 1 1/2 tsp vanilla extract – the main flavor base
- 1 cup buttermilk (or milk) – keeps the cake moist and slightly tangy
- 6 large egg whites – base for the buttercream
- 1 1/2 cups granulated sugar – sweetens the buttercream
- 2 cups unsalted butter (room temperature) – creates silky frosting
- 2 tsp vanilla extract – finishes the buttercream flavor
- Confetti sprinkles – for a playful finish
- Nonpareils – add texture and color
How to make The Best Vanilla Cake Recipe (Reader Favorite!)?
Step 1 – Prepare the pans
I preheat the oven to 350F and get the pans ready first. Grease, a light dust of flour, then parchment at the bottom. Skipping this once was enough to convince me never again.
There’s something calming about setting up the pans properly. It makes the rest feel smoother, like things are already under control.
Step 2 – Mix the dry ingredients
I whisk flour, baking powder, and salt in a bowl. Nothing fancy, just making sure it’s evenly combined. If I rush this, I end up with uneven texture later.
Sometimes I sift it if I’m feeling patient. Most days, I don’t. It still works out fine as long as it’s mixed well.
Step 3 – Cream butter and sugar
This part matters more than it looks. I beat butter and sugar until it turns pale and fluffy. It takes a few minutes, and I actually wait it out.
When it’s ready, it looks lighter and almost airy. That’s the moment I stop, not before.
Step 4 – Add eggs and vanilla
I add eggs one at a time, letting each one mix in fully before adding the next. If I rush, the batter looks slightly split, and I don’t like that.
Then goes in the vanilla. The smell shifts immediately, warmer and deeper. That’s always my favorite part.
Step 5 – Combine wet and dry
I alternate the flour mixture and buttermilk, starting and ending with flour. Three additions of dry, two of liquid. I keep the mixer low here.
Overmixing at this stage ruins the texture. I stop as soon as it comes together, even if it looks slightly uneven.
Step 6 – Bake the cakes
I divide the batter into pans and slide them into the oven. Around 30 to 35 minutes usually works, but I check early just in case.
The tops turn lightly golden, and the center springs back when touched. That’s when I know they’re done.
Step 7 – Cool the layers
I let the cakes sit in the pans for about 10 minutes. Not longer. I’ve made that mistake, and they stuck badly.
Then I turn them out onto a rack and let them cool completely. Warm cake and frosting don’t get along.
Something that almost went wrong
One time, my buttercream looked completely ruined. It was curdled, thick, and just off. I almost threw it out.
Instead, I kept mixing. Slowly, it came together into something smooth and glossy. Now I expect that phase and don’t panic anymore.
Step 8 – Make the buttercream
I whisk egg whites and sugar together over gentle heat until it feels smooth, not grainy. It takes a few minutes, and I don’t stop stirring.
Once it’s warm enough, I whip it until it turns into a thick, glossy meringue and cools down completely.
Step 9 – Add butter and finish frosting
I switch to a paddle and slowly add butter, piece by piece. It looks strange halfway through, but I keep going.
Then vanilla goes in, and suddenly it becomes smooth and creamy. That shift always feels a bit magical.
Step 10 – Assemble the cake
I place one cake layer down, spread a thick layer of buttercream, then stack the second. A thin crumb coat goes on first.
After a short chill, I frost the whole cake properly. Smooth sides or textured, depending on my mood.
Step 11 – Decorate
I press sprinkles along the base and scatter some on top. Sometimes I go neat, sometimes messy. Both look good.
Rosettes on top finish it off. Not perfect, but that’s part of the charm.
Tips
- Use room temperature ingredients for better mixing
- Measure flour by spooning and leveling, not scooping
- Cream butter and sugar properly – don’t rush this
- Add eggs one at a time and mix fully
- Do not overmix once flour is added
- Always line cake pans with parchment
- Check cakes early since ovens vary
- Cool cakes completely before frosting
- If buttercream looks curdled, keep mixing
- Use buttermilk for a softer texture and balanced flavor
How it tastes and feels in the end
The crumb is soft but not fragile. It holds together when sliced but still feels light when you bite into it. That balance took me a while to get right.
The flavor is simple in the best way. Vanilla comes through clearly, and the buttercream adds a smooth finish without being overly sweet.
Every time I cut into it, I notice the texture first. Then the flavor follows, and it just works without trying too hard.
I keep coming back to this cake because it doesn’t need anything extra. It stands on its own, quietly doing exactly what a good cake should.
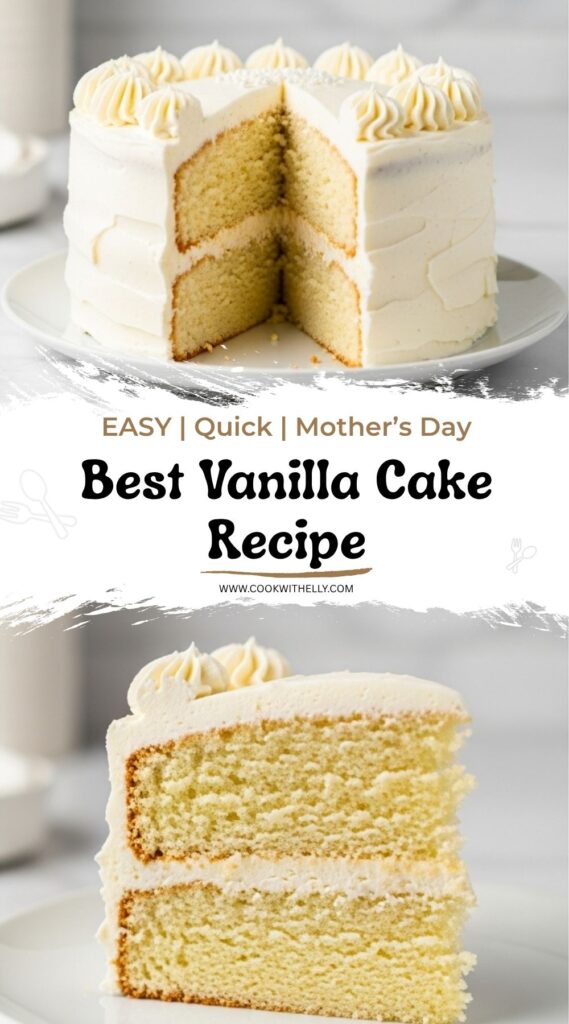
The Best Vanilla Cake Recipe (Reader Favorite!)
Description
This classic Vanilla Cake is a beloved reader favorite, featuring fluffy vanilla cake layers paired with silky Swiss Meringue Buttercream. It is the perfect base for birthdays, weddings, and holidays, offering a simple yet delicious flavor combination that stands the test of time.
Ingredients
Vanilla Cake
Swiss Meringue Buttercream
Assembly & Decoration
Instructions
Vanilla Cake
-
Prep Pans and Oven
Preheat oven to 350°F (175°C). Grease and flour two 8-inch cake rounds and line the bottoms with parchment paper. -
Mix Dry Ingredients
In a medium bowl, whisk together the all-purpose flour, baking powder, and salt until well combined. Set aside. -
Cream Butter and Sugar
Using a stand mixer fitted with a paddle attachment, cream the butter and sugar on medium-high speed until pale and fluffy, about 3 minutes. This step is crucial for a light texture. -
Add Eggs and Vanilla
Reduce speed to low. Add eggs one at a time, fully incorporating each addition before adding the next. Scrape down the sides of the bowl as needed. Add the vanilla extract. -
Combine Wet and Dry
Alternate adding the flour mixture and buttermilk, beginning and ending with the flour (3 additions of flour and 2 of buttermilk). Mix on low speed until just incorporated. Do not overmix. -
Bake
Divide batter evenly between the prepared pans. Bake for 30-35 minutes, or until a toothpick inserted into the center comes out mostly clean with a few moist crumbs. -
Cool
Place cakes on a wire rack to cool in the pans for 10 minutes. Then, turn them out onto the wire rack to cool completely before frosting.
Swiss Meringue Buttercream
-
Heat Egg Whites and Sugar
Place egg whites and sugar into the bowl of a stand mixer. Place the bowl over a pot with 1-2 inches of simmering water (double boiler method). Whisk constantly until the mixture is hot to the touch and no longer grainy, or until it reaches 160°F (71°C) on a candy thermometer (approx. 3 minutes). -
Whip Meringue
Place the bowl on your stand mixer fitted with the whisk attachment. Whip on medium-high speed until the meringue is stiff, glossy, and the bowl is no longer warm to the touch (approx. 5-10 minutes). -
Add Butter
Switch to the paddle attachment. With the mixer on low speed, slowly add the cubed butter one piece at a time. Once all butter is added, increase speed to medium-high and mix until smooth and creamy. -
Flavor
Add the vanilla extract and whip until smooth and fully incorporated.
Assembly
-
Layer and Crumb Coat
Place one layer of cake on a cake stand or serving plate. Top with approximately 1 cup of buttercream. Place the second layer on top. Apply a thin layer of buttercream around the entire cake to seal in crumbs (crumb coat). Chill for 20 minutes. -
Final Frosting
Frost the top and sides of the cake with the remaining buttercream. Smooth with a bench scraper or offset spatula. -
Decorate
If desired, use a decorating comb to create texture on the sides. Mix confetti and nonpareils in a small bowl. Press sprinkles gently along the bottom edge of the cake and sprinkle randomly on top and sides for a speckled effect. -
Pipe Rosettes
Use a 1M piping tip to pipe rosettes on top of the cake with any remaining frosting.
Nutrition Facts
Servings 12
Serving Size 1 slice
- Amount Per Serving
- Calories 485kcal
- % Daily Value *
- Total Fat 20g31%
- Saturated Fat 12g60%
- Trans Fat 0.5g
- Cholesterol 95mg32%
- Sodium 280mg12%
- Potassium 120mg4%
- Total Carbohydrate 72g24%
- Dietary Fiber 1g4%
- Sugars 52g
- Protein 6g12%
* Percent Daily Values are based on a 2,000 calorie diet. Your daily value may be higher or lower depending on your calorie needs.
Note
Tips for Success:
1. Room Temperature Ingredients: Ensure butter, eggs, and buttermilk are at room temperature for proper emulsification.
2. Measure Flour Correctly: Spoon and level flour into the measuring cup to avoid dense cakes.
3. Buttermilk Substitute: If you don't have buttermilk, add 1 tbsp lemon juice or vinegar to 1 cup of milk and let sit for 10 minutes.
4. Cooling: Cool cakes completely before frosting to prevent melting the buttercream.
Frequently Asked Questions
Can I make this cake in advance?
Yes! The cooled cake layers can be wrapped tightly in plastic wrap and frozen for up to 3 months. The frosting can be refrigerated for 1 week or frozen for 3 months. Bring to room temperature and rewhip before using.
Can I use regular milk instead of buttermilk?
Yes, you can use whole milk or 1% milk. For best results, you can make a sour milk substitute by adding 1 tablespoon of lemon juice or white vinegar to 1 cup of milk and letting it sit for 10 minutes.
How do I convert this to cupcakes?
This recipe makes approximately 18-24 cupcakes. Reduce the baking time to 15-18 minutes, checking for doneness with a toothpick.
Can I use American Buttercream instead?
Absolutely. If you prefer American Buttercream, you can substitute the Swiss Meringue Buttercream with your favorite vanilla American buttercream recipe.