 View Gallery
1 photo
View Gallery
1 photo
Easter always feels like a fresh start to me. The food gets lighter, the colors get brighter, and suddenly everything on the table feels a little more playful, even the appetizers.
ata-ezoic="1" data-no-optimize="1" data-no-defer="1">ezstandalone.cmd.push(function () { ezstandalone.showAds(119); });This Easter Cheese Board has become one of my favorite ways to kick off the meal. It’s cheerful without trying too hard, full of little bites that people actually want to snack on while they chat.
I love that it doesn’t require turning on the oven or juggling timers. You’re just arranging beautiful things, tasting as you go, and letting spring show off a bit.
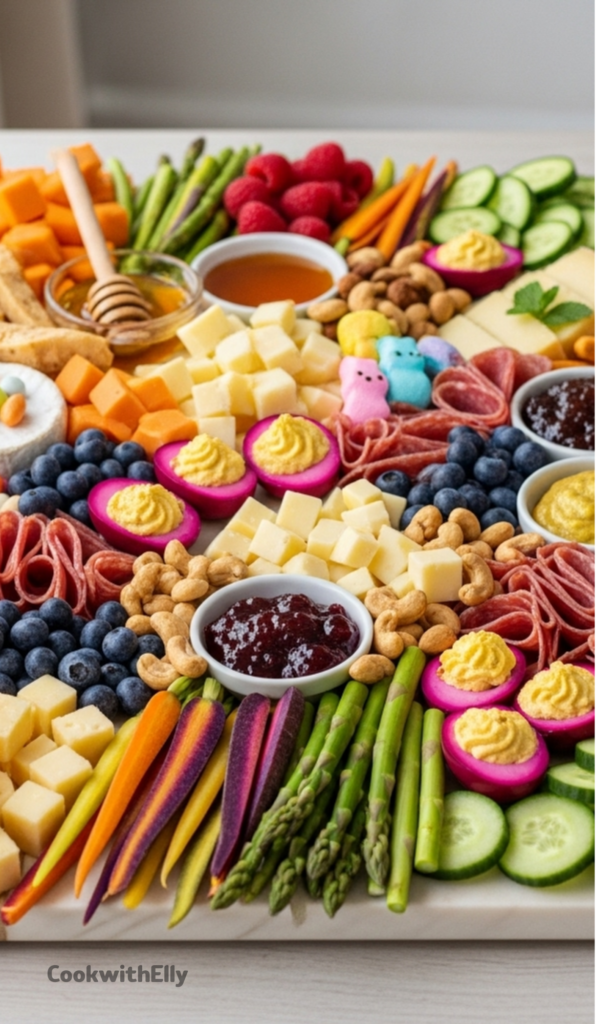
When I build this board, I focus on balance. Creamy cheeses, crisp vegetables, sweet berries, and just enough candy to make it feel like a holiday and not a regular Sunday.
It’s also forgiving. There’s no “wrong” way to put it together, which makes it perfect for hosting when you already have enough on your plate.
Why an Easter Cheese Board Works So Well
Easter food tends to lean rich later in the meal, so starting with something fresh and colorful sets the tone. A cheese board like this feels generous without being heavy.
I also love how it invites people to gather. Guests hover, build little bites, and ease into the celebration without the formality of plated appetizers.
The mix of savory, sweet, and crunchy means there’s something for everyone. Kids go for the jelly beans, adults linger near the cheese, and nobody feels left out.
Ingredients Needed for the Recipe
- Assorted cheeses like gouda and havarti, used as the creamy base of the board.
- Cured meats, added for savory contrast and satisfying texture.
- Beet pickled eggs or beet deviled eggs, bringing color and a tangy bite.
- Rainbow carrots, cucumbers, and asparagus, for crunch and fresh spring flavor.
- A variety of crackers, to carry all the cheeses and spreads.
- Fresh berries like blueberries and raspberries, for brightness and sweetness.
- Marcona almonds or cashews, offering a buttery crunch.
- Honey, jam, and mustard, to layer flavors and let guests customize bites.
- Spring candy like jelly beans or chocolate eggs, adding a festive finish.
Using Fresh Greens and Flowers on Your Board
Fresh greens and flowers are what take this Easter Cheese Board from pretty to truly special. They frame the food and make the whole spread feel intentional.
I like to tuck greens around the edges rather than mixing them into the food. It keeps everything clean and still gives that garden-inspired look.
Stick to edible or food-safe flowers, and give everything a gentle rinse and dry. Even a few small blooms go a long way.
How to make Easter Cheese Board?
Step 1 – Prep the Ingredients
Start by prepping everything so assembly feels relaxed instead of rushed. Cut the cheeses into cubes, wedges, or slices, keeping shapes varied.
Trim the woody ends off the asparagus, slice the cucumbers into rounds, and halve the carrots lengthwise if they’re thick.
Step 2 – Place the Cheeses First
Set your board or large platter out and place the cheeses first. I like spacing them across the board so each one has room to shine.
This creates anchors that make filling in the rest much easier later on.
Step 3 – Add the Meats
Fold or gently pile the cured meats near the cheeses. Don’t worry about making them perfect, a little looseness looks inviting.
Keeping meats near cheeses helps guests naturally build balanced bites.
Step 4 – Fill in with Crackers and Spreads
Slide crackers into open spaces, standing some upright and laying others flat. This keeps the board from feeling flat.
Add small jars or bowls of honey, jam, and mustard wherever they fit comfortably.
Step 5 – Layer in Fruits and Vegetables
Place berries in small clusters rather than spreading them everywhere. It keeps their color bold and contained.
Add the vegetables next, letting their shapes and colors break up the richer elements.
Step 6 – Add Eggs, Nuts, and Candy
Nestle the pickled or deviled eggs into open spots, where their color really pops. They’re always a conversation starter.
Finish with nuts and a sprinkle of spring candy to fill any gaps and make the board feel complete.
Step 7 – Final Touches
Step back and look for empty spaces. Fill them gently rather than overcrowding.
Add serving knives, toothpicks, and small spoons at the end so guests can help themselves easily.
Serving Ideas for Easter Gatherings
This board works beautifully as a starter while guests arrive. Set it out early so people can snack and settle in.
If you’re hosting a brunch, it pairs well with lighter dishes like salads, eggs, or pastries without stealing the spotlight.
I’ve also served it outdoors on mild spring days. Just keep it shaded and bring it inside once the party slows down.
Tips
- Work from largest items to smallest so filling gaps feels natural.
- Mix textures by balancing creamy cheeses with crunchy elements.
- Overlap ingredients slightly to make the board look abundant.
- Use small bowls for spreads to keep things tidy.
- Don’t stress about symmetry, relaxed boards feel more welcoming.
Making It Ahead and Storing Leftovers
You can prep most components a day ahead and store them separately. This makes assembly quick and stress-free.
If you have leftovers, wrap cheeses tightly and store vegetables and fruits in airtight containers. They’re easy to reuse the next day.
I often turn leftover bits into smaller snack boards or pack them into lunch boxes, nothing goes to waste.
This Easter Cheese Board isn’t about perfection. It’s about sharing good food, welcoming spring, and letting the table feel as joyful as the day itself.
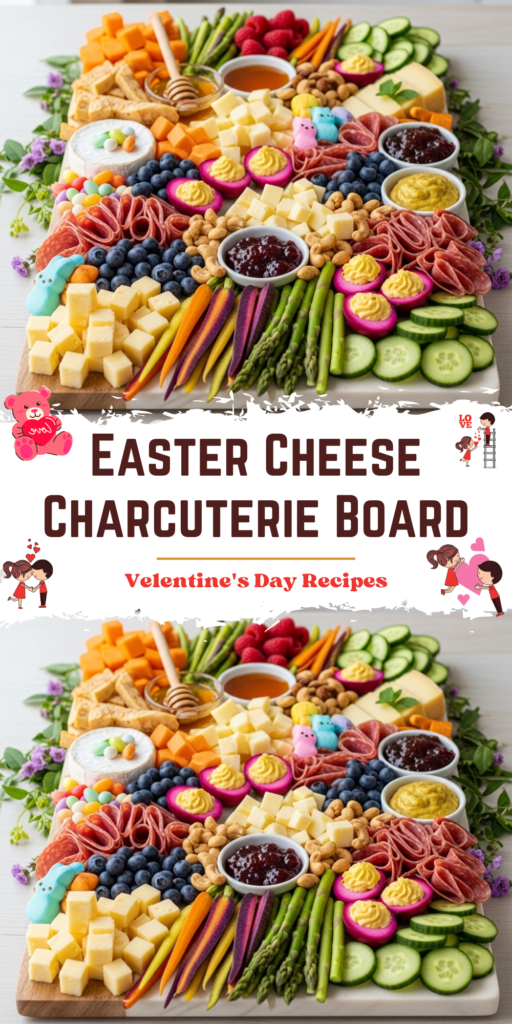
Easter Cheese Board
Description
A colorful Easter charcuterie board with cured meats, spring vegetables, fresh berries, eggs, and cheese! Beautiful flowers and greens outline the board, making it a stunning and festive appetizer for your holiday gathering.
ingredients
Cheeses & Meats
Fresh Produce & Eggs
Accompaniments & Sweets
Instructions
-
Cut cheese into cubes and triangles. If using petite carrots, cut them in half vertically. Break woody ends off of asparagus. Thinly slice cucumbers into rounds.
-
Start building your board by putting your cheeses down first, I like to put them across from each other in quadrants. Add meats next to the cheese.
-
Fill in with crackers, then your small jars of honey and jam.
-
Place berries into open areas, and the deviled eggs or pickled eggs. Fill in any empty holes with jelly beans and nuts.
Nutrition Facts
Servings 10
Serving Size 1 portion of board
- Amount Per Serving
- Calories 450kcal
- % Daily Value *
- Total Fat 30g47%
- Saturated Fat 12g60%
- Cholesterol 65mg22%
- Sodium 580mg25%
- Potassium 180mg6%
- Total Carbohydrate 25g9%
- Dietary Fiber 3g12%
- Sugars 15g
- Protein 22g44%
- Calcium 25 mg
- Iron 8 mg
* Percent Daily Values are based on a 2,000 calorie diet. Your daily value may be higher or lower depending on your calorie needs.
Note
- Board Material: Use non-porous boards like marble or treated hardwood (e.g., teak or maple) for best results.
- Flowers & Greens: Secure fresh edible greens and flowers around the board using wire hangers shaped into a ring for a festive wreath effect.
- Make-Ahead Tip: Assemble the board up to 4 hours ahead; cover and refrigerate until ready to serve.
Frequently Asked Questions
Can I make this board vegetarian?
Yes! Simply omit the cured meats and add more cheeses, nuts, roasted vegetables, or marinated artichokes for variety.
What’s the best way to transport this board?
Assemble it on a large rimmed baking sheet with a fitted lid or cover tightly with plastic wrap. Keep chilled until serving.