 View Gallery
1 photo
View Gallery
1 photo
Baked eggs are one of those recipes that feel almost too simple to be worth talking about, and yet, here we are. Because once you make them a few times, they quietly become part of your routine. They’re easy, reliable, and surprisingly satisfying.
laceholder-119" data-inserter-version="2" data-placement-location="under_page_title">I first leaned on baked eggs during busy stretches when mornings felt rushed but skipping breakfast wasn’t an option. There’s something comforting about knowing you can crack a few eggs, slide a pan into the oven, and have a solid meal without hovering over a stove.
What I love most is how forgiving this method is. You can make one egg or a dozen. You can keep them plain or dress them up. And they turn out consistently good, which is honestly half the battle with eggs.
Baked eggs also solve a very specific annoyance: peeling. If you’ve ever wrestled with stubborn hard-boiled eggs, this feels like a small victory. No peeling, no ice baths, no stress. Just eggs, baked exactly how you like them.
Elly shared this recipe years ago and kept coming back to it, which says a lot. When something sticks around that long, it’s usually because it earns its place. These baked eggs definitely do.
Ingredients Needed for the Recipe
- Large eggs – The main event, providing protein and structure for the entire recipe.
- Nonstick cooking spray – Keeps the eggs from sticking and helps them slide out cleanly.
- Salt – Enhances the natural flavor of the eggs without overpowering them.
- Pepper – Adds a gentle bite and balances the richness of the yolk.
That’s it. No hidden ingredients, no long shopping list. This recipe works because it doesn’t try to be complicated.
If you’ve got eggs in the fridge, you’re already most of the way there. Everything else is just about making those eggs behave nicely in the oven.
How to make Baked Eggs?
Step 1 – Preheat and Prep the Pan
Start by preheating your oven to 350°F. This temperature gives the eggs time to cook gently without turning rubbery or drying out too fast.
Generously spray a nonstick muffin tin with cooking spray. Even if your pan claims to be nonstick, don’t skip this. Eggs have a way of humbling cookware.
Step 2 – Crack the Eggs
Crack one egg into each muffin well. Try to keep the yolks intact, but don’t stress if one breaks. They’ll still taste good.
This is also the moment where you realize how efficient this method is. You can make several eggs at once with almost no effort.
Step 3 – Season Simply
Sprinkle each egg with a pinch of salt and pepper. Keep it light. You can always add more later.
Simple seasoning lets the eggs shine and keeps them versatile for whatever you plan to use them for.
Step 4 – Bake to Your Liking
Place the muffin tin in the oven and bake for 10 to 15 minutes, depending on how you like your yolks.
A shorter bake gives you runny yolks, while the full 15 minutes results in fully set eggs. I usually split the difference and check early.
Step 5 – Remove and Release
Once baked, remove the pan from the oven and let it cool for a minute. This brief rest makes the eggs easier to remove.
If an egg sticks, gently run a knife around the edge. They should lift out without much resistance.
Why Baked Eggs Work So Well
Baking eggs in a muffin tin creates even heat all around the egg. There’s no flipping, no splattering, and no babysitting.
The whites set gently while the yolks cook at a steady pace. That balance is hard to achieve on the stovetop, especially when cooking multiple eggs.
This method also scales beautifully. Making breakfast for one feels just as easy as prepping a week’s worth of eggs in one go.
It’s one of those techniques that quietly improves your cooking life without demanding anything in return.
Variations You Can Try
Once you’re comfortable with the basic version, variations are where things get fun. Small additions can change the whole mood of the egg.
You don’t need to overhaul the recipe. A single ingredient added thoughtfully is often enough.
- Add thawed frozen hash browns to the bottom of each muffin well for a heartier bite.
- Top with minced peppers and onions for a little sweetness and texture.
- Sprinkle diced ham and cheddar cheese on top before baking.
- Crack eggs into avocado halves for a richer, fork-and-knife version.
- Add a spoonful of cottage cheese before baking for extra creaminess.
Each variation keeps the core method intact while letting you adapt the eggs to your mood or pantry.
Tips
- Start checking your eggs at 10 minutes if you prefer softer yolks.
- Use a nonstick muffin tin or silicone cups to avoid sticking issues.
- Lightly grease even paper or silicone liners for best results.
- Let the eggs cool briefly before removing them from the pan.
- Season lightly before baking and adjust after if needed.
Make-Ahead and Storage
Baked eggs are excellent for meal prep, which is one reason they’ve stayed in my rotation for so long.
Once cooled completely, transfer them to an airtight container and store them in the fridge.
They’ll keep well for up to five days, making them perfect for quick breakfasts or protein-packed snacks.
I don’t recommend freezing baked eggs. The texture changes when thawed, and they lose that tender quality that makes them enjoyable.
Serving Ideas
On busy mornings, I eat baked eggs as-is with a little salt and pepper and maybe a dash of hot sauce.
They also pair well with classic breakfast sides like sausage or bacon when you want something more filling.
Baked eggs work surprisingly well in sandwiches. Slide one onto an English muffin, and breakfast is handled.
You can even chop them up and use them in egg salad. It’s a small twist that feels refreshingly easy.
At the end of the day, baked eggs aren’t flashy. They’re just dependable, adaptable, and quietly excellent. And honestly, that’s exactly what I want from a recipe I’ll make again and again.
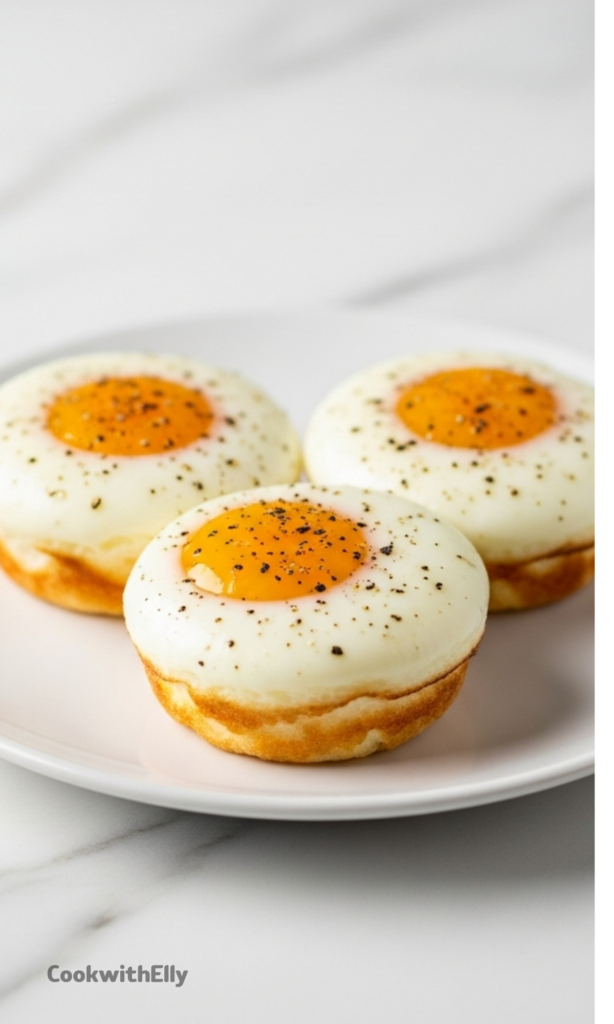
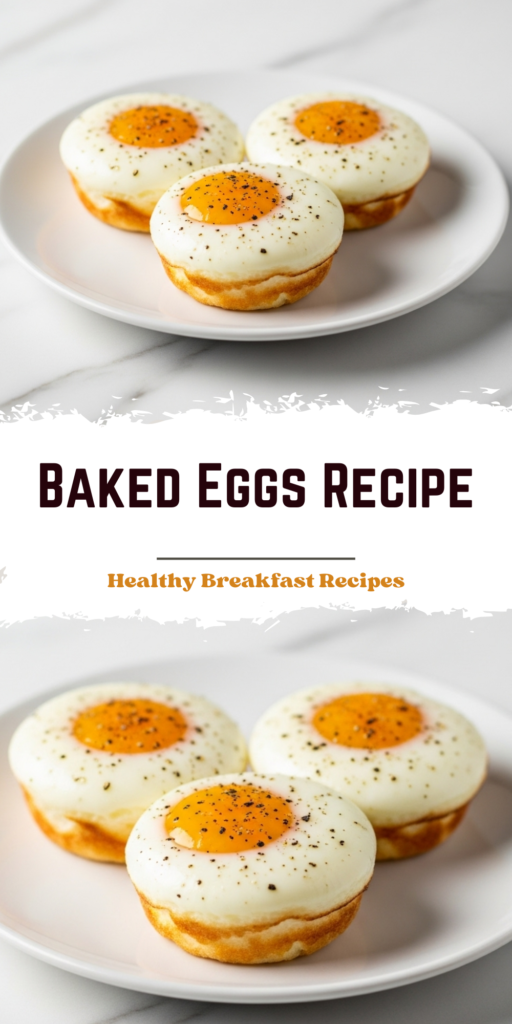
Baked Eggs Recipe
Description
This baked eggs recipe is as simple as it gets! Crack eggs into a greased muffin tin and bake for 10–15 minutes for a perfectly cooked, high-protein breakfast or snack. No peeling required—unlike hard-boiled eggs—and endlessly customizable with your favorite toppings like cheese, veggies, or ham.
ingredients
Instructions
-
Preheat your oven to 350°F (177°C). Generously spray a nonstick muffin tin with cooking spray. You can also use silicone muffin cups or paper liners (sprayed as well).
-
Crack one egg into each muffin cup. Season each with salt and pepper to taste.
-
Bake for 10–15 minutes depending on your desired yolk doneness: - 10–11 minutes: runny yolk - 12–13 minutes: over-medium (jammy yolk) - 14–15 minutes: fully cooked yolk
-
Remove from the oven. If eggs stick slightly, gently run a knife around the edges to loosen them.
Nutrition Facts
Servings 6
Serving Size 1 egg
- Amount Per Serving
- Calories 78kcal
- % Daily Value *
- Total Fat 6.3g10%
- Saturated Fat 2.1g11%
- Cholesterol 186mg62%
- Sodium 71mg3%
- Potassium 69mg2%
- Total Carbohydrate 0.6g1%
- Sugars 0.6g
- Protein 6.3g13%
- Calcium 28 mg
- Iron 0.9 mg
* Percent Daily Values are based on a 2,000 calorie diet. Your daily value may be higher or lower depending on your calorie needs.
Note
- Customize it: Add diced ham, shredded cheese, spinach, or roasted peppers before baking.
- Storage: Store cooled baked eggs in an airtight container in the fridge for up to 5 days. Do not freeze—they become rubbery when thawed.
- Make ahead: Perfect for weekly meal prep! Reheat gently in the microwave or enjoy cold in salads or sandwiches.
Frequently Asked Questions
Can I make baked eggs ahead of time?
Yes! Baked eggs keep well in the refrigerator for up to 5 days. They’re perfect for meal prepping breakfasts or snacks.
Can you freeze baked eggs?
We don’t recommend freezing baked eggs. The texture becomes rubbery and unappetizing after thawing.