
Every March I get the urge to bake something cheerful, buttery, and just a little nostalgic. Not overly complicated, not fussy. Just something that feels festive the second it comes out of the oven.
e">These vanilla bean cookies have become that tradition for me. They are soft, lightly sweet, and full of real vanilla flavor that smells incredible while baking. The kind of smell that makes people wander into the kitchen asking what’s ready.
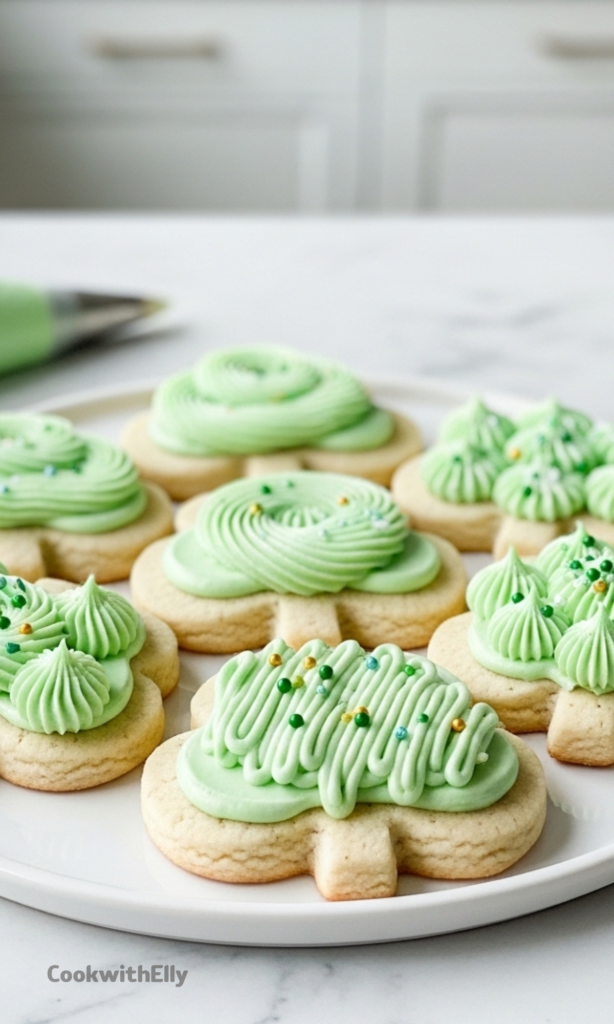
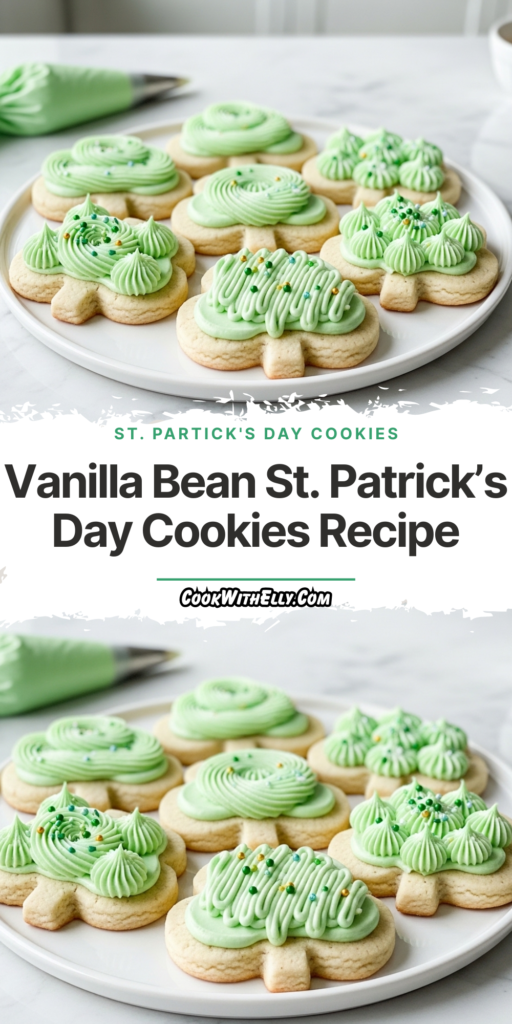
I love shaping them into shamrocks for St. Patrick’s Day, but honestly the dough works with any cutter you own. Hearts, circles, even slightly wonky freehand shapes. They always bake up tender with clean edges and a smooth surface.
You can leave them plain and cozy, or decorate them with buttercream and sprinkles if you’re feeling playful. Both versions are equally good, which is exactly why I make them every year.
Why Vanilla Bean Makes a Difference
Using actual vanilla bean instead of just extract changes everything about these cookies. The flavor is deeper and warmer, not just sweet but slightly floral and rich in a way that feels bakery-level without extra work.
Those tiny specks running through the dough are more than pretty. They carry real flavor, and you can taste it in every bite. It turns a simple sugar cookie into something that feels special enough for a celebration.
It’s still an easy recipe though. No complicated techniques, just good ingredients handled with care and a little patience while the dough chills.
Ingredients Needed for the Recipe
- All-purpose flour – Gives the cookies their structure while keeping the crumb soft.
- Baking powder – Adds just a bit of lift so the cookies stay tender, not dense.
- Salt – Balances the sweetness and enhances the vanilla flavor.
- Unsalted butter, softened – Creates that rich, buttery base and smooth texture.
- Granulated sugar – Sweetens while helping the cookies hold their shape.
- Seeds from one whole vanilla bean – The star ingredient that delivers deep vanilla flavor.
- Egg, at room temperature – Binds everything together and adds softness.
- Pure vanilla extract – Reinforces the vanilla flavor for a fuller taste.
- Extra flour for rolling – Keeps the dough manageable without sticking.
How to make Vanilla Bean St. Patrick’s Day Cookies?
Step 1 – Mix the Dry Ingredients
Start by whisking together the flour, baking powder, and salt in a bowl. This step helps distribute everything evenly so you don’t end up with uneven texture later.
I like to give it a good whisk for about 30 seconds. It sounds small, but it really does make a difference in how uniform the cookies bake.
Step 2 – Cream Butter and Sugar
In a larger bowl, beat the softened butter and sugar together until creamy and smooth. This usually takes a few minutes, and it should look lighter in color when it’s ready.
This step builds the foundation of the cookie’s texture. If rushed, the cookies won’t have that soft, melt-in-your-mouth feel.
Step 3 – Add the Vanilla Bean and Wet Ingredients
Scrape in the vanilla bean seeds and mix again so they’re fully incorporated. Then add the egg and vanilla extract, beating until everything comes together into a silky mixture.
You’ll notice the aroma right away. That’s when you know you’re on the right track.
Step 4 – Combine Wet and Dry Mixtures
Add the dry ingredients to the wet ingredients and mix on low speed. The dough will be soft but should hold together without being sticky.
If it feels too sticky to roll, sprinkle in a little extra flour, just one tablespoon at a time.
Step 5 – Roll the Dough Before Chilling
Divide the dough into two portions and roll each one out to about 1/4-inch thickness. Rolling now, while the dough is soft, makes life much easier.
Trying to roll chilled dough is frustrating and tough. Doing it this way keeps the surface smooth and even.
Step 6 – Chill the Rolled Dough
Transfer the rolled dough onto parchment or a baking mat, cover it, and refrigerate for at least one to two hours. This step prevents spreading and helps the cookies keep their shape.
Chilling also firms the butter back up, which is what gives you those clean edges after baking.
Step 7 – Cut Into Shapes
Once chilled, cut the dough using shamrock cutters or any shapes you like. Re-roll scraps gently and continue cutting until all the dough is used.
Don’t worry if the dough doesn’t seem like much at first. You’ll get plenty of cookies from the re-rolls.
Step 8 – Bake the Cookies
Arrange the cookies on lined baking sheets, spacing them a few inches apart. Bake until the edges are just lightly golden.
The centers should stay pale and soft. That’s how you know they’ll stay tender after cooling.
Step 9 – Cool Completely
Let the cookies cool on the baking sheet briefly, then transfer them to a rack. Decorating warm cookies leads to melting frosting, so patience here really matters.
Once cooled, they’re ready to enjoy as-is or decorate however you like.
Decorating Ideas for a Festive Touch
Sometimes I frost them with vanilla bean buttercream and sometimes I leave them plain. Both options work beautifully depending on the mood or how much time I have.
If decorating, a simple piping bag works great, but a spoon and a little swirl can look just as charming. These cookies don’t need perfection to feel special.
Green-tinted frosting adds that St. Patrick’s Day feel, and sprinkles are always welcome. They also conveniently hide any decorating mishaps, which I fully support.
Tips
- Roll the dough before chilling to avoid cracking and stiffness later.
- Use room temperature butter that is soft but not greasy.
- Chill the rolled dough thoroughly to prevent spreading.
- Lightly flour your surface to keep the dough from sticking.
- Do not overbake – pale centers mean soft cookies.
- Re-roll scraps gently to avoid tough cookies.
- Let cookies cool completely before decorating.
- Use gel coloring if tinting frosting so consistency stays stable.
- If dough gets warm while working, return it to the fridge briefly.
- For a stronger vanilla flavor, add a little extra bean to the frosting.
Storing and Making Ahead
These cookies store surprisingly well, which makes them perfect for preparing ahead of a celebration. Keep unfrosted cookies in an airtight container at room temperature and they’ll stay soft for several days.
Frosted cookies can be refrigerated and brought back to room temperature before serving. The texture stays tender, not dry.
You can also freeze the baked cookies or even the dough itself. I often make the dough early, freeze it, then thaw and bake when I need something festive without starting from scratch.
Having dough ready to go feels like a small gift to your future self. Especially during busy weeks.
Whether you decorate them elaborately or keep them simple with a cup of tea, these vanilla bean St. Patrick’s Day cookies always bring a little extra warmth to the table. And honestly, that’s exactly what I want from a holiday bake.
Vanilla Bean St. Patrick’s Day Cookies Recipe
Description
These soft-baked vanilla bean sugar cookies are perfect for St. Patrick's Day when cut into shamrock shapes. Wonderfully buttery and flavored with real vanilla bean, they're delicious plain with coffee or tea, or decorated with vanilla bean buttercream and festive sprinkles. The cookies hold their shape beautifully in the oven and have a flat surface ready for decorating.
ingredients
Cookies
Vanilla Bean Buttercream
Instructions
-
Whisk the flour, baking powder, and salt together in a medium bowl. Set aside.
-
In a large bowl using a handheld or stand mixer fitted with a paddle attachment, beat the butter and sugar together on high speed for about 3 minutes until creamy.
-
Add the vanilla bean seeds and beat again until combined and butter is creamy, about 1-2 more minutes. Add the egg and vanilla extract and beat on high speed until combined, about 1 minute. Scrape down the sides and bottom of the bowl as needed.
-
Add the dry ingredients to the wet ingredients and beat on low speed until combined. If the dough seems too soft and sticky for rolling, add 1 more Tablespoon of flour.
-
Divide the dough into 2 equal portions. Place each portion on a piece of lightly floured parchment paper or silicone baking mat. Roll the dough out to about 1/4-inch thickness using a lightly floured rolling pin.
-
Lightly dust one rolled-out dough with flour, place parchment on top, then stack the second rolled-out dough on top. Cover with plastic wrap or foil and refrigerate for at least 1-2 hours and up to 2 days.
-
Once chilled, preheat oven to 350°F (177°C). Line 2-3 large baking sheets with parchment paper or silicone baking mats.
-
Carefully remove the top dough piece from the refrigerator. Using a cookie cutter, cut the dough into shapes. Re-roll the remaining dough and continue cutting until all is used. Repeat with the second piece of dough.
-
Arrange cookies on baking sheets 3 inches apart. Bake for 11-12 minutes or until lightly browned around the edges. Rotate baking sheet halfway through if your oven has hot spots.
-
Allow cookies to cool on the baking sheet for 5 minutes, then transfer to a wire rack to cool completely before decorating.
-
Make the buttercream frosting:
With a handheld or stand mixer fitted with a paddle attachment, beat the butter and vanilla bean seeds together on medium speed until butter is creamy, about 2 minutes. Add confectioners' sugar, heavy cream, and vanilla extract. Beat on low speed for 30 seconds, then increase to medium-high speed and beat for 2 full minutes. Taste and add a pinch of salt if frosting is too sweet.To color the frosting, divide between bowls and stir in 1-2 tiny drops of gel food coloring. -
Frost the cooled cookies:
Decorate the cookies with a knife, icing spatula, or use a piping bag and piping tip. Top with sprinkles if desired. For two-toned frosting, spoon 2 or more colors of buttercream into your piping bag before piping.Frosting does not harden or crust very much. Store frosted cookies covered at room temperature for up to 1 day or in the refrigerator for up to 1 week.
Nutrition Facts
Servings 24
Serving Size 1 cookie with frosting
- Amount Per Serving
- Calories 245kcal
- % Daily Value *
- Total Fat 12gg19%
- Saturated Fat 7gg35%
- Trans Fat 0gg
- Cholesterol 35mgmg12%
- Sodium 40mgmg2%
- Potassium 45mgmg2%
- Total Carbohydrate 32gg11%
- Dietary Fiber 0.5gg2%
- Sugars 24gg
- Protein 2gg4%
- Calcium 1% mg
- Iron 3% mg
* Percent Daily Values are based on a 2,000 calorie diet. Your daily value may be higher or lower depending on your calorie needs.
Note
- Vanilla Bean Tip: To get the seeds out of a vanilla bean, use a small knife to cut the vanilla bean lengthwise and then use the dull side of the knife to scrape out the vanilla seeds.
- Vanilla Bean Paste Substitute: If you have vanilla bean paste, you can use that instead of vanilla bean. Add 1 teaspoon vanilla bean paste when you add the vanilla extract.
- Room Temperature Ingredients: Room temperature butter and egg are essential for proper mixing. Room temperature butter should be cool to the touch, not melted.
- Freezing Instructions: Plain or frosted sugar cookies freeze well up to 3 months. Thaw in the refrigerator or at room temperature. You can also freeze the cookie dough for up to 3 months before rolling it out.
- Cookie Cutter Options: You can use any cookie cutter with this dough. For shamrocks, use small and medium shamrock cutters for variety.
Frequently Asked Questions
Can I make these cookies ahead of time?
Yes! The cookie dough can be refrigerated for up to 2 days before baking. You can also freeze the dough disks for up to 3 months. Baked cookies (unfrosted) can be stored at room temperature for up to 5 days or frozen for up to 3 months.
Do I have to use vanilla bean?
No, but it adds wonderful flavor and beautiful specks. If you can't find vanilla beans, you can substitute with 1 teaspoon vanilla bean paste or add an extra 1/2 teaspoon of pure vanilla extract to the dough.
Why do I need to chill the dough before cutting?
Chilling the rolled-out dough helps the cookies hold their shape in the oven and prevents over-spreading. It also makes the dough easier to cut into clean shapes.
Can I skip the frosting?
Absolutely! These vanilla bean cookies are delicious plain and lightly sweetened. They're perfect with coffee or tea without any decoration.