
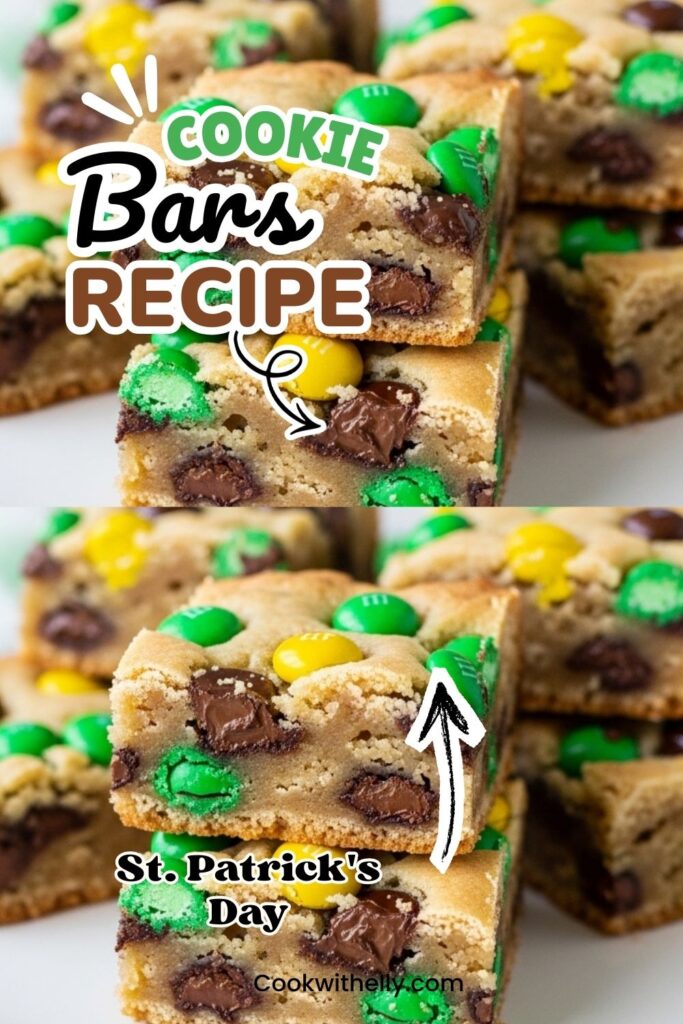
I’ve always had a soft spot for cookie bars. They’re easy, comforting, and honestly a lot less work than scooping dozens of individual cookies. When St. Patrick’s Day rolls around, I like to take my favorite chocolate chip cookie bar recipe and give it a little festive twist.
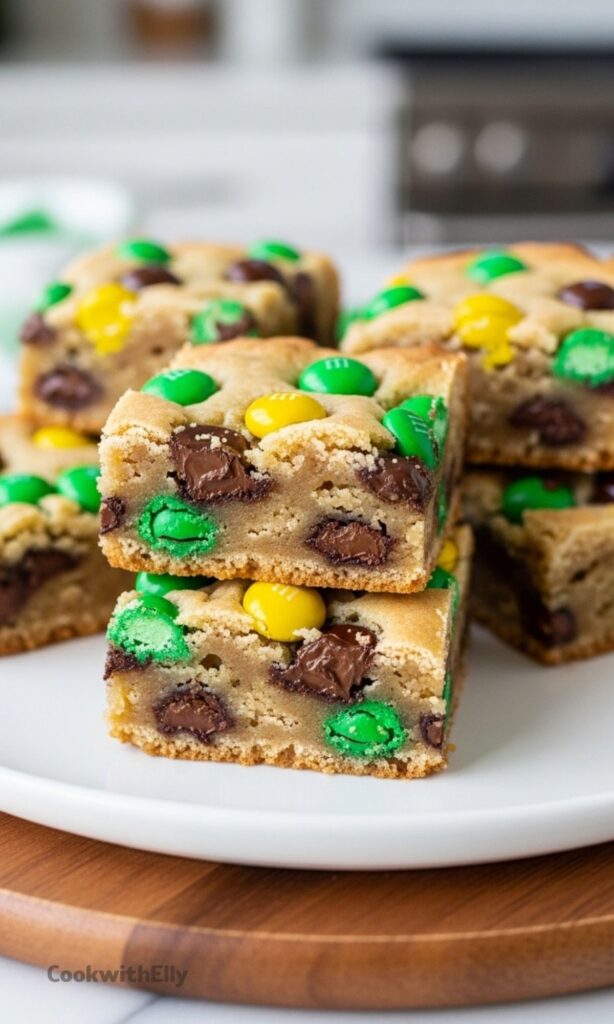
That’s how these St. Patrick’s Day Cookie Bars came to be. They’re buttery, chewy, packed with chocolate chips, and dotted with bright green candies that instantly make them feel like a holiday treat.
I’ll admit something right away. I make cookie bars mostly because I’m impatient. Chilling cookie dough and baking tray after tray just isn’t my thing. Pressing the dough into one pan and baking it all at once? Now that’s my style.
And the fun part is the color. Green mini candies scattered through the dough, plus a few yellow ones on top for that little “pot of gold” idea. It’s playful, slightly corny, and honestly… that’s exactly what makes them fun.
Why Cookie Bars Are Perfect for St. Patrick’s Day
Holiday baking doesn’t always need to be complicated. Some people go all out with decorated sugar cookies, icing bags, and detailed designs. I admire that dedication, but my kitchen usually leans toward simpler treats.
Cookie bars fit right into that relaxed style. One bowl, one pan, and a handful of festive candy colors. Suddenly a classic chocolate chip base turns into something that looks ready for a parade or a family gathering.
My family has always preferred chocolate chip cookies over sugar cookies anyway. They’re richer, softer, and feel more comforting. So instead of switching to a sugar cookie base for the holiday, I stick with what we love and just change the colors.
Sometimes that’s all a recipe really needs. A small twist, a few bright candies, and suddenly the whole pan feels like it belongs to the celebration.
Ingredients Needed for the Recipe
- All-purpose flour – provides the structure for the cookie bars and gives them their soft but sturdy texture.
- Salt – balances the sweetness and enhances the flavor of the chocolate and sugar.
- Baking soda – helps the cookie bars rise slightly and keeps the texture tender.
- Melted butter – adds richness and moisture while creating that chewy cookie bar base.
- Brown sugar – brings deep caramel flavor and keeps the bars soft.
- Granulated sugar – adds sweetness and helps create lightly crisp edges.
- Egg – binds the ingredients together and contributes to the chewy texture.
- Semi-sweet chocolate chips – provide classic chocolate flavor throughout the bars.
- Green mini M&M candies – add festive color and a little crunch for the St. Patrick’s Day theme.
- Yellow M&M candies – optional decoration on top, representing a playful “pot of gold.”
How to make St. Patrick’s Day Cookie Bar?
Step 1 – Prepare the Oven and Pan
Start by preheating the oven to 325°F. A moderate temperature helps the cookie bars bake evenly without getting too dark on top.
Lightly coat a baking pan with cooking spray. A pan around 12 x 8 inches works nicely, though a standard 9 x 13 pan can also be used if needed.
Step 2 – Mix the Dry Ingredients
In a small bowl, whisk together the flour, salt, and baking soda. This simple step makes sure the leavening and seasoning are evenly distributed.
I like doing this first so the dry mixture is ready when it’s time to combine everything. It keeps the process smooth and quick.
Step 3 – Combine the Butter and Sugars
In a larger mixing bowl, combine the melted butter, brown sugar, and granulated sugar. Use either a hand mixer or a stand mixer and blend until the mixture looks smooth and glossy.
The melted butter makes everything come together easily. It also gives the finished bars that soft, chewy bite people love.
Step 4 – Add the Egg
Crack in the egg and mix again until fully incorporated. The batter should start looking creamy and slightly thick at this point.
This step is quick, but it’s important. The egg helps bind the ingredients and keeps the cookie bars from feeling crumbly.
Step 5 – Incorporate the Flour Mixture
Slowly add the dry ingredients into the wet mixture. Mix a little at a time until everything comes together into a soft cookie dough.
I try not to overmix here. Once the flour disappears and the dough looks even, it’s ready for the fun ingredients.
Step 6 – Fold in Chocolate Chips and Candy
Gently fold the chocolate chips and green mini candies into the dough. Use a spatula and mix just enough to spread them evenly.
The green candies instantly give the dough that St. Patrick’s Day look. It’s such a small touch, but it makes the whole recipe feel festive.
Step 7 – Press the Dough Into the Pan
Scoop the cookie dough into the prepared baking pan and press it evenly into the corners. A spatula or even slightly damp hands can help smooth the surface.
If you’re using the yellow candies, press them lightly on top. I usually scatter around sixteen of them to create that playful “pot of gold” idea.
Step 8 – Bake the Cookie Bars
Place the pan in the oven and bake for about 25 to 30 minutes. The edges should look lightly golden while the center may still appear a little soft.
For my oven, 27 minutes tends to be perfect. The bars will continue to set as they cool, so don’t worry if the center looks slightly underdone.
Step 9 – Cool and Slice
Let the cookie bars cool completely before cutting. This step makes a big difference in how clean the slices look.
Once cooled, cut them into squares or rectangles and serve. The inside should be chewy with chocolate in every bite.
Serving Ideas for St. Patrick’s Day Gatherings
These cookie bars are easy to serve at just about any type of celebration. I often cut them into smaller squares and arrange them on a large platter for parties.
They also travel well, which makes them perfect for school events, potlucks, or neighborhood gatherings. One pan feeds quite a few people.
At home, I like pairing them with a simple dessert spread. Maybe a plate of brownies, a bowl of candies, and these bright green cookie bars right in the center.
Sometimes the simplest desserts end up disappearing the fastest. And honestly, that’s usually what happens with these.
Tips
- If mini candies are unavailable, use regular sized candies and increase the amount to about ¾ cup.
- Do not overbake the bars. They should look slightly soft in the center when removed from the oven.
- A 9 x 13 inch baking pan works well if you prefer slightly thinner cookie bars.
- Add green sprinkles immediately after baking for an extra pop of festive color.
- Allow the bars to cool fully before slicing to prevent crumbly edges.
- Use parchment paper in the pan if you want easy lifting and clean cuts.
- Scatter a few extra candies on top before baking to make the finished bars look more colorful.
Ways to Customize This Recipe
One of the reasons I love cookie bars so much is how easy they are to customize. The base recipe stays the same, but small changes can completely shift the theme.
For example, switching the candy colors instantly makes this recipe fit another holiday. Red and green for winter, pastel shades for spring, or bright colors for birthdays.
You can also play with the chocolate. Dark chocolate chips add a richer flavor, while white chocolate chips make the bars sweeter and creamier.
Sometimes I even mix both kinds together. The result is a colorful cookie bar that feels a little different every time.
The truth is, once you have a solid cookie bar base, the possibilities are pretty endless. And that’s part of the fun.
St. Patrick’s Day Cookie Bar Recipe
Description
These festive M&M St. Patrick's Day Cookie Bars are every bit as delicious and irresistible as classic chocolate chip cookie bars, with a fun holiday twist! Loaded with green M&Ms and a few golden yellow ones for that pot 'o gold charm, these easy no-chill bars are perfect for celebrating St. Paddy's Day. Soft, chewy, and packed with chocolatey goodness, they're a crowd-pleasing treat that requires minimal effort and maximum flavor.
ingredients
Instructions
-
Preheat oven to 325°F (163°C). Lightly grease a 9x13-inch baking pan or line with parchment paper. Set aside.
-
In a small bowl, whisk together flour, salt, and baking soda. Set aside.
-
Using a stand mixer or hand mixer, beat together melted butter, brown sugar, and granulated sugar until well combined.
-
Add egg and vanilla extract to the butter-sugar mixture. Mix until smooth and creamy.
-
Gradually add the flour mixture to the wet ingredients, mixing on low speed just until combined. Do not overmix.
-
Fold in chocolate chips and green M&Ms using a spatula until evenly distributed.
-
Press dough evenly into the prepared baking pan. If desired, gently press the 16 yellow M&Ms onto the surface in a decorative pattern for the pot 'o gold effect.
-
Bake for 25-30 minutes (27 minutes is ideal for most ovens) until edges are lightly golden. Centers may look slightly underdone but will set as they cool.
-
Remove from oven and let cool completely in the pan before cutting into 20 bars. Optional: sprinkle with green sanding sugar while still warm for extra festive flair.
Nutrition Facts
Servings 20
Serving Size 1 bar
- Amount Per Serving
- Calories 228kcal
- % Daily Value *
- Total Fat 10gg16%
- Saturated Fat 6gg30%
- Trans Fat 0gg
- Cholesterol 25mgmg9%
- Sodium 95mgmg4%
- Potassium 45mgmg2%
- Total Carbohydrate 30gg10%
- Dietary Fiber 1gg4%
- Sugars 22gg
- Protein 3gg6%
- Calcium 2% mg
- Iron 4% mg
* Percent Daily Values are based on a 2,000 calorie diet. Your daily value may be higher or lower depending on your calorie needs.
Note
- Mini M&Ms not available? Use regular-size M&Ms and increase to ¾ cup total.
- Pan size tip: A 9x13-inch pan works best for even baking and perfect bar thickness.
- Extra festive: Add green sprinkles or sanding sugar right after baking for a pop of color.
- Make it yours: Customize the candy colors for any holiday or celebration—just swap the M&M shades!
- Storage: Keep bars in an airtight container at room temperature for up to 4 days, or freeze for up to 1 month.
Frequently Asked Questions
Can I use regular M&Ms instead of mini?
Yes! If mini M&Ms aren't available, use regular-size and increase the amount to ¾ cup. The flavor will be the same, just with bigger candy pieces.
Do these cookie bars need to be chilled before baking?
No chilling required! One of the best parts about cookie bars is that the dough goes straight from mixing to the pan to the oven—no waiting.
How do I know when the bars are done baking?
Bake until the edges are lightly golden and the center looks just set (it may still seem slightly soft). They'll continue to firm up as they cool. Overbaking can make them dry, so pull them at 25-27 minutes for best results.
Can I make these ahead of time?
Absolutely! These bars keep well at room temperature for up to 4 days. You can also bake them a day ahead and store covered until ready to serve.