 View Gallery
1 photo
View Gallery
1 photo
There’s something quietly magical about turning what you might toss into something you absolutely devour.
These tortillas are that kind of magic, a soft, tangy, and utterly satisfying project that rewards a little patience with a lot of flavor.
More Than Just a Wrap
This isn’t just about using up discard, though that’s a brilliant start. It’s about reclaiming a process.
Store-bought tortillas are fine in a pinch, but a homemade one? It’s warm, pliable, and has a soul. You can taste the care in every bite.
Ingredients Needed for the Recipe
Gathering your ingredients is the first quiet step in the ritual. Here’s what you’ll need.
- Bread Flour (500g): This gives the tortillas their sturdy yet soft structure, perfect for holding your fillings without tearing.
- Water (280g): It brings everything together, hydrating the flour and starter to form your dough.
- Sourdough Starter or Discard (200g): The star of the show. It adds that characteristic tang and helps the dough develop its lovely texture.
- Olive Oil (15g): A little fat for tenderness and elasticity, making the dough easier to roll and the final tortilla supple.
- Salt (15g): It’s essential for balancing and enhancing all the other flavors in the mix.
The Heart of Your Starter: Discard or Active?
This is a common question, and the beautiful answer is you can use either. Your schedule and your taste buds get to decide.
Active starter will give you a quicker rise and a slightly airier texture. Discard, especially if it’s a few days old, works perfectly well but asks for more time. It also imparts a deeper, more complex sourdough flavor that I personally adore. The dough will rise, maybe not dramatically, but enough. You’ll see little bubbles of life forming, a promise of what’s to come.
How to make Sourdough Discard Tortillas?
The process is a series of gentle stages. Don’t rush it. Let the dough guide you.
Step 1- Combine and Rest
Dump all your ingredients right into a large mixing bowl. No need for separate bowls or fancy steps here.
Use your hands or a spatula to mix until you have a shaggy, rough dough. Then, cover the bowl and walk away for 30 minutes. This autolyse period lets the flour fully absorb the water, making the next step much smoother.
Step 2- Knead to Smoothness
Now, it’s time to develop the gluten. You can knead by hand on a clean surface for about 10 minutes, or use a stand mixer with a dough hook for 4-6.
You’re looking for a dough that’s smooth, silky, and slightly elastic. It should feel alive under your hands, not sticky or tough.
Step 3- The First Rise
Place your lovely smooth dough back in the bowl, cover it tightly, and let it rest at room temperature.
We’re not waiting for it to double. Look for a 30-50% increase in size, and for bubbles to form on the surface. This could take 4 hours, it could take 8. Your kitchen’s warmth is the clock. It’s ready when it looks puffy and playful.
Step 4- Shape and Relax
Turn the dough out onto a counter. Using a bench scraper or knife, divide it into roughly 80-gram pieces.
Gently shape each piece into a loose ball. Place them on the counter, cover them with a damp kitchen towel, and let them rest again for 30 minutes. This crucial step relaxes the gluten, so the dough won’t fight you when you try to roll it thin.
Step 5- Roll Them Out
Take a dough ball and press it flat with your palm. Using a rolling pin, roll from the center outwards, turning the dough as you go to form a rough circle.
Don’t aim for perfection. Aim for thin, about 2-3 millimeters thick. If it springs back, let it rest for a few more minutes. A little flour on the pin and surface prevents sticking.
A Few Clever Substitutions
Out of something? No panic. This dough is wonderfully adaptable.
You can swap the bread flour for all-purpose flour for a slightly more tender tortilla. The olive oil can be replaced with any neutral oil, melted butter, or even melted coconut oil for a hint of sweetness. The method remains exactly the same.
Step 6- The Hot, Fast Cook
Heat a dry cast-iron skillet, griddle, or heavy frying pan over medium-high heat. Get it properly hot.
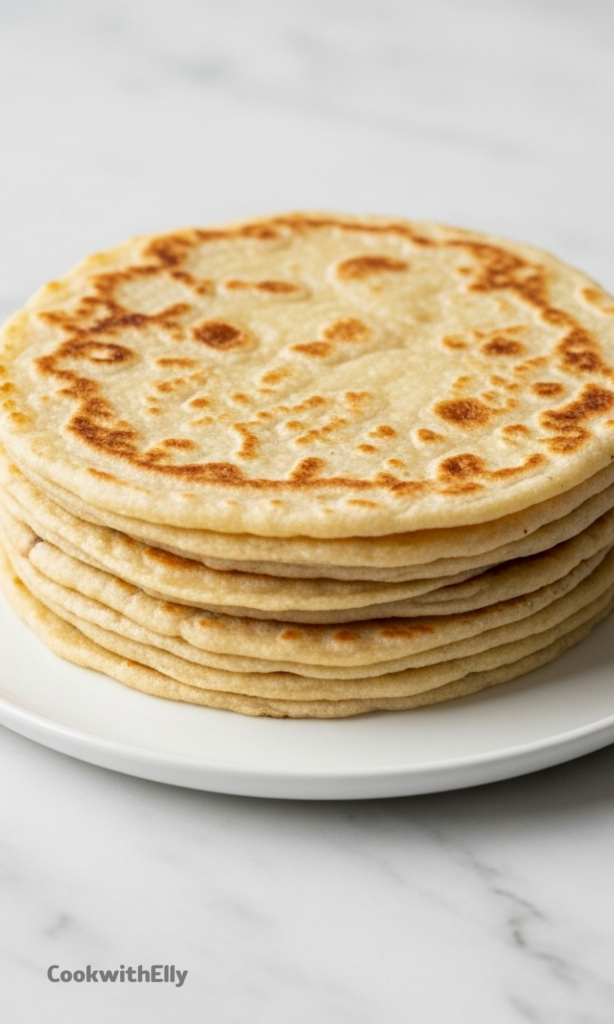
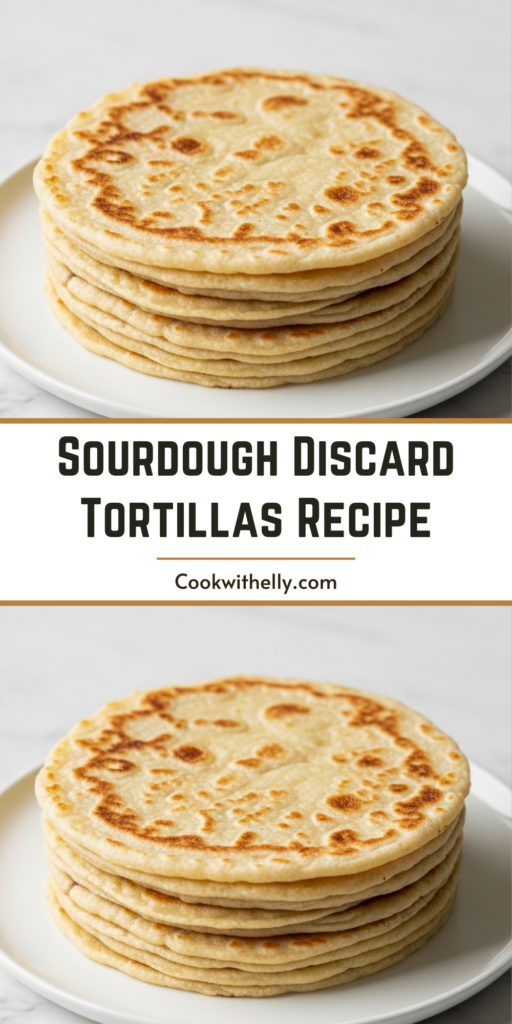
Just before cooking, gently stretch your rolled tortilla with your hands. Lay it in the hot pan. It will sizzle and start to form beautiful brown spots and air pockets in about 60 seconds. Flip it, cook for another 30-60 seconds, then remove. The whole cook is blisteringly fast.
Step 7- Keep Them Warm
As the tortillas come off the pan, stack them and wrap them tightly in a clean cotton kitchen towel.
The steam they release keeps the whole stack soft, pliable, and warm until you’re ready to eat. If they puff up like balloons in the pan, they’ll deflate gently in the towel, becoming perfectly flat.
Serving Ideas Beyond Tacos
Sure, they make incredible tacos and burritos. But let’s think bigger, or maybe smaller.
Cut them into wedges and bake or fry for the most amazing homemade tortilla chips. Use them as a wrap for a next-level bacon and egg breakfast roll. My kids love them as personal pizza bases, just add sauce and cheese. Leftover tortillas? Transform them into crispy quesadillas for lunch the next day.
Tips
- Rolling rhythm is key. Roll one tortilla, then start the next while the first relaxes, then go back to finish rolling the first. This staggered approach makes the whole process flow.
- Don’t oil the pan. A dry, hot surface is what creates those perfect charred spots and allows the tortilla to puff.
- Trust the bubbles. When you see those gorgeous golden bubbles form, it’s not just for show. It means the inside is cooking perfectly, creating layers of steam and flavor.
Storing Your Homemade Treasure
If, by some miracle, you have leftovers, storing them right keeps them delightful.
For short-term storage, keep them wrapped in that cotton towel at room temperature for up to a day. For longer storage, let them cool completely, then place them in a zip-top bag. They’ll stay soft for 2-3 days in the fridge. To freeze, layer them between sheets of parchment paper in a freezer bag. They’ll be good for up to 3 months. Just reheat gently in a dry skillet or microwave wrapped in a damp towel.
Making these tortillas connects you to a long, simple tradition of turning basic elements into sustenance.
It’s a gentle, rewarding process that ends with a stack of warm, homemade goodness on your table. Your kitchen, your hands, your time. The result is something truly special.
Sourdough Discard Tortillas Recip
Description
Simple, flavorful, and a fantastic way to use your sourdough discard! These homemade sourdough tortillas are soft, pliable, and packed with a subtle tang that store-bought versions just can’t match. Perfect for tacos, quesadillas, wraps, or even mini pizzas—these tortillas are versatile, easy to make with basic pantry staples, and a great way to reduce kitchen waste.
Ingredients
Instructions
-
In a large mixing bowl, combine bread flour, water, sourdough starter (or discard), olive oil, and salt. Mix until a shaggy dough forms.
-
Cover the bowl and let the dough rest for 30 minutes (autolyse).
-
Knead the dough by hand for 10 minutes or using a stand mixer with a dough hook for 4–6 minutes, until smooth and elastic.
-
Cover the dough with plastic wrap or a damp tea towel and let it rise at room temperature until it increases by about 30% in volume. This can take 6–10 hours depending on kitchen temperature and starter activity.
-
Divide the dough into 12 equal portions (about 80g each). Shape each into a ball.
-
Cover the dough balls with a tea towel and let them rest for 30 minutes to relax the gluten.
-
On a lightly floured surface, roll each dough ball into a thin round (about 15–18 cm / 6–7 inches in diameter). Rotate and flip as needed to prevent sticking.
-
Heat a cast iron skillet, frying pan, or griddle over medium-high heat (no oil needed).
-
Cook each tortilla for about 60 seconds per side, or until bubbles form and light brown spots appear. Flip once and remove from heat.
-
Stack cooked tortillas in a clean kitchen towel to keep them soft and warm.
Nutrition Facts
Servings 12
Serving Size 1 tortilla (80g)
- Amount Per Serving
- Calories 177kcal
- % Daily Value *
- Total Fat 2g4%
- Saturated Fat 0.3g2%
- Sodium 487mg21%
- Potassium 42mg2%
- Total Carbohydrate 33g11%
- Dietary Fiber 1g4%
- Sugars 0.1g
- Protein 5g10%
- Calcium 7 mg
- Iron 0.4 mg
* Percent Daily Values are based on a 2,000 calorie diet. Your daily value may be higher or lower depending on your calorie needs.
Note
- Tip: For faster rise, use active sourdough starter instead of discard.
- Storage: Keep in a cotton towel for up to 24 hours, or in a sealed bag in the fridge for up to 3 days. Freeze between parchment paper for up to 3 months.
- No tortilla press: Flour tortillas require rolling—presses work best for corn.
Frequently Asked Questions
Can I use sourdough discard that’s been in the fridge for a week?
Yes! Older discard works fine—it may just take longer to rise. The flavor will be tangier, which many people enjoy.
Why didn’t my tortillas puff up?
Puffing depends on dough hydration, rolling thickness, and pan heat. Ensure your pan is very hot, and the tortilla is rolled evenly. Even if they don’t puff, they’ll still taste great!