
The kitchen smelled sharp and sweet at the same time, like something was halfway between dessert and trouble. I had the pot going a little hotter than I should have, and the rhubarb was already collapsing faster than expected.
I stirred it down, lowered the heat, and let it settle. That first burst of steam always catches me off guard. It’s not gentle cooking. It’s loud, sticky, and a little unpredictable.
Still, this is one of those recipes I keep coming back to. Simple ingredients, quick process, and somehow it always feels a bit special when it’s done.
A quick moment before it all starts
I don’t always plan to make this. Sometimes I just see rhubarb and grab it without thinking too much. Then it sits for a day, maybe two, until I finally give in.
There’s something about those bright stalks that makes me feel like I should do something with them. Not complicated, just something that lets their flavor stay loud.
That’s where this jam fits in. No overthinking. Just a pot, a spoon, and a bit of patience.
Ingredients Needed for the Recipe
- 35 oz fresh rhubarb – the main base, tart and slightly earthy
- 35 oz granulated white sugar – balances the sharpness and helps preserve
- 3 tablespoons lemon juice – adds brightness and helps the jam set
How to make Rhubarb Jam?
Step 1 – Get the jars ready
I start by boiling the jars for about 10 minutes. It feels like a chore, but skipping it never sits right with me.
While that’s going, I slide a small plate into the freezer. I forget this step sometimes, then regret it later when I’m guessing the texture.
Step 2 – Prep the rhubarb
I trim off the ends, rinse the stalks, and chop them into rough chunks. I don’t measure too carefully here.
Some pieces end up bigger than others, which I actually like. It gives the final jam a bit of texture instead of turning it into a smooth paste.
Step 3 – Start cooking
I toss the rhubarb and sugar into a heavy saucepan and turn the heat to medium-high. At first, nothing really happens.
Then suddenly the sugar starts melting, and everything loosens up. I give it a stir, sometimes pressing the fruit slightly to help it along.
Step 4 – Add lemon and bring to a boil
Once the mixture looks glossy and wet, I squeeze in the lemon juice. That sharp smell hits right away.
I let it come to a proper boil. Not a gentle simmer. A real bubbling, active boil that needs watching.
Step 5 – Let it cook down
I keep it boiling for about 10 minutes, stirring now and then. Foam rises to the top, and I skim it off without overthinking.
This is where I usually make a small mistake. Either I stir too much or not enough. It still turns out fine, just slightly different each time.
Step 6 – Check if it’s ready
I take the plate out of the freezer and drop a spoonful of jam onto it. After a few seconds, I push it lightly.
If it wrinkles and holds its shape, I’m done. If it slides too easily, I put the pot back on the heat for another couple of minutes.
Step 7 – Jar and cool
I let the jam sit for a minute before pouring it into the warm jars. Not too long though, or it starts thickening too much.
I leave a bit of space at the top, wipe the edges, and seal them. Then I just let everything cool on the counter without touching it.
Something that almost went wrong
One time I walked away during the boiling stage, thinking it would be fine for a minute. It wasn’t.
The jam thickened too quickly, and I ended up with something closer to a sticky paste. Still edible, but not spreadable in the way I wanted.
Now I stay nearby, even if I’m just leaning against the counter doing nothing. It’s a short process anyway, so it’s worth the attention.
Tips
- Use redder rhubarb if you want a deeper color
- Don’t rush the sugar dissolving stage – it matters more than it seems
- Keep the heat controlled once it starts boiling to avoid burning
- Skim foam lightly, no need to be perfect about it
- Test the texture more than once if unsure
- Let the jam cool slightly before jarring to avoid overflow
- Store in the fridge if using soon, or process longer for extended storage
How I usually end up eating it
I tell myself it’s for toast, but that’s rarely where it ends up. I usually grab a spoon while it’s still slightly warm.
Sometimes I spread it over bread with butter, other times I mix it into yogurt just to cut through the plainness. It doesn’t need much help.
On certain days, I spoon it over something cold like ice cream. The contrast works better than I expect every time.
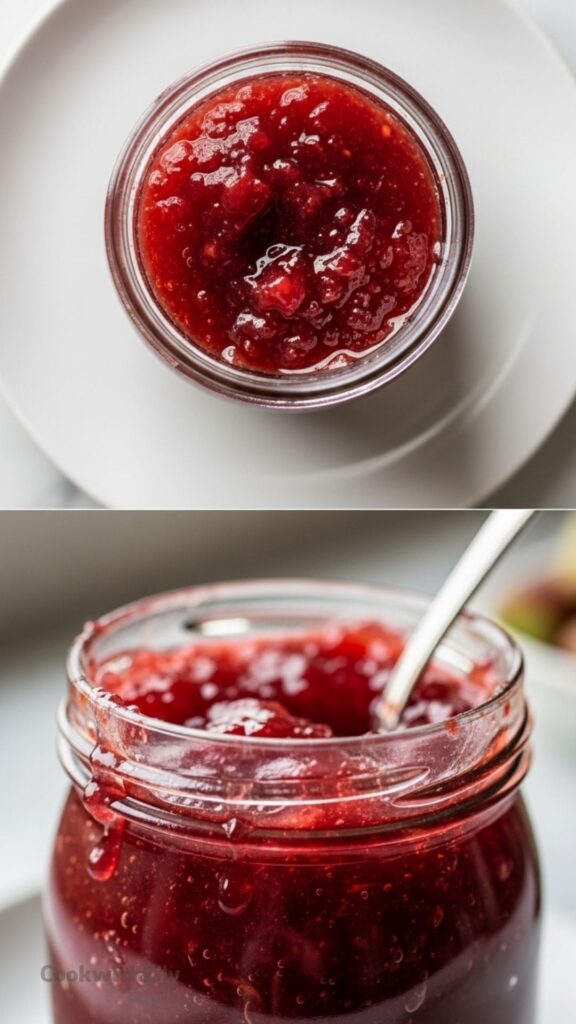
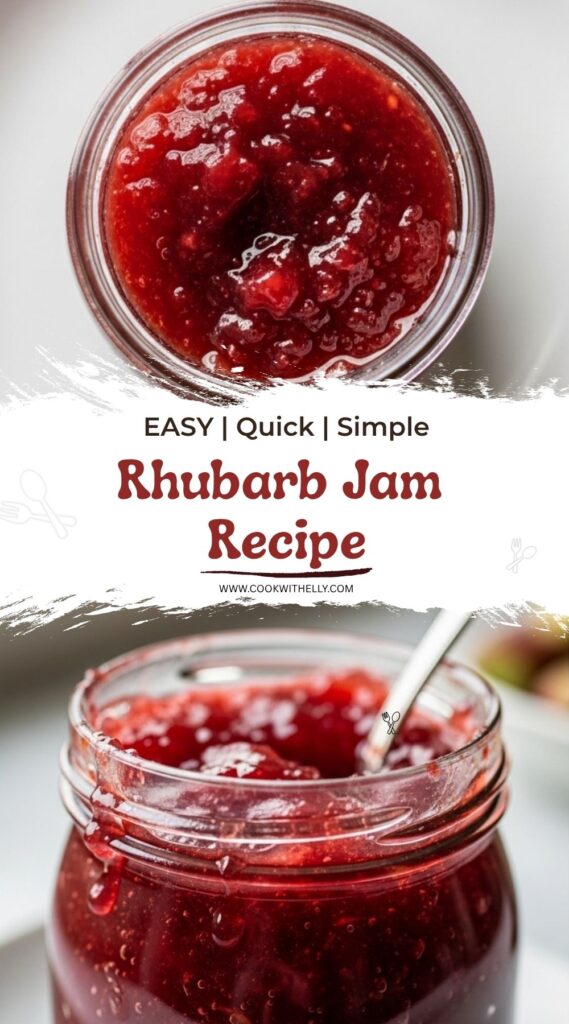
Rhubarb Jam Recipe
Description
This homemade rhubarb jam is sweet, tangy, and ridiculously easy—just three ingredients and no pectin needed! Perfect for toast, yogurt, desserts, or even as a cake filling. If you love rhubarb but find it a little too sharp, this jam is the answer. Simmering rhubarb, sugar, and lemon juice brings out the best of that classic rhubarb flavor—bold, bright, and just the right amount of sweet. And the best part? It comes together in about 30 minutes, with no fancy ingredients or complicated steps.
Ingredients
Instructions
-
Sterilize Jars & Chill Plate – Boil canning jars and lids in a pot of water for 10 minutes to sterilize. Place a small ceramic plate in the freezer to chill; this will be used to test if the jam has set.
-
Prep Rhubarb – Trim the tops and bottoms off the rhubarb stalks. Rinse them thoroughly and pat dry. Chop the stalks into roughly 1-inch pieces. There is no need to peel them.
-
Cook Mixture – Add the chopped rhubarb and sugar to a large, heavy-based saucepan. Heat over medium-high heat, stirring occasionally, until the sugar has completely dissolved.
-
Boil – Once the sugar is dissolved, stir in the lemon juice. Bring the mixture to a rolling boil. Let it boil for about 10 minutes, skimming off any foam that rises to the surface with a spoon.
-
Test for Set – Remove the pan from the heat. Take the chilled plate from the freezer and spoon a small amount of jam onto it. Let it sit for a few seconds, then push it with your finger. If the surface wrinkles slightly and doesn't run back together, it is ready. If it is still runny, return to heat and boil for 2 more minutes, then test again.Target temperature is 220ºF (105ºC) if using a thermometer.
-
Jar and Store – Let the jam cool slightly. Ladle it into warm, sterilized jars, leaving about ¼ inch (6mm) of headspace at the top. Wipe the rims clean with a damp cloth to ensure a good seal. Screw the lids on finger-tight. Let cool to room temperature before storing in the fridge for up to two weeks, or process in a water bath canner for long-term storage.
Nutrition Facts
Servings 80
Serving Size 1 Tbsp
- Amount Per Serving
- Calories 45kcal
- % Daily Value *
- Total Fat 0.1g1%
- Sodium 1mg1%
- Potassium 60mg2%
- Total Carbohydrate 12g4%
- Dietary Fiber 0.5g2%
- Sugars 11g
- Protein 0.2g1%
* Percent Daily Values are based on a 2,000 calorie diet. Your daily value may be higher or lower depending on your calorie needs.
Note
For long-term storage, process jars in a water bath canner according to USDA guidelines. Fresh lemon juice is great for fridge jam, but bottled lemon juice is recommended for canning to ensure stable pH levels.
Frequently Asked Questions
Can I make this jam without pectin?
Yes! This recipe relies on the natural pectin in the rhubarb and the high sugar content to set. The lemon juice also helps activate the setting process.
How long does homemade rhubarb jam last?
When stored in the refrigerator in sealed jars, it lasts up to 2 weeks. If processed in a water bath canner, it can last up to a year in a cool, dark pantry.
Can I use frozen rhubarb?
Yes, you can use frozen rhubarb. There is no need to thaw it completely before cooking, though you may need to simmer it slightly longer to evaporate excess moisture.