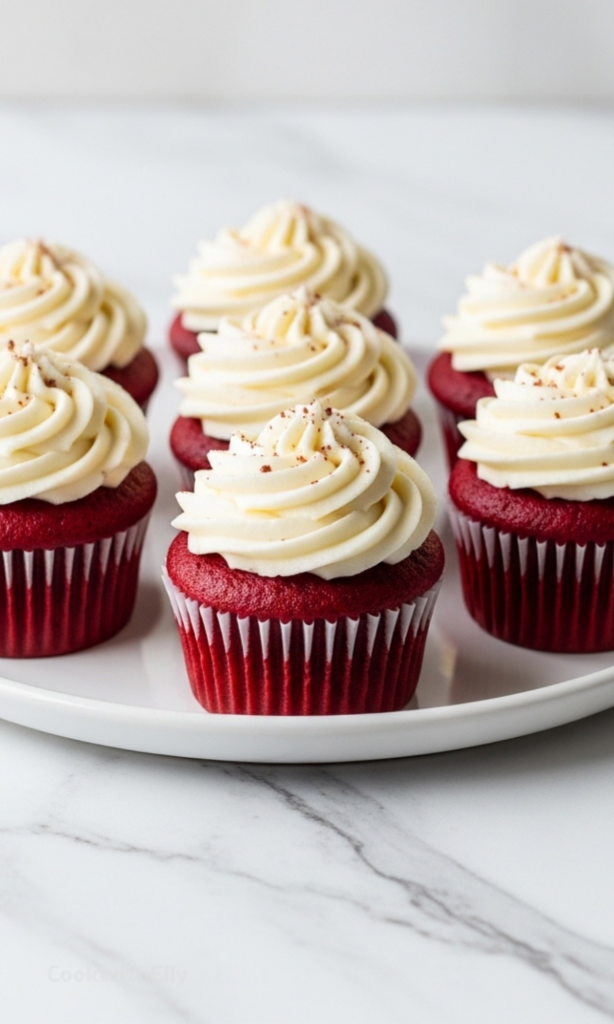

Red velvet cupcakes have a way of feeling special without trying too hard. They are bold in color, soft in texture, and quietly comforting in flavor. I have baked them for casual weekends and big celebrations, and they always feel right.
There is something nostalgic about them, too. The deep red crumb, the subtle cocoa, the tangy cream cheese frosting. They look dramatic, but the taste is gentle and balanced, which is exactly why people keep coming back for one more.
I make these red velvet cupcakes when I want a dessert that feels a little dressed up but still familiar. They are dependable, crowd-pleasing, and surprisingly easy. Once you make them a couple of times, they start to feel like an old friend.
Why These Cupcakes Never Go out Of Style
Red velvet has been around for decades, and there is a reason it never fades away. It sits somewhere between vanilla and chocolate, never overpowering, never boring. That quiet complexity is part of the charm.
The color alone makes people smile. It signals celebration before the first bite, and it instantly elevates a dessert table. I have watched guests reach for these cupcakes simply because they stand out.
What really keeps them timeless, though, is the texture. Soft, moist, and tender, with frosting that melts just slightly on the tongue. When baked well, red velvet cupcakes feel indulgent without being heavy.
Ingredients Needed for the Recipe
- All-purpose flour – forms the structure of the cupcakes and keeps them tender.
- Granulated sugar – adds sweetness and helps create a soft crumb.
- Unsweetened cocoa powder – gives a subtle chocolate depth without overpowering.
- Baking soda – helps the cupcakes rise and stay light.
- Salt – balances sweetness and enhances overall flavor.
- Buttermilk – adds moisture and that classic tangy red velvet taste.
- Apple cider vinegar – reacts with the baking soda for lift and tenderness.
- Vanilla extract – rounds out the flavor and adds warmth.
- Red food coloring – creates the signature vibrant red color.
- Powdered sugar – sweetens and smooths the frosting.
- Unsalted butter – gives the frosting richness and body.
- Cream cheese – adds tang and creaminess to the frosting.
How to make red velvet cupcakes?
Step 1 – Prepare the oven and pan
Start by preheating the oven to 350°F. Line a standard muffin tin with cupcake liners so everything is ready once the batter is mixed.
Having the pan prepared ahead of time helps keep the process smooth. Once the batter is ready, you want to bake right away for the best rise.
Step 2 – Mix the dry ingredients
In a large bowl, whisk together the flour, sugar, cocoa powder, baking soda, and salt. Take a moment here to break up any cocoa lumps.
This step ensures the cupcakes bake evenly. A well-mixed dry base makes the final texture much more consistent.
Step 3 – Combine the wet ingredients
In a separate bowl, whisk together the buttermilk, apple cider vinegar, vanilla extract, and red food coloring. The mixture will look vibrant and slightly thin.
This is where the signature color really comes to life. Adjust the food coloring if you want a deeper red.
Step 4 – Bring the batter together
Pour the wet ingredients into the bowl of dry ingredients. Stir gently until everything is just combined and smooth.
Try not to overmix here. A light hand keeps the cupcakes soft instead of dense.
Step 5 – Fill the liners
Divide the batter evenly among the cupcake liners, filling each one just under three-quarters full. This allows room for the cupcakes to rise.
Keeping the portions even helps them bake at the same rate and look uniform once finished.
Step 6 – Bake the cupcakes
Place the pan in the oven and bake for 17 to 20 minutes. The tops should spring back lightly when touched.
A toothpick inserted in the center should come out clean or with a few moist crumbs.
Step 7 – Cool completely
Let the cupcakes rest in the pan for a few minutes before transferring them to a cooling rack. This prevents the liners from pulling away.
Allow them to cool fully before frosting. Warm cupcakes and cream cheese frosting do not mix well.
Step 8 – Make the frosting
Beat the powdered sugar, softened butter, cream cheese, and vanilla until smooth and creamy. The texture should be spreadable but not runny.
Taste and adjust if needed. I like the frosting lightly sweet so it balances the cupcakes.
Step 9 – Frost and decorate
Once the cupcakes are cool, frost them using a piping bag or a simple spatula. Both work beautifully.
If you want, add sprinkles or cake crumbs on top for a finished look.
Step 10 – Serve
Serve the cupcakes once frosted, or chill them briefly to set the frosting. They are lovely slightly cool.
Each bite should feel soft, tangy, and just sweet enough.
Tips
- Use gel food coloring if you want a deeper, more vibrant red.
- Mix the batter only until combined to keep the cupcakes tender.
- Do not skip the buttermilk or vinegar, they are essential for flavor.
- Let cupcakes cool completely before frosting to avoid melting.
- Beat the frosting until smooth for the best texture.
Serving ideas for different occasions
These red velvet cupcakes work beautifully for birthdays, holidays, and casual gatherings. Their color alone makes them feel festive without extra effort.
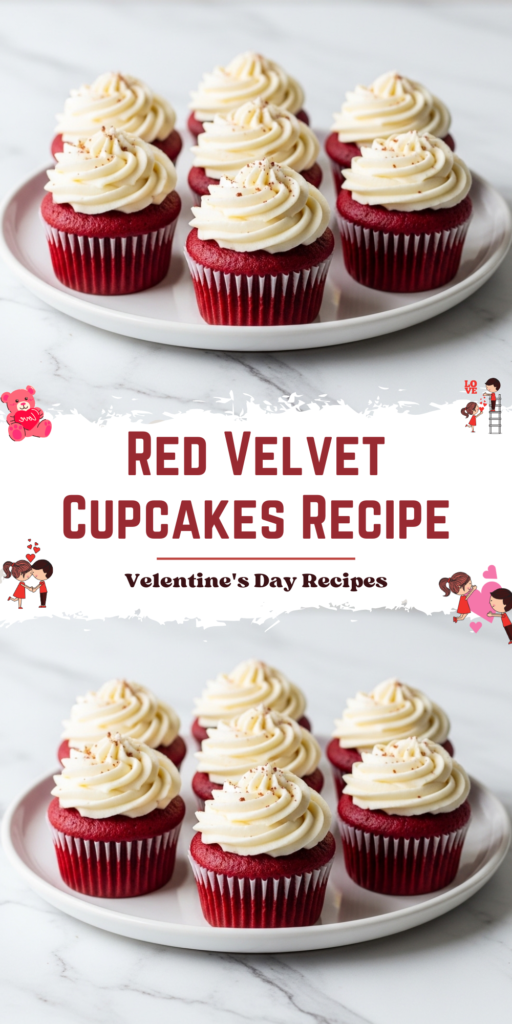
For Valentine’s Day, I like to keep the decorations simple and romantic. A swirl of frosting and a few crumbs on top is enough.
During the holidays, you can add seasonal sprinkles or colored liners. They adapt easily without losing their classic feel.
Storing and making ahead
If you are baking ahead of time, unfrosted cupcakes can be stored at room temperature or in the fridge once fully cooled. Keep them in an airtight container.
Frosted cupcakes should be stored in the refrigerator and enjoyed within a few days. The cream cheese frosting stays fresh and smooth when chilled.
You can also freeze unfrosted cupcakes for longer storage. Thaw them overnight in the fridge and frost before serving.
These red velvet cupcakes are one of those recipes I return to again and again. They feel reliable, comforting, and just special enough every single time.
Red Velvet Cupcakes Recipe
Description
Red velvet cupcakes are timeless and classic, captivating taste buds with their vibrant appearance, luscious flavor, and velvety texture. These indulgent treats have become a staple at various celebratory events such as birthdays, weddings, Valentine’s Day, and other special occasions. Featuring a subtle chocolate base with a tangy twist from buttermilk and vinegar, and crowned with smooth, not-too-sweet cream cheese frosting, these cupcakes deliver elegance in every bite.
ingredients
For the cupcakes:
For the cream cheese frosting:
Instructions
-
Preheat your oven to 350°F (175°C) and line a muffin tin with cupcake liners.
-
In a large mixing bowl, whisk together the all-purpose flour, granulated sugar, cocoa powder, baking soda, and salt until well combined.
-
In a separate bowl, whisk together the buttermilk, apple cider vinegar, vanilla extract, and red food coloring.
-
Pour the wet ingredients into the dry ingredients and stir until the batter is smooth and well combined. Be careful not to overmix.
-
Divide the batter evenly among the cupcake liners, filling each one about ¾ full.
-
Bake in the preheated oven for 17 to 20 minutes, or until a toothpick inserted into the center of a cupcake comes out clean.
-
Remove the cupcakes from the oven and let them cool in the muffin tin for a few minutes. Then transfer them to a cooling rack to cool completely.
-
While the cupcakes are cooling, prepare the frosting. In a mixing bowl, beat the powdered sugar, softened butter, cream cheese, and vanilla extract together until smooth and creamy.
-
Once the cupcakes have cooled completely, frost them with the cream cheese frosting using a piping bag or a spatula.
-
If desired, you can decorate the cupcakes with sprinkles or grated chocolate.
-
Serve and enjoy these delicious red velvet cupcakes!
Nutrition Facts
Servings 12
Serving Size 1 cupcake
- Amount Per Serving
- Calories 277kcal
- % Daily Value *
- Total Fat 12g19%
- Saturated Fat 7g35%
- Cholesterol 43mg15%
- Sodium 230mg10%
- Potassium 105mg3%
- Total Carbohydrate 40g14%
- Dietary Fiber 1g4%
- Sugars 28g
- Protein 3g6%
- Calcium 60 mg
- Iron 1 mg
* Percent Daily Values are based on a 2,000 calorie diet. Your daily value may be higher or lower depending on your calorie needs.
Note
- Buttermilk is essential—do not substitute, as it provides the signature tangy flavor and tender crumb.
- Use gel food coloring if you prefer a more vibrant red without thinning the batter.
- Cool completely before frosting to prevent melting and ensure clean piping.
- Storage: Keep frosted cupcakes refrigerated in an airtight container for up to 4 days.
Frequently Asked Questions
Can I make these cupcakes ahead of time?
Yes! Bake and cool the cupcakes up to 2 days in advance. Store unfrosted cupcakes at room temperature in an airtight container. Frost just before serving for best texture and appearance.
What makes red velvet different from chocolate cake?
Red velvet has only a hint of cocoa and gets its unique tangy flavor from buttermilk and vinegar. It’s lighter and more delicate than traditional chocolate cake, with a signature red hue.