 View Gallery
1 photo
View Gallery
1 photo
There’s something truly special about a cookie that manages to feel both classic and completely new all at once.
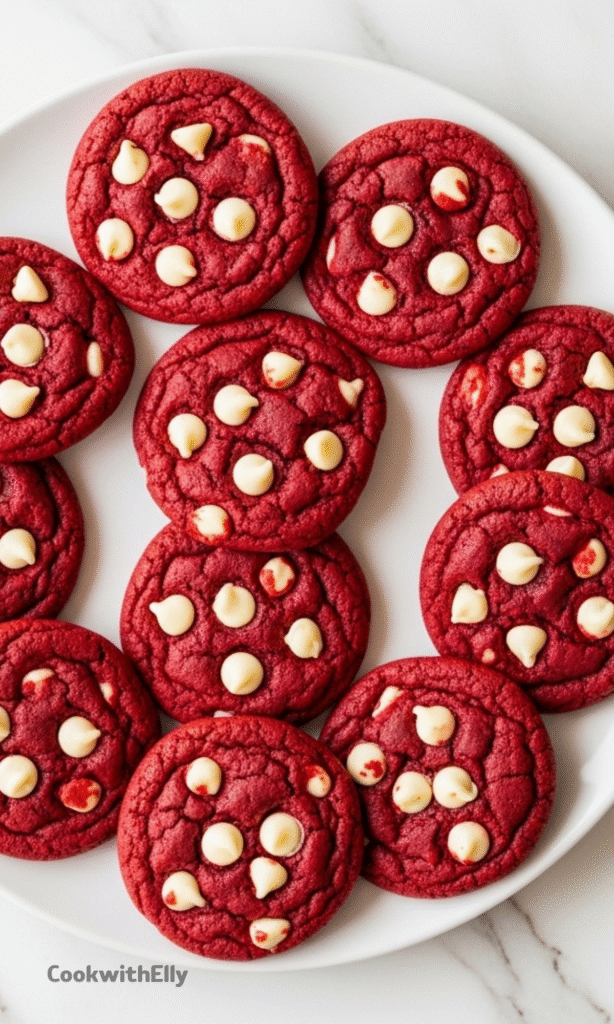
These red velvet cookies are exactly that, a delightful twist on the beloved chocolate chip cookie that brings a pop of color and a deep, chocolatey soul.
Why You’ll Adore This Recipe
If you’re a fan of those thin, crispy-edged cookies with a surprisingly chewy center, you’ve come to the right place.
They spread out beautifully in the oven, creating a delicate texture that shatters with the first bite before giving way to a soft, almost fudgy heart.
Ingredients Needed for the Recipe
Each component here has a specific role to play, coming together to create that perfect red velvet magic.
You’ll find most of these are pantry staples, waiting for their moment to shine.
- Butter (softened): This is the base for our rich dough, and creaming it with the sugar is what helps create that wonderful, slightly spread-out texture.
- Granulated White Sugar & Brown Sugar: The white sugar gives crispness, while the brown sugar introduces a hint of molasses depth and that signature chew.
- Red Food Coloring: This is where the “red” comes from, of course. A gel food coloring works best for a vibrant, bold hue without thinning the dough.
- Egg: Our binding agent, the egg brings everything together and adds structure to the final cookie.
- Vanilla Extract: A classic flavor enhancer that rounds out the chocolate and buttery notes perfectly.
- All-Purpose Flour: The main structural backbone of our cookie dough.
- Cocoa: Don’t be fooled by the color, this is the “velvet” part, providing that essential, subtle chocolate foundation.
- Baking Soda: Our leavening agent, it gives the cookies just the right amount of lift and spread.
- Salt: A crucial flavor booster that makes all the other ingredients taste more like themselves.
- White Chocolate Chips: These are the genius finishing touch, mimicking the flavor of classic cream cheese frosting in a convenient, melty morsel.
The Secret History of Red Velvet
That iconic red color wasn’t always just for show. Originally, it was a natural chemical reaction.
Non-Dutch-processed cocoa, buttermilk, and vinegar would interact to create a reddish-brown tint, a phenomenon that clever bakers later amplified with beet juice or, eventually, food coloring.
How to make Red Velvet Cookies?
The process is wonderfully straightforward, almost meditative. Just follow these simple steps.

Before you know it, your kitchen will smell incredible and you’ll have a tray of gorgeous red cookies.
Step 1 – Creaming the Base
Start by beating the softened butter, both sugars, and your red food coloring together in a large bowl.
This initial step is where you build the foundation for both color and texture, so mix it until it’s well-combined and slightly fluffy.
Step 2 – Incorporating Wet Ingredients
Next, stir in the vanilla extract and the single egg until the mixture is completely smooth and uniform.
You’ll see the color become even more consistent and rich as you blend these in.
Step 3 – Combining the Dry Ingredients
Now, it’s time for the dry team. Add the all-purpose flour, cocoa, baking soda, and salt all at once.
Stir just until a soft dough forms and no dry streaks of flour remain, being careful not to overmix at this stage.
Step 4 – The Final Mix-In
Gently fold in the white chocolate chips, distributing them evenly throughout the vibrant red dough.
This is where the cookie really comes to life, with those creamy white specks promising pockets of sweet flavor.
Step 5 – Scooping and Pan Prep
Cover your baking sheet with a piece of parchment paper or a silicone baking mat—this prevents sticking and promotes even browning.
Use a cookie scoop or a tablespoon to portion out the dough, leaving plenty of room between each one because they will spread.
Step 6 – Baking to Perfection
Bake the cookies in the upper two-thirds of your oven, preheated to 350°F (177°C), for about 10 to 12 minutes.
They’re done when the edges look set and slightly crispy, but the centers still appear a bit soft and puffy.
Step 7 – The Crucial Cool Down
Remove the baking sheet from the oven and let the cookies rest on it for a few minutes to firm up.
Then, carefully transfer them to a wire cooling rack to finish setting completely, this step is non-negotiable for that perfect crisp-chewy contrast.
Choosing Your Food Coloring
Not all red food colorings are created equal, and your choice will directly impact the final look of your cookies.
Liquid food coloring can work, but it sometimes waters down the dough; for a truly intense, vibrant red, gel or paste food colorings are your best bet.
Tips
A few little insights can make the difference between a good cookie and a great one. Here’s what you need to know.
These are the small details that elevate your baking game.
- For the best spread and texture, ensure your butter is properly softened—it should be cool to the touch but leave a slight indentation when you press it.
- If your dough feels a bit too soft or sticky after mixing, don’t panic. A brief 15-20 minute chill in the refrigerator will make it much easier to handle and scoop.
- Resist the urge to over-bake. The cookies will continue to cook on the hot baking sheet after you take them out of the oven, so pulling them when the centers look slightly underdone is the secret.
Creative Variations to Try
Once you’ve mastered the classic, feel free to get playful and make this recipe your own.
A simple swap or addition can create a whole new cookie experience.
- For a more intense chocolate flavor, swap the white chocolate chips for dark or semi-sweet chocolate chunks.
- Add a cup of chopped pecans or walnuts to the dough for a delightful crunch that complements the soft texture.
- For a fun holiday twist, you could even fold in a handful of peppermint bits along with the white chocolate chips.
Storing and Keeping Them Fresh
These cookies are best enjoyed the day they are made, when the contrast between the crispy edge and chewy center is at its peak.
If you have leftovers, store them in an airtight container at room temperature for up to three days.
You can also freeze the unbaked dough balls on a parchment-lined sheet, then transfer them to a freezer bag.
Bake straight from frozen, adding just a minute or two to the baking time, for a fresh, warm cookie anytime the mood strikes.
Red Velvet Cookies Recipe
Description
These red velvet cookies are inspired by classic thin and crispy chocolate chip cookies—think Tate’s Bakeshop style—but with a delightfully chewy center. Vibrantly red with a hint of cocoa and studded with creamy white chocolate chips, they capture the essence of red velvet cake in cookie form. Perfect for holiday baking or any day you're craving something sweet, festive, and irresistibly delicious!
Ingredients
Instructions
-
Preheat oven to 350°F (177°C). Line baking sheets with parchment paper or silicone baking mats.
-
In a large bowl, cream together the softened butter, granulated sugar, brown sugar, and red food coloring until light and fluffy (about 2–3 minutes with a hand mixer).
-
Beat in the egg and vanilla extract until fully incorporated.
-
In a separate bowl, whisk together flour, cocoa powder, baking soda, and salt. Gradually add the dry ingredients to the wet mixture, mixing until just combined.
-
Fold in the white chocolate chips until evenly distributed throughout the dough.
-
Using a medium cookie scoop (about 1.5 tablespoons), portion dough onto prepared baking sheets, spacing cookies at least 2 inches apart—they spread while baking!
-
Bake in the upper two-thirds of the oven for 11–12 minutes, or until edges are set and centers look slightly underdone.
-
Let cookies cool on the baking sheet for 2 minutes before transferring to a wire rack to cool completely.
Nutrition Facts
Servings 24
Serving Size 1 cookie
- Amount Per Serving
- Calories 180kcal
- % Daily Value *
- Total Fat 9g14%
- Saturated Fat 5g25%
- Cholesterol 25mg9%
- Sodium 120mg5%
- Potassium 60mg2%
- Total Carbohydrate 24g8%
- Dietary Fiber 1g4%
- Sugars 16g
- Protein 2g4%
- Calcium 30 mg
- Iron 1 mg
* Percent Daily Values are based on a 2,000 calorie diet. Your daily value may be higher or lower depending on your calorie needs.
Note
- Room temperature ingredients ensure even mixing—don’t skip this step!
- Spacing matters: These cookies spread significantly, so leave ample room between dough balls.
- No gel food coloring? Liquid works, but you may need more (1–2 tbsp) for vibrant red—just reduce egg slightly or add a touch more flour if dough becomes too wet.
- Storage: Keep in an airtight container for up to 5 days or freeze baked cookies for up to 3 months.
Frequently Asked Questions
Can I use natural red food coloring?
Yes, but natural dyes (like beet powder) may yield a pink or muted red. For classic red velvet color, gel-based artificial dye is most effective.
Why do my cookies spread too much?
Over-softened butter, warm dough, or insufficient flour can cause excessive spreading. Chill the dough for 15–30 minutes before baking if needed.
Can I substitute dark chocolate chips for white?
Absolutely! Dark or semi-sweet chocolate chips create a richer flavor contrast with the cocoa in the dough.