 View Gallery
1 photo
View Gallery
1 photo
Let’s settle something, right from the start. People sometimes ask if red velvet is just chocolate cake in a fancy dress. I get it. But to me, the answer is a firm, friendly no.
There’s a distinct, subtle tang, a velvety crumb, a whole different personality. It’s its own delicious thing. And that’s exactly why turning it into a brownie is such a brilliant idea.
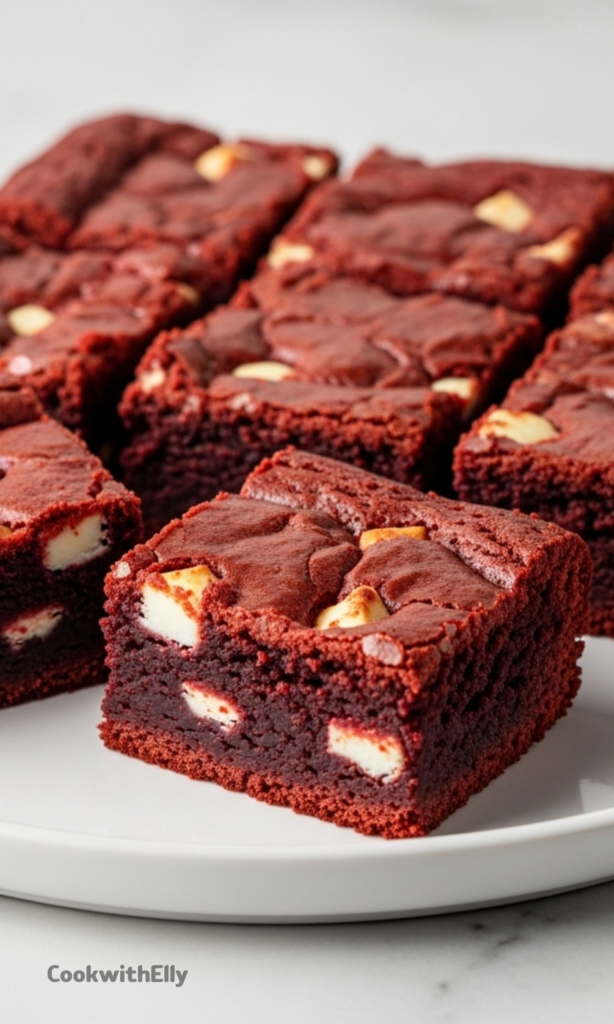
We’re taking that iconic flavor and packing it into the ultimate fudgy, dense, and satisfying square. These aren’t just brownies tinted red. They’re a full-blown, decadent experience with a signature shiny, crinkly top that cracks perfectly under your fingers.
I’m Elly, and I fell head over heels for this recipe. It combines the best of both worlds, and honestly? I might like them more than my classic brownies. They’re that good.
What Makes These Brownies Special
Two secrets set these brownies apart. First, we use white chocolate as the base. It melts into the butter creating a uniquely rich and creamy foundation that lets the cocoa and red velvet flavor sing without being overpoweringly dark.
Second, that perfect shiny, paper-thin crust on top. It’s not just for looks, it adds a delightful textural contrast to the fudgy interior. And the trick to getting it is simpler than you think.
It’s all about dissolving the sugar properly. We’ll do it by whipping the eggs and sugar together until they’re pale and fluffy. This little step makes all the difference between a good brownie and a spectacular one.
Ingredients Needed for the Recipe
Gathering your ingredients is the first step to success. Using the right type, especially for the food coloring, is crucial for that beautiful red hue. Here’s what you’ll need:
- White Chocolate (220g): The star of the show. It creates a wonderfully sweet, creamy base for our batter.
- Unsalted Butter (140g): I prefer unsalted to control the saltiness, but salted works—just skip the added salt later.
- Large Eggs (3): They provide structure and help create that iconic shiny top when whipped.
- Granulated Sugar (180g): Caster sugar works too. This is what we’ll dissolve for that perfect crust.
- Vanilla Extract (1 tablespoon): A generous pour adds essential warmth and depth of flavor.
- Red Gel Food Colouring: This is non-negotiable. Liquid coloring won’t give a vibrant color without using a whole bottle. A gel or paste is concentrated and effective.
- Plain Flour (200g): Also called all-purpose flour, it’s the structural backbone.
- Cocoa Powder (20g): Use unsweetened. It gives that classic red velvet hint of chocolate.
- Salt (1/2 teaspoon): It enhances all the other flavors. Omit if you used salted butter.
- Extra White Chocolate (200g, chopped): Folding this in is optional, but highly recommended for melty pockets of sweet chocolate in every bite.
The Right Red: Choosing Your Food Colouring
This is the make-or-break moment for the “red” in red velvet. Using a liquid food colouring from the supermarket will lead to frustration. You’d need half the bottle, and it could thin out your batter.
Invest in a small pot of gel or paste food colouring. My personal favourite is a colour called ‘Red Extra’ from Sugarflair. It’s highly pigmented, so you need less, and the colour is a true, vibrant red.
A little goes a long way, and it won’t alter the texture of your brownie batter. It’s the single best tip for achieving that stunning, bakery-quality colour.
How to make Red Velvet Brownies?
The process is straightforward, but a few key techniques ensure perfection. Follow these steps, and you’ll be rewarded with the fudgiest, most gorgeous brownies.
Step 1 – Prep and Melt
Start by heating your oven to 180°C (350°F). Grease and line an 8-inch square cake tin with parchment paper, leaving some overhang for easy removal later.
In a saucepan over medium heat, combine the 220g of white chocolate and the unsalted butter. Stir gently until both are completely melted and smooth. You can also do this in a microwave-safe bowl in 30-second bursts.
Once melted, set this mixture aside to cool for a bit. You don’t want it so hot that it cooks the eggs in the next step.
Step 2 – Whip to Shine
In a large bowl, combine the three eggs, granulated sugar, and vanilla extract. Now, whip. Use an electric mixer on high speed, or channel some serious energy with a whisk.
Keep going until the mixture becomes noticeably paler, thickens, and increases in volume. This should take about 2 to 3 minutes. You’re looking for a light, frothy consistency.
This whipping action is the magic that dissolves the sugar granules, which is what guarantees that beautiful, shiny, crinkly top on your baked brownies.
Step 3 – Combine and Colour
Pour the slightly cooled white chocolate and butter mixture into the whipped eggs and sugar. Gently whisk everything together until it’s fully combined and uniform.
Now, add your red gel food colouring. Start with a teaspoon or so, whisking it in completely. Add more until you achieve a deep, rich red color that you’re happy with.
Don’t be shy here. The cocoa powder will darken it slightly, so go for a shade brighter than you think you need.
Step 4 – Fold in the Dry Goods
Sift the plain flour, cocoa powder, and salt directly into the wet mixture. This prevents lumps and ensures even distribution.
Switch to a spatula and fold the dry ingredients in gently. Stop as soon as you no longer see streaks of flour. Overmixing at this stage can lead to tough brownies.
If you’re using the extra chopped white chocolate, fold most of it into the batter now. Save a small handful to scatter over the top before baking.
Step 5 – Bake with Care
Pour the thick, luxurious batter into your prepared tin. Smooth the top with your spatula, then sprinkle over the reserved chocolate chunks.
Bake in the preheated oven. Here’s an important note: brownies made with white chocolate often take longer to bake. For me, it took between 1 hour and 1 hour 20 minutes.
Start checking at the 50-minute mark. The brownie is done when a toothpick inserted into the center comes out with a few moist, fudgy crumbs clinging to it. If you see wet batter, it needs more time. A clean pick means it’s over-baked.
Step 6 – The Cool Down
Once baked, take the tin out of the oven. Give it a firm slam on your countertop a few times. This helps release any trapped air and settles the interior.
Let the brownie cool in its tin at room temperature for about 20 minutes. This is the hardest part, the waiting. But patience is a virtue here.
After that initial cool, transfer the entire tin to your refrigerator. Let it chill and set firmly for at least one hour. This step is non-negotiable for getting clean, perfect slices.
Serving & Storing Your Creation
After the chilling time, use the parchment paper overhang to lift the whole brownie slab out of the tin. Place it on a cutting board.
Use a large, sharp knife to slice into squares. For super clean cuts, wipe the knife clean with a warm, damp cloth between each slice. They’re fantastic on their own, still slightly cool from the fridge.
For a real treat, serve them slightly warmed with a scoop of vanilla ice cream or a dollop of whipped cream. Store any leftovers (lucky you!) in an airtight container at room temperature for a few days, or in the fridge for up to a week.
Tips
- Don’t skip the whipping step for the eggs and sugar. It’s the secret to that professional, crinkly top everyone loves.
- Gel food coloring is essential. Liquid coloring will dilute your batter and give a faint pink, not a bold red.
- Trust the toothpick test. You want fudgy crumbs, not wet batter or a clean pick. The brownie will continue to set as it cools.
- The long chill is key. Cutting into warm brownies will give you a messy, crumbly result. Let the fridge do its work for perfect squares.
- If you want to highlight the “velvet” flavor, a simple cream cheese frosting drizzle on top is a match made in heaven.
Why the Chill Time is Everything
I know, I know. You’ve just baked something that smells incredible, and you have to wait even longer. It feels like a special kind of torture.
But here’s the science of it, simplified. To get that ultra-fudgy, dense texture, the brownies are purposely slightly underbaked in the center when they come out of the oven.
The residual heat continues to cook them gently as they cool at room temperature. The fridge then solidifies the butter and chocolate, setting the structure completely.
If you skip this, you’ll have a gooey, delicious mess. It will taste great but won’t hold its shape. The wait truly transforms them from a warm pudding into the perfect, sliceable brownie.
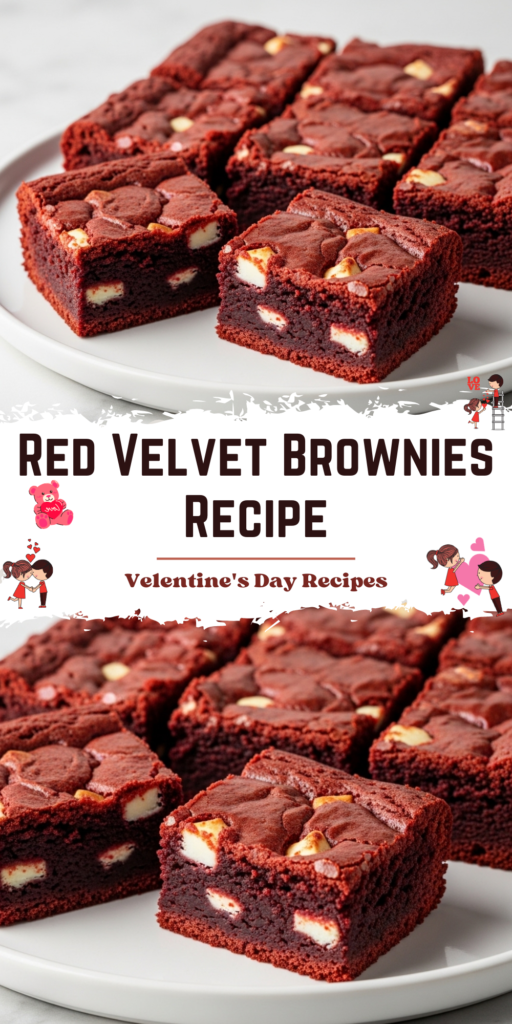
Red Velvet Brownies Recipe
Description
These fudgy red velvet brownies are a decadent twist on the classic, blending rich cocoa notes with the subtle tang and vibrant color of red velvet. Made with white chocolate for extra richness and a glossy crinkly top, they’re perfect for anyone who loves a soft, chewy, and indulgent treat. Chill them before slicing for clean, fudgy perfection!
ingredients
For the brownie batter
Optional add-in
Instructions
-
Prep
Preheat your oven to 180°C (350°F). Grease and line an 8-inch square cake tin with baking paper. -
Melt chocolate & butter
In a saucepan over medium heat, melt the 220g white chocolate and unsalted butter together until smooth. Alternatively, microwave in 30-second bursts, stirring between each. Set aside to cool slightly. -
Whip eggs & sugar
In a large bowl, whisk together the eggs, granulated sugar, and vanilla extract for 2–3 minutes until pale, thick, and slightly increased in volume. -
Combine wet ingredients
Pour the cooled melted white chocolate mixture into the egg mixture and whisk until fully combined. Add the red gel food colouring and mix until evenly distributed. -
Add dry ingredients
Sift in the flour, cocoa powder, and salt. Gently fold until just combined—do not overmix. -
Fold in chocolate chunks
Add most of the chopped white chocolate (reserve some for topping) and fold gently into the batter. -
Bake
Pour the batter into the prepared tin and smooth the top. Sprinkle reserved white chocolate on top. Bake for 60–80 minutes, or until a toothpick inserted into the center comes out with a few moist crumbs (no raw batter). -
Cool & chill
Remove from oven and gently tap the tin on the counter to settle. Let cool at room temperature for 20 minutes, then transfer to the fridge for at least 1 hour (preferably 2) before slicing.
Nutrition Facts
Servings 9
Serving Size 1 brownie (approx. 90g)
- Amount Per Serving
- Calories 320kcal
- % Daily Value *
- Total Fat 18g28%
- Saturated Fat 11g56%
- Cholesterol 85mg29%
- Sodium 210mg9%
- Potassium 120mg4%
- Total Carbohydrate 36g12%
- Dietary Fiber 1g4%
- Sugars 28g
- Protein 5g10%
- Calcium 40 mg
- Iron 1 mg
* Percent Daily Values are based on a 2,000 calorie diet. Your daily value may be higher or lower depending on your calorie needs.
Note
- Use gel food colouring—liquid won’t give you a vibrant red without altering texture.
- Don’t skip chilling—it’s essential for clean slices and fudgy texture.
- Storage: Keep in an airtight container in the fridge for up to 5 days or freeze for up to 2 months.
Frequently Asked Questions
Can I make these without white chocolate?
You can substitute with dark or milk chocolate, but white chocolate gives these brownies their signature richness and fudginess. It also helps create that shiny top!
Why do my brownies crack on top?
A slight crack is normal—but aggressive mixing or overbaking causes major cracks. Whip eggs/sugar well for a crinkly (not cracked) crust, and don’t overbake!