
Every year when that cool minty season rolls around, I start craving that nostalgic combo of vanilla and mint that feels both refreshing and a little indulgent. It reminds me of simpler treats, the kind that didn’t try too hard but somehow always hit the spot.
" data-inserter-version="2" data-placement-location="under_page_title">That craving is exactly what led me to create these Oreo Shamrock Shake Cookies. I wanted something soft, bakery-style, with a creamy mint flavor and just enough crunch to keep things interesting. Not a copy of anything, just a cookie that captures that familiar feeling.
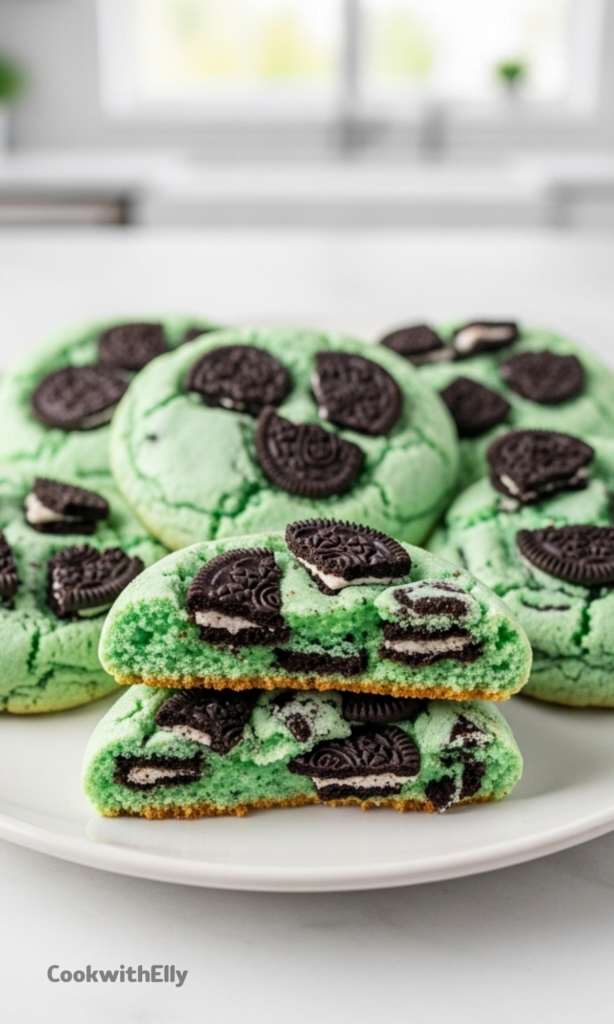
These cookies are chewy in the center, lightly crisp at the edges, and packed with chunks of mint Oreos that melt slightly while baking. The flavor is cool and sweet without being overpowering, which makes them surprisingly hard to stop eating.
I tend to make them when spring starts peeking in, but honestly, they work anytime you want a dessert that feels fun and a little different from the usual chocolate chip routine.
Why These Cookies Work So Well
What makes these cookies special is the balance. Mint can easily become too strong or taste artificial, but here it blends into a soft vanilla base so it feels smooth rather than sharp.
The Oreo pieces add texture and flavor at the same time. Some bits stay slightly crunchy, while others soften into the dough, creating little pockets of chocolatey creaminess throughout the cookie.
Chilling the dough is another quiet hero in this recipe. It allows the flavors to settle and keeps the cookies thick and tender instead of spreading into thin, flat discs.
Ingredients Needed for the Recipe
- All-purpose flour – Gives the cookies their structure while keeping them soft and tender.
- Baking soda – Helps the cookies rise slightly and creates that classic chewy texture.
- Baking powder – Adds a little lift so the cookies stay thick instead of dense.
- Salt – Balances the sweetness and deepens the chocolate and mint flavors.
- Unsalted butter, softened – Provides richness and creates that melt-in-your-mouth consistency.
- Granulated sugar – Sweetens the dough and helps achieve lightly crisp edges.
- Egg – Binds everything together so the cookies hold their shape.
- Vanilla extract – Adds warmth and gives that milkshake-like base flavor.
- Peppermint extract – Brings the refreshing mint note that defines these cookies.
- Green food coloring (optional) – Adds a festive touch without changing the flavor.
- Mint Oreos, crushed – Deliver crunch, creaminess, and chocolate contrast in every bite.
How to make Oreo Shamrock Shake Cookies?

Step 1 – Prepare for Baking
Start by preheating your oven to 350°F (175°C) and lining baking sheets with parchment paper. This prevents sticking and makes cleanup much easier later.
Let the butter and egg sit out until they reach room temperature. It might feel like a small detail, but it helps everything mix smoothly and evenly.
Step 2 – Mix the Dry Ingredients
In a medium bowl, whisk together the flour, baking soda, baking powder, and salt. This ensures the leavening agents are evenly distributed before they meet the wet ingredients.
I like to give it a quick extra whisk just to avoid hidden clumps. It only takes a few seconds and makes a difference in texture.
Step 3 – Cream the Butter and Sugar
In a larger bowl, beat the softened butter and sugar together for about 2 to 3 minutes. The mixture should become lighter in color and slightly fluffy.
This step builds the foundation of the cookie’s softness, so don’t rush it. Proper creaming adds air and helps create that chewy center later.
Step 4 – Add the Wet Ingredients
Mix in the egg, vanilla extract, and peppermint extract until fully incorporated. The dough will start to smell fresh and sweet at this stage.
If you are using food coloring, add a few drops now and mix until the color looks even. You can adjust the shade depending on how vibrant you want them.
Step 5 – Combine Wet and Dry Mixtures
Gradually add the dry ingredients into the wet mixture, mixing on low speed. Stop as soon as everything is combined to avoid overworking the dough.
Overmixing can make cookies tough, and we want the opposite here. Soft, thick, and tender is the goal.
Step 6 – Fold in the Mint Oreos
Gently stir in the crushed Mint Oreos, making sure they are spread throughout the dough. Leave some larger chunks for texture.
Those uneven pieces create little surprises in each bite, which is part of what makes these cookies feel homemade and not overly uniform.
Step 7 – Scoop and Chill the Dough
Scoop portions of dough about 3 tablespoons in size and place them onto a lined baking sheet. Cover and chill for at least one hour.
This resting time allows the dough to firm up and prevents the cookies from spreading too much while baking.
Step 8 – Bake the Cookies
Place the chilled dough balls onto prepared baking sheets, leaving space between each one. Bake for 11 to 12 minutes until the edges are lightly golden.
The centers may look slightly underdone, and that is exactly what you want. They will continue to set as they cool.
Step 9 – Cool Before Serving
Let the cookies rest on the baking sheet for about 5 minutes before transferring them to a wire rack. This helps them finish baking without drying out.
Once cooled, they become perfectly chewy with just enough structure to hold together beautifully.
Tips
- Chill the dough for at least one hour to keep the cookies thick and prevent spreading.
- Do not overmix once the flour is added or the cookies may turn dense.
- Break Oreos into chunks instead of fine crumbs for better texture.
- Slightly underbake for the softest centers.
- Use room temperature butter and egg for smoother mixing.
- If using regular Oreos, add a touch more peppermint extract to maintain the mint flavor.
- Pack the dough firmly when scooping to avoid crumbly cookies.
- Let cookies cool on the pan briefly so they finish setting properly.
Fun Variations to Try
If you want to lean more into the chocolate side, add a handful of white or semi-sweet chocolate chips. They melt into the dough and create an extra creamy bite.
For a stronger mint presence, mix in peppermint baking chips or drizzle melted chocolate over the cooled cookies. It adds a bakery-style finish without much effort.
You can also swap in gluten-free flour if needed, using a one-to-one baking blend. The texture stays surprisingly soft, especially when you keep the dough well chilled.
Storing and Freezing
Once the cookies have cooled completely, store them in an airtight container at room temperature. They stay soft for several days, and the mint flavor actually deepens slightly over time.
If you want to freeze baked cookies, place them in a single layer first until solid, then transfer to a freezer-safe container. This keeps them from sticking together.
You can also freeze the unbaked dough balls and bake them straight from the freezer. Just add a couple of extra minutes to the baking time and they turn out just as fresh.
Having dough ready to go like that feels like a small win on busy days. Warm cookies without the full effort is always a good idea.
Oreo Shamrock Shake Cookies Recipe
Description
These soft and chewy Oreo Shamrock Shake Cookies combine the refreshing mint flavor of a McDonald's Shamrock Shake with the crunch of Mint Oreos for a fun and festive treat. Perfect for St. Patrick's Day, Easter brunch, Spring, or whenever you're craving a delicious twist on a classic dessert!
ingredients
Instructions
-
Prepare for baking
Preheat the oven to 350°F (175°C) and line two baking sheets with parchment paper to prevent sticking. Set out butter and egg to bring to room temperature for better mixing. -
Mix the dry ingredients
In a medium-sized mixing bowl, whisk together the all-purpose flour, baking soda, baking powder, and salt. -
Cream the butter and sugar
In a large mixing bowl or stand mixer fitted with the paddle attachment, beat the softened butter and granulated sugar on medium-high speed for 2-3 minutes, until the mixture is light and fluffy. This step is crucial for achieving a soft and chewy cookie texture. -
Add the wet ingredients
Mix in the egg, vanilla extract, and peppermint extract, beating until fully incorporated. If using, add the green food coloring and continue mixing until the dough reaches a uniform green shade. -
Combine wet and dry ingredients
Gradually add the dry ingredient mixture to the wet ingredients, mixing on low speed just until combined. Avoid overmixing, as this can make the cookies dense instead of soft and chewy. -
Fold in the Mint Oreos
Gently stir in the crushed Mint Oreos, distributing them evenly throughout the dough. For best results, leave some larger chunks to add texture and crunch to the cookies. -
Scoop and chill the dough
Use a cookie scoop or ice cream scoop to form dough balls, about 3 tablespoons each, and place them onto a parchment-lined baking sheet. Cover and chill the dough for at least 1 hour (or up to 48 hours). Chilling helps prevent the cookies from spreading too much while baking. -
Bake the cookies
Arrange the chilled cookie dough balls on the prepared baking sheets, spacing them 2 inches apart. Bake in the preheated oven for 11-12 minutes, or until the edges are lightly golden and the centers are set but still slightly soft. -
Cool before serving
Remove the cookies from the oven and let them cool on the baking sheet for 5 minutes before transferring them to a wire rack to cool completely. Enjoy!
Nutrition Facts
Servings 12
Serving Size 1 cookie
- Amount Per Serving
- Calories 423kcal
- % Daily Value *
- Total Fat 19.6gg31%
- Saturated Fat 10.8gg54%
- Trans Fat 0.5gg
- Cholesterol 65mgmg22%
- Sodium 250mgmg11%
- Potassium 80mgmg3%
- Total Carbohydrate 60gg20%
- Dietary Fiber 1gg4%
- Sugars 29gg
- Protein 5gg10%
- Calcium 35mg mg
- Iron 1.2mg mg
* Percent Daily Values are based on a 2,000 calorie diet. Your daily value may be higher or lower depending on your calorie needs.
Note
- Oreo cookies: If Mint Oreos are out of season, use regular Oreos and add an extra ½ tsp peppermint extract to the dough.
- Two flavor extracts: Vanilla + peppermint create the authentic Shamrock Shake flavor profile.
- Dry dough tip: Dough will be crumbly due to crushed cookies—pack firmly into scoop to prevent air pockets.
- Don't overmix: Mix wet and dry ingredients JUST until combined to keep cookies tender, not tough.
- Food coloring: Optional! 6 drops gives festive green hue without affecting flavor.
- Chill is crucial: Minimum 1 hour chilling prevents overspreading and enhances chewy texture.
- Perfect bake: Slightly underbake—remove when edges are golden but centers still look soft. They'll finish setting as they cool.
- Make ahead: Dough can be chilled up to 48 hours before baking, or frozen for up to 3 months.
Frequently Asked Questions
Can I use regular Oreos if I can't find Mint Oreos?
Yes! Simply use classic chocolate Oreos and add an extra ½ teaspoon of peppermint extract to the dough to maintain the signature Shamrock Shake mint flavor.
Is chilling the dough really necessary?
Yes! Chilling for at least 1 hour (up to 48 hours) is important. It prevents the cookies from spreading too much during baking and helps develop that perfect soft, chewy texture.
Can I skip the green food coloring?
Absolutely. The food coloring is purely for festive aesthetics and won't affect the flavor. Your cookies will still taste deliciously minty and vanilla without the green hue.
How should I crush the Mint Oreos for best texture?
For the perfect balance of crunch, break the Oreos into small chunks rather than grinding them into fine crumbs. Place them in a zip-top bag and crush gently with a rolling pin or the bottom of a heavy pan.
How do I get extra soft and chewy cookies?
Slightly underbake them! Remove from the oven when the edges are set but the centers still look slightly soft. They'll continue to bake and set as they cool on the baking sheet.
Can I substitute peppermint extract with mint extract?
You can use mint extract, but note it has a slightly different, more herbal flavor profile. For best Shamrock Shake flavor, peppermint extract is recommended. You can also enhance mintiness by adding crushed Andes Mints or chocolate mint chips.
Why did my cookies turn out dry?
Dry cookies can happen from overmixing the dough, adding too much flour, or overbaking. Always measure flour using the spoon-and-level method, mix just until combined, and watch baking time closely—remove when edges are golden but centers are still soft.