 View Gallery
1 photo
View Gallery
1 photo
You know that lull, right? The one that hits around three in the afternoon.
Your energy dips, and the siren call of the snack cabinet gets a little too loud. I used to face that exact moment, and let’s just say my choices weren’t always the best. Then, I started keeping a batch of these no-bake protein balls in the fridge. They changed the game completely. They’re sweet, a little salty, and wonderfully satisfying.
They’re the perfect little bite to grab when you need a proper boost. The best part is how incredibly simple they are to make. You just stir everything together in one bowl, roll, and chill. No baking, no fancy equipment, just a few minutes of hands-on time for a whole week of smart snacking.
Why You’ll Want to Make a Batch This Week
These protein balls are my secret weapon for busy days. I find them especially helpful when I’m running out the door and need something substantial to toss in my bag. They’re far more wholesome than anything you’ll find in a shiny wrapper at the store.
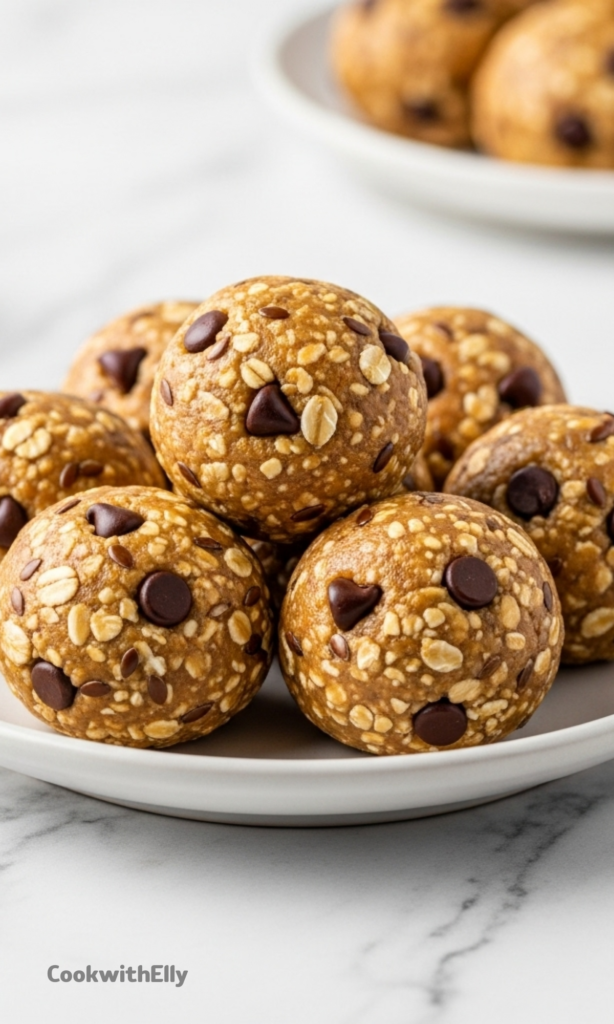
They have a fantastic, doughy texture from the oats and peanut butter. The mini chocolate chips, well, they’re my non-negotiable little treat. They make eating something good for you feel like a genuine delight. Honestly, they remind me of cookie dough, but one you can feel really good about eating.
Ingredients Needed for the Recipe
Here’s everything you’ll need, simple pantry staples that come together magically. I love recipes where you can almost visualize the bowl just by reading the list.
- Whole Rolled Oats: The hearty, chewy base that gives these balls their satisfying structure. They’re packed with fiber to keep you feeling full.
- Creamy Peanut Butter: This is the star, providing rich, nutty flavor and acting as the primary glue that holds everything together. Its natural oils make the mixture pliable.
- Ground Flaxseed: A powerhouse ingredient that helps bind the mixture while adding a boost of omega-3s and a subtle, nutty depth.
- Honey: Our natural sweetener that adds a floral sweetness. Its sticky quality is essential for helping the dough cling together in perfect little spheres.
- Protein Powder: This is where the name comes from, offering that extra satiating protein punch. It also slightly thickens the mixture.
- Vanilla Extract: A warm, aromatic note that makes the whole thing smell and taste like you’re making something special. It rounds out all the other flavors beautifully.
- Mini Chocolate Chips: The joyful element. Their tiny size ensures a bit of chocolate in every single bite, which, in my opinion, is absolutely mandatory.
Let’s Talk About Protein Powder
Choosing a protein powder can feel overwhelming. My advice is to use one you already enjoy the taste of on its own. A vanilla-flavored one works wonderfully here, complementing the other ingredients.
If you’re sensitive to strong flavors, an unflavored variety is a perfect, neutral choice. I often use an unflavored pea protein powder, and it blends right in. The goal is to enhance the snack, not overpower it with a chalky or artificial taste.
How to make No-Bake Protein Balls?

Step 1 – Combine Your Ingredients
Grab a large mixing bowl and add every single ingredient at once. Yes, all of them. The oats, peanut butter, ground flax, honey, protein powder, vanilla, and those precious mini chocolate chips. Now, arm yourself with a sturdy spoon or spatula.
Start to stir. You’ll notice the mixture is very thick, almost like a dense cookie dough. That’s exactly what you want. If it seems unusually dry or crumbly and won’t come together, add water just a teaspoon at a time. Go slowly, you can always add more.
Step 2 – Scoop and Roll the Balls
Once your mixture is uniformly combined, it’s time to shape them. I highly recommend using a cookie scoop if you have one—a 2-tablespoon size is ideal for consistent, snack-sized balls. It keeps your hands cleaner and makes the process speedy.
Scoop up a portion and press it firmly into the scoop. Release it into your clean hand and gently roll it into a smooth ball. Don’t worry if they’re not perfectly spherical, a little rustic charm is good. Place each finished ball on a plate or a small baking sheet.
Step 3 – Chill Until Firm
This is the crucial waiting period. Slide the plate of protein balls into the refrigerator. Let them chill, undisturbed, for at least an hour, or up to two.
This time allows the oats to soften slightly, the flax to absorb moisture, and the peanut butter to firm up. The result is a perfectly cohesive, firm bite that holds its shape beautifully when you pick it up.
The Joy of Customizing Your Batch
The basic recipe is fantastic, but it’s also a wonderful canvas for your own tastes. If peanut butter isn’t your thing, almond butter or cashew butter would be lovely. For a nut-free version, sunflower seed butter is a brilliant swap.
Not a chocolate person? Chopped dried cranberries or raisins add a lovely chewy sweetness. You could even roll the finished balls in shredded coconut or a dusting of cocoa powder for a different finish. Make them your own.
Tips
- For the easiest mixing, let your peanut butter come to room temperature if it was stored in the fridge. It will blend much more smoothly with the other ingredients.
- Wet your hands slightly with water before rolling if you find the mixture is sticking to your palms too much. This little trick creates a smooth barrier.
- Always do a taste test before you roll! This is your chance to adjust. Want it sweeter? A tiny extra drizzle of honey. More peanut flavor? Go for another spoonful.
How to Store Your Protein Balls
Once they’re firm, transfer your protein balls to an airtight container. They’ll live happily in the refrigerator for up to one week. I usually stash mine in a glass container with a lid, and they’re my first stop when I open the fridge.
They also freeze incredibly well. Place them in a single layer on a parchment-lined sheet to freeze solid, then transfer to a freezer bag. They’ll keep for about three months. You can pop one straight into your lunchbox in the morning—it’ll be thawed and ready by your snack time.
The Perfect Anytime Snack
I love these not just for afternoon slumps. They’re a great pre-workout nibble, a post-school treat for kids, or even a little something sweet after dinner. Their portability is unmatched. Tuck a couple in a small container for road trips, hikes, or long study sessions.
They’re a reliable friend in the fridge, a promise that a good, quick choice is always within reach. Making them feels like a small, kind act for your future self. And that’s a feeling worth savoring, one delicious, no-bake ball at a time.
No-Bake Protein Balls Recipe
Description
These no-bake protein balls are one of my favorite healthy snacks! Made with simple ingredients like peanut butter, oats, flaxseed, honey, protein powder, and mini chocolate chips, they're lightly sweet, nutty, and incredibly satisfying. Perfect for an afternoon energy boost or a post-workout bite, they require no baking and no food processor—just stir, roll, and chill!
ingredients
Instructions
-
In a large bowl, mix together the oats, peanut butter, flaxseed, honey, protein powder, vanilla extract, and mini chocolate chips. The mixture will be very thick.If too dry, add water 1 teaspoon at a time until it becomes moldable.
-
Use a 2-tablespoon cookie scoop to portion the mixture, then roll each portion into a smooth ball using your hands.
-
Place the balls in a single layer on a plate or baking sheet and chill in the refrigerator for 1 to 2 hours, or until firm.
-
Store in an airtight container in the refrigerator for up to 1 week or freeze for up to 3 months.
Nutrition Facts
Servings 12
Serving Size 1 ball
- Amount Per Serving
- Calories 189kcal
- % Daily Value *
- Total Fat 11g17%
- Saturated Fat 2g10%
- Sodium 85mg4%
- Potassium 230mg7%
- Total Carbohydrate 17g6%
- Dietary Fiber 3g12%
- Sugars 9g
- Protein 8g16%
- Calcium 40 mg
- Iron 1 mg
* Percent Daily Values are based on a 2,000 calorie diet. Your daily value may be higher or lower depending on your calorie needs.
Note
- Vegan option: Replace honey with pure maple syrup.
- Nut-free version: Use sunflower seed butter and ensure chocolate chips are nut-free.
- Storage tip: Keep them chilled—they soften quickly at room temperature.
- Customize it: Add dried fruit, coconut flakes, chia seeds, or spices like cinnamon for variety.
Frequently Asked Questions
Can I skip the protein powder?
Yes, but the texture and protein content will change. You can replace it with an extra ¼ cup of oats or ground nuts, though the mixture may be slightly less firm.
How many balls does this recipe make?
This recipe yields about 12 protein balls using a 2-tablespoon scoop. Each ball is considered one serving.
Can I use a different type of protein powder?
Absolutely! Vanilla, chocolate, or unflavored protein powders all work. Note that flavored powders may alter the taste slightly—chocolate powder adds a malty note, for example.
Do I need to refrigerate them?
Yes, refrigeration helps them firm up and stay fresh. They’ll keep for up to a week in the fridge or 3 months in the freezer.