 View Gallery
1 photo
View Gallery
1 photo
You know that feeling when you bite into a cookie and it’s just… everything? Let’s talk about that magic today.
We’re aiming for that perfect balance: a soft, chewy center giving way to a slightly crisp edge, all packed with pockets of chocolate.
Why This Recipe Just Works
There’s a simple joy in a cookie that delivers exactly what it promises, without any fuss.
This one-bowl wonder manages to be both spectacularly reliable and endlessly adaptable, which is probably why it never lasts long on the cooling rack.
Ingredients Needed for the Recipe
Gathering your ingredients first makes the whole process smooth, almost peaceful. Here’s what you’ll need, and a little note on why each one matters.
- Unsalted Butter (just barely softened): This gives you control over the saltiness and creates that essential rich, tender crumb. It should give slightly to a gentle press.
- Light Brown Sugar & Granulated Sugar: The brown sugar brings moistness and a warm, almost caramel-like depth, while the white sugar helps create those lovely crisp edges.
- Large Eggs & Vanilla Extract: Eggs bind everything together and add structure, and a good vanilla is the quiet background note that makes all the other flavors sing.
- All-Purpose Flour, Baking Soda, & Salt: The flour builds the cookie’s body, baking soda helps it rise and spread just right, and salt, well, it makes the sweet stuff taste sweeter.
- Semi-Sweet Chocolate Chips: They melt into pools of gooey chocolate, contrasting beautifully with the candy shells. Mini chips are a fun alternative for more distributed chocolate in every bite.
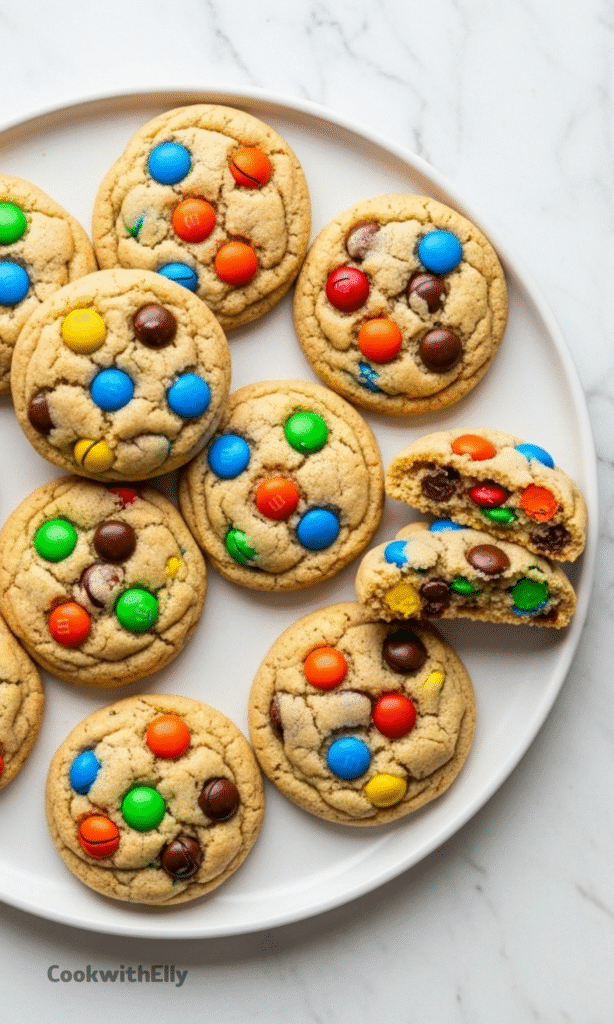
- Regular M&M’s Candies: They add vibrant color, a satisfying crunch, and that iconic candy-coated chocolate flavor. Always keep a few extra for pressing on top.
How to make ?
The process is straightforward, but a few mindful steps make all the difference between a good cookie and a great one. Let’s walk through it.
Step 1- Prep and Cream
Start by preheating your oven to 375°F and lining your baking sheets. This is a non-negotiable habit for even baking and easy cleanup.
In a large bowl, cream together the softened butter, brown sugar, and granulated sugar for about a minute. You’re not just mixing, you’re incorporating air, which is the first step towards a perfect texture.
Step 2- Combine Wet Ingredients
Add the eggs and vanilla extract to the butter mixture. Mix until everything is seamlessly combined, and the mixture looks pale and smooth.
You’ll notice the smell changing already, becoming richer and more inviting. That’s your signal to move on.
Step 3- Incorporate Dry Ingredients
Add the flour, baking soda, and salt all at once. Mix on a low speed, or stir by hand, just until the flour disappears. A few streaks are okay.
Overmixing here is the enemy of tenderness, so show a little restraint. The dough will be thick and glorious.
Step 4- Fold and Chill
This is the fun part. Gently fold in the chocolate chips and the cup of M&M’s. You want them evenly distributed without crushing the candies.
Now, cover the bowl and refrigerate the dough for at least 15 minutes. This chilling time re-solidifies the butter, preventing the cookies from spreading too thin in the oven. It’s a secret for thickness.
Step 5- Scoop and Top
Use a large cookie scoop (about 3 tablespoons) to portion the dough onto your prepared sheets. Give them about two inches of space to grow.
Press a few extra M&M’s onto the top of each dough ball. It makes them look professionally cheerful, and promises more candy in every bite.
Step 6- Bake and Cool
Bake for 7 to 10 minutes. The edges should be set and just barely turning golden, but the centers will still look soft. They’re done, I promise.
Let the cookies rest on the hot baking sheet for exactly two minutes. This allows them to finish setting up without overcooking. Then, transfer them to a cooling rack.
Perfecting Your Cookie Texture
Cookie preference is deeply personal, almost philosophical. Do you like them thin and crisp, or thick and doughy?
The beauty of this dough is that you can guide it. For thinner, crispier cookies, skip the chill and use a smaller scoop. For supremely thick, bakery-style cookies, chill the scooped dough balls for a full 24 hours. The patience pays off.
Tips
A few small tweaks can elevate your results from great to unforgettable. Keep these in mind.
- That chilling step isn’t a suggestion. Even 15 minutes in the fridge makes a world of difference in preventing flat, greasy cookies.
- Resist the urge to over-bake. Pull them out when they look *almost* underdone. They continue to cook from residual heat on the sheet.
- If your cookies spread more than you wanted, your butter was likely too soft. Next time, aim for cool-to-the-touch, not warm.
Fun Variations to Try
Once you’ve mastered the classic, the canvas is yours to play with. The basic dough is wonderfully forgiving.
Swap the M&M’s for seasonal colors for instant holiday cookies. Try peanut or crispy M&M’s for a different texture. You could even stir in a half cup of rolled oats for a heartier, breakfast-cookie vibe. The possibilities are genuinely endless.
Serving and Storing Your Creations
A warm cookie with a cold glass of milk is a timeless pairing, but don’t stop there. Crumble them over vanilla ice cream for an epic sundae.
To keep them soft, store cooled cookies in an airtight container at room temperature for up to 3 days. For longer storage, you can freeze the baked cookies or, even better, freeze the portioned dough balls. Bake straight from the freezer, adding a minute or two to the baking time, for a fresh cookie anytime.
BEST M&M Cookie Recipe
Description
The BEST M&M Cookies that are soft and chewy with crispy edges and packed full of chocolate chips and M&Ms. This recipe is a family favorite and so easy to make!
Ingredients
Instructions
-
Preheat the oven to 375°F (190°C). Line two baking sheets with silicone baking mats or parchment paper.
-
In a large bowl, using a mixer with the paddle attachment, cream together 1 cup softened butter, 1 cup brown sugar, and 3/4 cup granulated sugar for 1 minute until light and fluffy.
-
Add 2 large eggs and 2 teaspoons vanilla extract. Mix until just combined.
-
Add 3 cups all-purpose flour, 1 teaspoon baking soda, and 1 teaspoon salt. Stir just until combined.
-
Fold in 1 cup chocolate chips and 1 cup M&M’s until evenly distributed.
-
Refrigerate the dough for 15 to 60 minutes (or up to 24 hours) to prevent excessive spreading while baking.
-
Using a large cookie scoop (about 3 tablespoons), portion dough onto prepared baking sheets, spacing about 2 inches apart. Press a few extra M&M’s onto the tops of each dough ball if desired.
-
Bake for 7–10 minutes, or until the edges are barely golden brown. The centers should still look slightly underdone.
-
Allow cookies to rest on the baking sheet for 2 minutes before transferring to a wire rack to cool completely.
Nutrition Facts
Servings 24
Serving Size 1 cookie
- Amount Per Serving
- Calories 180kcal
- % Daily Value *
- Total Fat 9g14%
- Saturated Fat 5g25%
- Cholesterol 30mg10%
- Sodium 180mg8%
- Potassium 100mg3%
- Total Carbohydrate 24g8%
- Dietary Fiber 1g4%
- Sugars 15g
- Protein 2g4%
- Calcium 20 mg
- Iron 1 mg
* Percent Daily Values are based on a 2,000 calorie diet. Your daily value may be higher or lower depending on your calorie needs.
Note
- Chill the dough: For thicker, chewier cookies, refrigerate the dough for at least 15 minutes or up to 24 hours.
- Don’t overbake: Remove cookies from the oven just before they look fully done—they’ll continue to cook on the hot baking sheet.
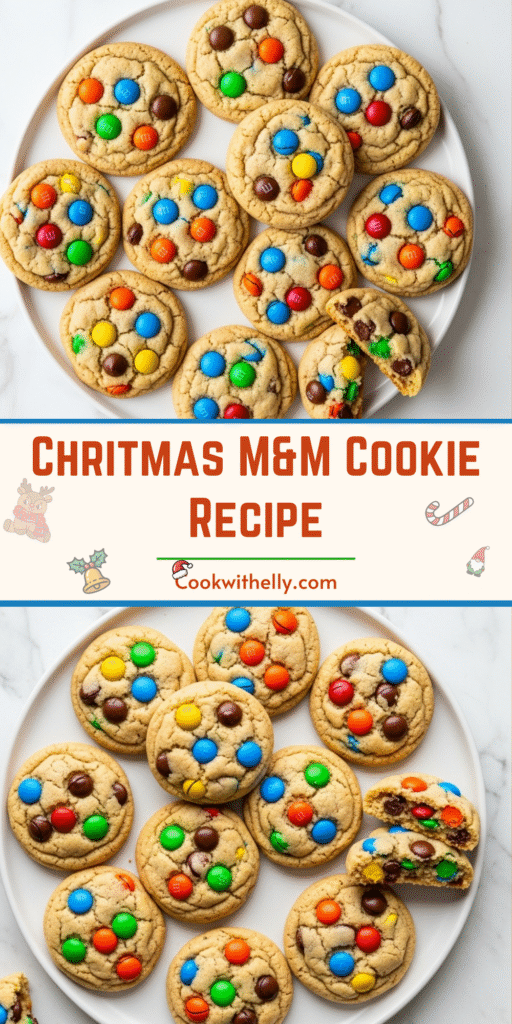
- Make it festive: Use holiday-colored M&Ms for Christmas, Valentine’s Day, or 4th of July.
- Storage: Store in an airtight container at room temperature for up to 3 days or freeze for longer storage.
Frequently Asked Questions
Can I make these cookies ahead of time?
Yes! You can chill the dough up to 24 hours before baking. Baked cookies can be stored in an airtight container for up to 3 days or frozen for up to 3 months.
Can I use other types of M&Ms?
Absolutely! Peanut M&Ms, holiday colors, or even mini M&Ms work great. Just keep the total amount around 1 cup.