
Every year when the weather turns cold and the kitchen starts smelling like sugar and butter, I get the urge to make something festive. Not fancy. Not complicated. Just something cheerful that makes people smile the second they see it.
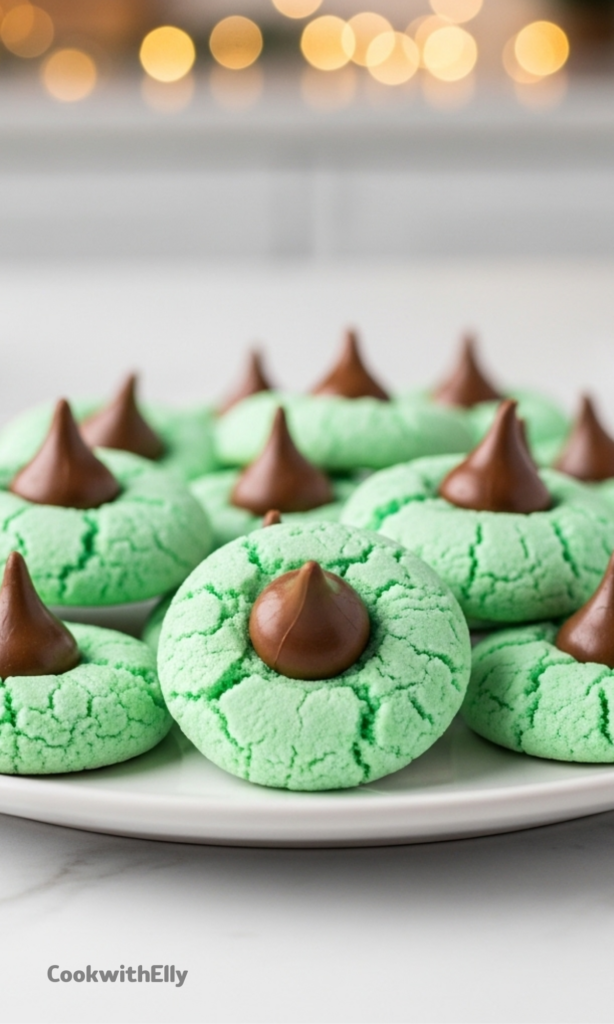
That is exactly what these Mint Chocolate Kiss Blossom Cookies do. They are bright, soft, a little nostalgic, and honestly one of the most satisfying cookies I make all season.
I went through a few trial runs before landing on this version. One batch was too dry, another spread way too much, and one tasted more like toothpaste than dessert. But once I got the balance right, I knew these were keepers.
Now they come out puffy, tender, and perfectly minty every single time. The chocolate kiss on top seals the deal, both in looks and flavor.
Why These Cookies Work So Well
What makes these different from other holiday cookies is the texture. They are soft but not cakey, rich but not heavy, and they almost melt when you bite into them.
The powdered sugar gives them a delicate crumb that feels somewhere between a shortbread and a classic sugar cookie. It is subtle, but it completely changes how the cookie feels.
And then there is the mint. Not overpowering, not artificial tasting, just enough to make the chocolate pop without taking over.
Ingredients Needed for the Recipe
- Butter (room temperature) – Provides richness, structure, and that unmistakable real-butter flavor that makes the cookies tender.
- Powdered Sugar – Creates a softer, melt-in-your-mouth texture instead of a traditional crisp cookie.
- Whole Egg – Adds moisture and helps bind the dough together.
- Egg Yolk – Gives extra richness and keeps the cookies soft instead of dry.
- Peppermint Extract – Brings the signature mint flavor, so a little goes a long way.
- Green Food Coloring – Adds that fun holiday color, completely optional but visually festive.
- All-Purpose Flour – Forms the base of the dough and provides structure.
- Baking Powder – Helps the cookies puff slightly so they stay soft rather than dense.
- Kosher Salt – Balances the sweetness and enhances the chocolate and mint flavors.
- Chocolate Kisses – The classic topping that adds a creamy chocolate center to each cookie.
A Quick Note About Using Real Butter
I always use real butter for these cookies, and I do not recommend swapping it out. Butter is simply cream, and that simplicity shows up in both flavor and texture.
Some substitutes contain more water and less fat, which can change how the dough behaves. That is when cookies spread too much or lose that soft bite.
Also, nothing tastes like real butter. When you are making something this simple, every ingredient matters.
How to make Mint Chocolate Kiss Blossom Cookies?
Step 1 – Preheat and Prepare the Baking Sheet
Preheat your oven to 350 degrees. Line a baking sheet with parchment paper or a silicone mat so nothing sticks.
This small step makes cleanup easier and helps the cookies bake evenly on the bottom.
Step 2 – Cream the Butter and Sugar
In a mixing bowl, beat the butter and powdered sugar together until light and fluffy. Do not rush this part because it builds the base texture.
The mixture should look pale and smooth, not dense or grainy.
Step 3 – Add the Eggs and Flavoring
Mix in the whole egg, egg yolk, and peppermint extract until fully combined. This is when the dough starts to smell amazing.
Add the food coloring a few drops at a time, mixing until you reach the shade you like.
Step 4 – Combine the Dry Ingredients
Add the flour, baking powder, and salt to the bowl. Mix just until everything comes together into a soft dough.
Overmixing can make cookies tough, so stop once you no longer see dry flour.
Step 5 – Roll the Dough into Balls
Scoop small portions and roll them into one-inch balls using your hands. Place them on the prepared baking sheet with a little space between each one.
If you want a little sparkle, you can roll the dough balls in granulated sugar before baking.
Step 6 – Bake Just Until Set
Bake the cookies for 7 to 9 minutes. I usually pull mine at about 8 minutes when they are set but still soft.
Avoid overbaking or they will lose that tender texture that makes them special.
Step 7 – Add the Chocolate Kiss
Let the cookies sit on the baking sheet for about 2 minutes after removing them from the oven. Then gently press a chocolate kiss into the center of each one.
The chocolate will soften slightly but will hold its shape as the cookies cool.
Step 8 – Cool Completely
Transfer the cookies to a wire rack and let them cool completely. This allows the structure to set and keeps them from becoming crumbly.
Once cooled, they are ready to serve or store.
Tips
- Start with a small amount of peppermint extract and adjust to taste since mint can quickly become overpowering.
- Add food coloring gradually because it is much easier to deepen the color than fix it.
- Do not overbake or the cookies will turn dry instead of soft.
- Wait a minute or two before adding the chocolate kiss so it does not melt completely.
- If the dough feels too warm while rolling, chill it briefly to help the cookies hold their shape.
- Use room temperature butter so it creams properly with the sugar.
- For even cookies, try using a small cookie scoop instead of guessing sizes.
- Let the cookies cool fully before storing so condensation does not make them soggy.
Fun Variations to Try
Once you make these a few times, it is easy to play around with small changes. The base dough is forgiving and works well with little twists.
You can swap the classic chocolate kiss for a dark chocolate version if you prefer less sweetness. That contrast with the mint is really nice.
Sometimes I skip the green coloring for a more natural look, especially if I am making them outside the holidays. They taste exactly the same, just without the festive color.
You can also roll them in sanding sugar for a little crunch on the outside. It adds texture without changing the softness inside.
How to Store and Serve Them
These cookies store beautifully, which makes them great for baking ahead. Just keep them in an airtight container at room temperature.
They stay soft for several days, and the flavor actually deepens a bit after the first day.
If you are stacking them, place a sheet of parchment between layers so the chocolate tops stay pretty. It is a small detail that makes a difference when sharing them.
Serve them with a cold glass of milk or even hot cocoa if it is chilly outside. There is something about mint and chocolate that feels extra cozy in the winter.
Whether you are making them for a gathering, a cookie exchange, or just because you want something sweet in the kitchen, these Mint Chocolate Kiss Blossom Cookies always deliver. They are simple, cheerful, and just a little bit nostalgic, which is exactly what a holiday cookie should be.
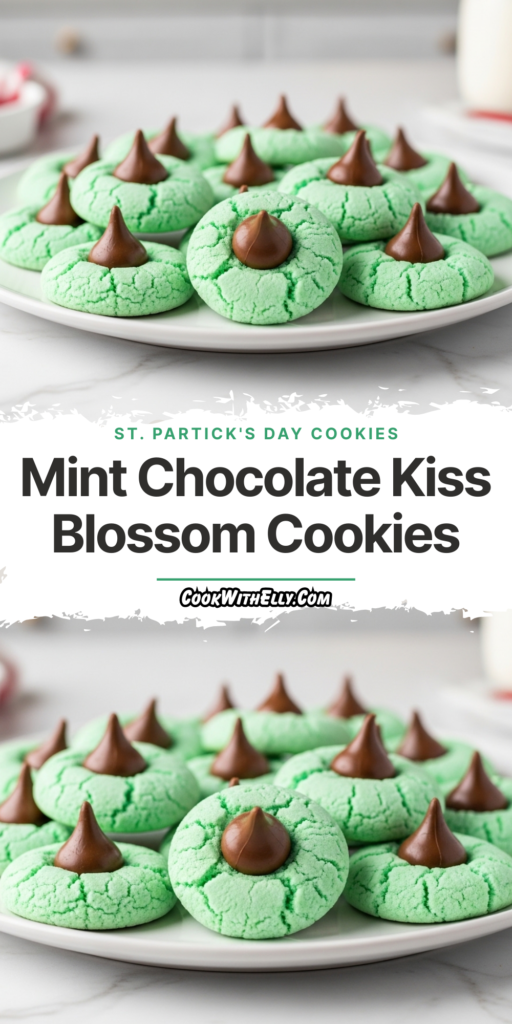
Mint Chocolate Kiss Blossom Cookies Recipe
Description
Mint Chocolate Kiss Blossom Cookies are not only the cutest Christmas cookies around, they're out of this world delicious! These melt-in-your-mouth mint cookies are topped with a big chocolate kiss, making them perfect for holiday cookie trays, gift-giving, or enjoying with a glass of cold milk. Anyone that loves mint and chocolate is going to fall in love with these festive treats!
ingredients
Instructions
-
Pre-heat oven to 350°F (175°C). Line a baking sheet with parchment paper, a silpat, or spray with nonstick baking spray.
-
Cream butter and powdered sugar together until light and fluffy, about 2-3 minutes with a hand mixer or stand mixer.
-
Add egg, egg yolk, peppermint extract, and green food coloring. Start with 6 drops of food coloring, mix until smooth. Gradually add more food coloring until desired green shade is reached.
-
Add flour, baking powder, and salt. Mix on low speed just until combined and no flour streaks remain.
-
Roll cookie dough into 1-inch balls. Place on prepared cookie sheet about 2 inches apart.Optional: Roll dough balls in granulated sugar for extra sparkle and texture.
-
Bake for 7-9 minutes (8 minutes is perfect). Be sure not to overbake or cookies will be dry. Edges should be just set and bottoms lightly golden.
-
Remove cookies from oven. Let sit on cookie sheet for about 2 minutes. Gently press one chocolate kiss into the top of each cookie.Adding kisses too soon will melt them; waiting too long may cause cookies to crack.
-
Move cookies to a wire rack to finish cooling completely. Store cooled cookies in an airtight container at room temperature.
Nutrition Facts
Servings 24
Serving Size 1 cookie
- Amount Per Serving
- Calories 124kcal
- % Daily Value *
- Total Fat 6.2gg10%
- Saturated Fat 3.7gg19%
- Trans Fat 0.2gg
- Cholesterol 28mgmg10%
- Sodium 61mgmg3%
- Potassium 30mgmg1%
- Total Carbohydrate 15.5gg6%
- Dietary Fiber 0.4gg2%
- Sugars 7gg
- Protein 1.8gg4%
- Calcium 12mg mg
- Iron 0.5mg mg
* Percent Daily Values are based on a 2,000 calorie diet. Your daily value may be higher or lower depending on your calorie needs.
Note
- Butter matters: Use real butter (not margarine) for best flavor and texture. Butter's fat content creates that melt-in-your-mouth shortbread-like quality.
- Food coloring tip: Start with just a few drops of green food coloring and add more gradually. It's easy to add more, but hard to remove! Omit entirely if preferred—cookies will taste the same.
- Don't overbake: These cookies are perfect when edges are just set. Overbaking leads to dry, crumbly cookies. Set a timer for 7 minutes and check!
- Timing the kiss: Wait 1-2 minutes after removing from oven before pressing in chocolate kisses. Too soon = melted mess; too late = cracked cookies.
- Make ahead: Dough balls can be frozen unbaked. Bake from frozen, adding 1-2 minutes to bake time. Fully baked cookies freeze well for up to 1 month.
Frequently Asked Questions
Can I omit the green food coloring?
Absolutely! The food coloring is purely decorative. Your cookies will taste exactly the same—deliciously minty—just without the festive green hue. Perfect if you prefer to avoid food dyes.
Why did my cookies spread too flat or crack?
Flat cookies often result from butter that's too warm or over-creaming. Cracks can happen if kisses are pressed in after cookies have cooled too much. Keep butter just room-temperature, don't overmix, and add kisses while cookies are still slightly warm (after 1-2 minutes resting on the sheet).
Can I use peppermint extract instead of mint extract?
Yes! Peppermint extract is actually preferred for that classic candy-cane mint flavor. Start with 1 teaspoon and taste the dough—if you prefer a subtler mint, reduce to ¾ teaspoon. Spearmint extract works too but has a milder, sweeter profile.
How do I store these cookies?
Store completely cooled cookies in an airtight container at room temperature for up to 5 days. For longer storage, freeze in a single layer then transfer to a freezer bag for up to 1 month. Thaw at room temperature before serving.