
I’ll be honest, I wasn’t always a cheesecake person. Something about the heavy texture used to put me off a bit, and I’d usually pass it up for something lighter. But once I started tweaking recipes in my own kitchen, things changed fast.
I ended up making a version that felt softer, creamier, and just… easier to eat. Less dense, more fresh. That’s where this Mini Egg Cheesecake really comes in. It’s everything I wanted cheesecake to be, but without the fuss or the oven.
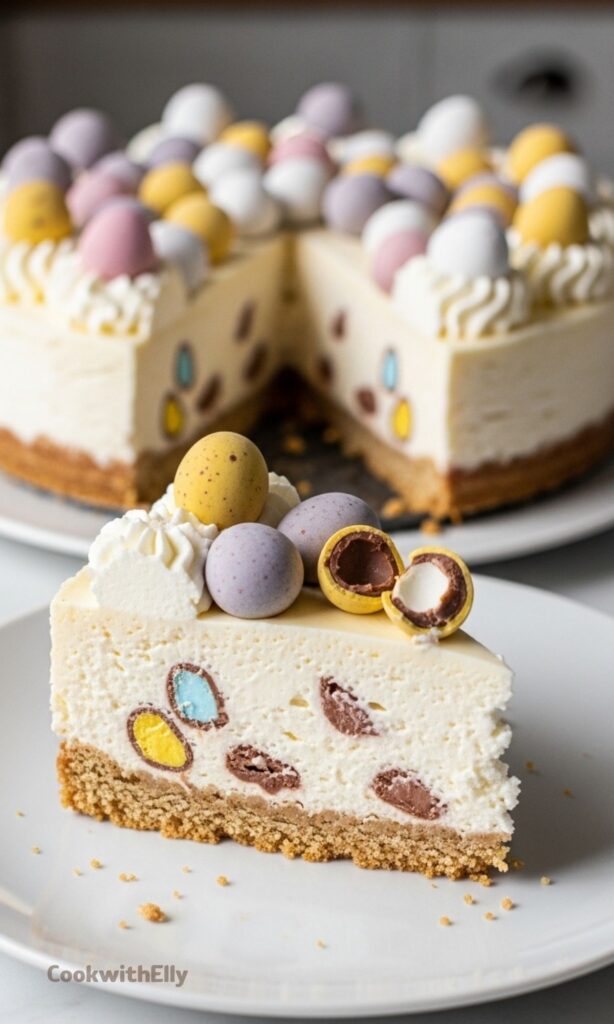
This one has quickly become my go-to Easter dessert. It’s packed with crunchy chocolate eggs, has that buttery biscuit base, and the filling is smooth but not too rich. It feels special, but it’s honestly so simple to pull together.
And I love that I can make it ahead. No last-minute stress, just a chilled, ready-to-serve dessert sitting in the fridge waiting to impress people. That’s my kind of baking.
Ingredients Needed for the Recipe
- Digestive biscuits – These form the base and give that crumbly, slightly sweet crunch. You can swap with graham crackers if needed.
- Unsalted butter – Melted and mixed with the biscuits to hold the base together and add richness.
- Cadbury’s Mini Eggs – The star of the recipe, used inside the filling and on top for decoration, adding crunch and chocolate flavor.
- Double cream – Whipped to create that light, airy texture in the cheesecake filling.
- Cream cheese – Full-fat works best, giving the cheesecake its creamy body and slight tang.
- Icing sugar – Sweetens the filling and keeps it smooth when sifted properly.
- Lemon juice – Just a little, to balance the sweetness and lift the overall flavor.
Why This Cheesecake Works So Well
There’s something about a no-bake cheesecake that just makes life easier. No worrying about cracks, no oven timing, no water baths. You mix, chill, and that’s pretty much it.
But beyond that, this version feels balanced. The cream lightens the filling, the lemon cuts through the sweetness, and those Mini Eggs add texture in every bite. It’s not just soft all the way through, which I really appreciate.
I also like how adaptable it is. Once you get the base method down, you can tweak flavors, swap toppings, or change the biscuits. It’s a solid recipe that doesn’t fall apart if you make small changes.
How to make Mini Egg Cheesecake?
Step 1 – Prepare the Biscuit Base
Start by crushing your digestive biscuits until they resemble coarse sand. I usually toss them into a food processor because it’s quicker, but a rolling pin works just fine too.
Mix the crumbs with melted butter until everything is coated. Press this mixture firmly into your tin, making sure it’s even. Pop it into the fridge so it can firm up while you work on the filling.
Step 2 – Chop the Mini Eggs
Take your Mini Eggs and chop them in half. Some might crumble a bit, and that’s okay. You actually want a mix of chunks and smaller pieces for texture.
Set them aside, but try not to snack on too many. I always end up eating a few, every single time.
Step 3 – Whip the Cream
Pour your double cream straight from the fridge into a bowl and start whipping. You’re aiming for soft peaks that hold their shape but still look smooth.
Don’t overdo it here. If it gets too stiff, the cheesecake will feel heavy instead of light. I usually stop as soon as it starts to thicken nicely.
Step 4 – Mix the Filling
In another bowl, combine the cream cheese, sifted icing sugar, and lemon juice. Mix until smooth before folding in the whipped cream gently.
Add the chopped Mini Eggs last, folding them through so they’re evenly distributed. The mixture should look creamy, thick, and just a bit fluffy.
Step 5 – Assemble the Cheesecake
Take your chilled base out of the fridge and spoon the filling on top. Spread it out evenly, smoothing the surface with the back of a spoon.
Try not to press too hard. You want it level, not compacted. A slightly soft touch works best here.
Step 6 – Chill Until Set
Place the cheesecake back into the fridge and let it chill for at least 3 hours. Overnight is even better if you have the time.
This step really matters. It allows everything to firm up properly so you get clean slices later on.
Step 7 – Decorate and Serve
Once it’s set, carefully remove the cheesecake from the tin. Run a warm knife around the edge if needed to loosen it.
Top with a bit of whipped cream and pile on more Mini Eggs. I like to chop some and leave some whole for that mix of textures.
Serving Ideas
I usually serve this straight from the fridge, slightly chilled but not too cold. That’s when the texture feels just right, soft but still holding its shape.
If you want to dress it up a bit, you can add a drizzle of melted chocolate on top. It makes it look a little more polished, especially if you’re serving guests.
Sometimes I’ll even add a few extra chocolate bits or crushed biscuits over the top for extra crunch. It’s not necessary, but it does add something fun.
Tips
- Whip the cream just until soft peaks form – overwhipping will make the filling dense.
- Always use full-fat cream cheese for the best texture and stability.
- Sift the icing sugar to avoid lumps in the filling.
- Chill the base before adding the filling so it doesn’t crumble when sliced.
- Use a springform or removable base tin to make releasing the cheesecake easier.
- Run a warm knife around the edge before removing from the tin for clean sides.
- If the cheesecake feels too soft, chill it longer or place it in the freezer briefly.
- Don’t skip the lemon juice – it balances the sweetness perfectly.
- Decorate just before serving for the freshest look.
Storage and Make-Ahead Advice
This cheesecake is perfect if you like planning ahead. I usually make it the night before and let it chill overnight, which honestly gives the best texture.
You can keep it in the fridge for up to three days. Just make sure it’s covered well so it doesn’t dry out or pick up other flavors.
If you want to make it even earlier, you can freeze it without the topping. Let it thaw slowly in the fridge before decorating, and it’ll still taste great.
Small Variations You Can Try
If you feel like switching things up a little, there’s plenty you can do without changing the whole recipe. That’s part of why I love this one so much.
You can swap the biscuits for chocolate ones if you want a richer base. It changes the flavor quite a bit, but in a really good way.
Or try mixing in white chocolate chunks along with the Mini Eggs. It adds another layer of sweetness and makes it feel a bit more indulgent.
Even the topping can be playful. Crushed Mini Eggs, chocolate drizzle, or just a simple swirl of cream. I don’t think there’s a wrong way to finish it.
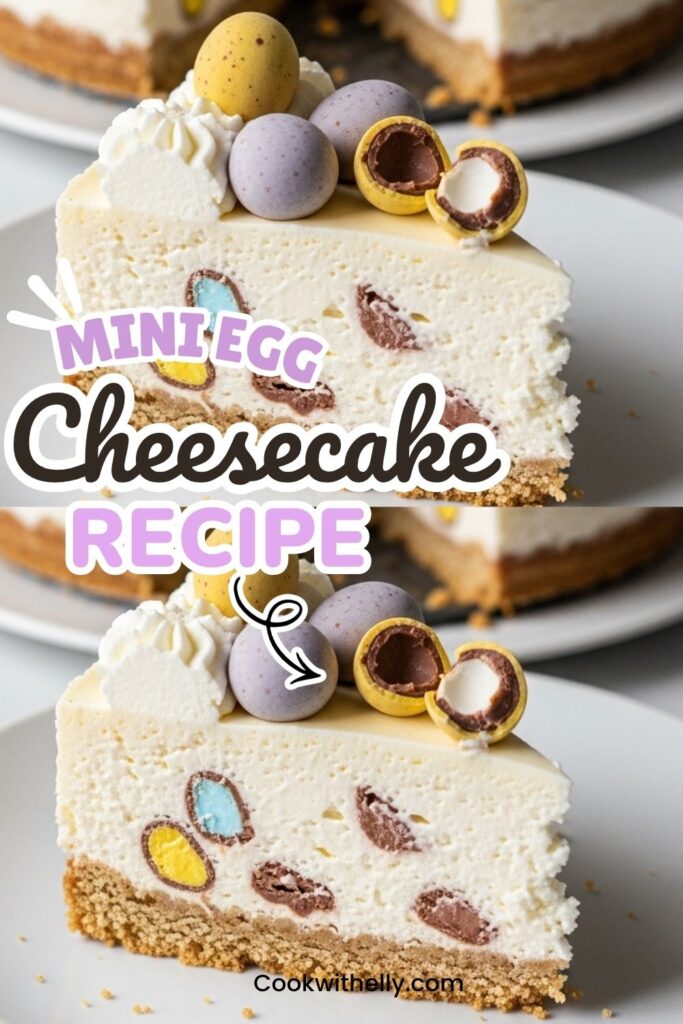
Mini Egg Cheesecake Recipe
Description
This no-bake Mini Egg Cheesecake is the ultimate Easter showstopper! Packed with crunchy Cadbury's Mini Eggs, it features a buttery digestive biscuit base and a light, creamy filling that sets perfectly in the fridge. With no oven required, it's an easy make-ahead dessert that's lighter and fresher than traditional baked cheesecakes, perfect for spring celebrations and family gatherings.
ingredients
For the Base
For the Filling
For Decoration
Instructions
-
Prepare the Base
Crush the digestive biscuits until they resemble lumpy sand (a food processor works best). Mix thoroughly with the melted butter. Press the mixture firmly into the bottom of a 7-inch springform or removable base tin. Place in the fridge to chill while you make the filling.Chilling the base helps it set and prevents crumbling. -
Prep the Mini Eggs
Chop the 360g of Mini Eggs in half. Set aside. -
Whip the Cream
Using an electric whisk, whip the cold double cream until it forms soft, floppy peaks (similar to the texture of ice cream). Be careful not to over-whip. Remove approximately 3 dessert spoons of the whipped cream and place in a small bowl in the fridge for decoration later.Cream straight from the fridge whips best. If too runny, the cheesecake will be sloppy; if too stiff, it will be dense. -
Make the Filling
In a large bowl, combine the remaining whipped cream, sifted icing sugar, full-fat cream cheese, lemon juice, and the chopped Mini Eggs. Gently fold everything together until fully combined and smooth.Sifting the sugar ensures a smooth texture. -
Assemble
Remove the base from the fridge. Spoon the cheesecake mixture on top and smooth it out with the back of a spoon or a palette knife. -
Chill
Place the cheesecake in the fridge for a minimum of 4 hours, but ideally overnight, to allow it to set completely.Overnight chilling yields the best slicing results. -
Release and Decorate
Run a warm knife around the edge of the tin to loosen the cheesecake. If using a removable base, sit the tin on a tall glass and press down gently to release the sides. Top with the reserved whipped cream and pile on the remaining whole and halved Mini Eggs.Warm the knife under hot water and dry it before running it around the edge.
Nutrition Facts
Servings 12
Serving Size 1 slice
- Amount Per Serving
- Calories 685kcal
- % Daily Value *
- Total Fat 50gg77%
- Saturated Fat 31gg155%
- Trans Fat 0.5gg
- Cholesterol 135mgmg45%
- Sodium 320mgmg14%
- Potassium 180mgmg6%
- Total Carbohydrate 58gg20%
- Dietary Fiber 1gg4%
- Sugars 42gg
- Protein 6gg12%
- Calcium 110mg mg
- Iron 1.2mg mg
* Percent Daily Values are based on a 2,000 calorie diet. Your daily value may be higher or lower depending on your calorie needs.
Note
- Cream Consistency: The key to a perfect no-bake cheesecake is whipping the cream to soft peaks. It should hold its shape but still be light. If it's too stiff, the cheesecake becomes dense; too runny, and it won't set.
- Gluten-Free Option: Simply swap standard digestive biscuits for gluten-free ones. Always check labels on Mini Eggs and other ingredients to ensure they are GF certified.
- Making Ahead: This cheesecake can be made up to 3 days in advance. Store it in the tin, covered with cling film (ensure the film doesn't touch the surface) or a plate. It can also be frozen (undecorated) for up to 1 month; defrost in the fridge for 24 hours before decorating.
- Removing from Tin: Use a springform tin or a tin with a removable base for easiest removal. Warm a knife under hot water to slice cleanly through the chilled filling if serving directly from the tin.
Frequently Asked Questions
Does this cheesecake taste like cheese?
No! While it uses cream cheese for structure and creaminess, the flavor is dominated by the sweet cream, vanilla notes, and the chocolatey crunch of the Mini Eggs. The lemon juice adds a subtle freshness that balances the sweetness.
My cheesecake mixture seems too runny, what should I do?
This usually happens if the cream wasn't whipped enough. Don't panic! You can pop the assembled cheesecake into the freezer for 1-2 hours to help it firm up before serving. Next time, ensure your cream is very cold and whip it until it just holds soft peaks.
Can I use a different type of chocolate egg?
Absolutely. While Cadbury's Mini Eggs are traditional for this recipe, you can use any similar crunchy chocolate candy eggs available in your region. Just ensure they are chopped to a similar size for even distribution.
How do I get clean slices?
Dip your knife in hot water and wipe it dry between each cut. This melts through the cold cream cheese and chocolate slightly, giving you perfect, clean slices every time.