
There is something about bright lemon desserts that instantly lifts the mood. These Lemon Crumb Bars are the kind of treat I reach for when I want something fresh, buttery, and just sweet enough without feeling heavy. They strike that perfect balance between cozy and vibrant.
The first time I made them, I was surprised by how different they felt from classic lemon bars. Instead of a shortbread base, you get soft, crumbly oatmeal layers that sandwich a creamy lemon filling. It is comforting, a little rustic, and completely irresistible.
I love desserts that feel simple but taste like you put in far more effort than you actually did. These bars do exactly that. Each bite has texture, brightness, and just enough richness to make you go back for another square.
If you already enjoy lemon desserts, this recipe will quickly become one you make on repeat. It is easy to assemble, forgiving, and always gets compliments. Always.
What Makes These Bars So Special
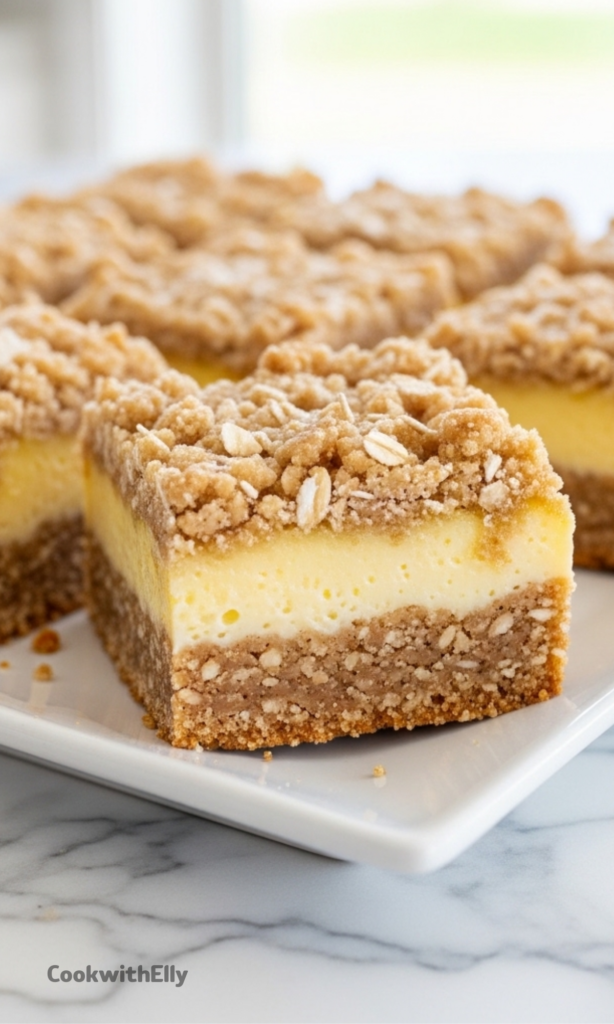
Unlike traditional lemon bars that lean silky and sharp, these have layers that add personality. The oat crust and crumble topping bring a slightly chewy texture that pairs beautifully with the smooth filling. You get contrast in every bite.
Another thing I adore is how the lemon flavor settles into the oats as the bars rest. It is not just a topping and a base. Everything blends together into one cohesive dessert that tastes even better after chilling.
They are the kind of bars you can serve casually with tea or dress up for guests. No fuss, no complicated decorating, just honest flavor and texture doing all the work.
Ingredients Needed for the Recipe
- Quick-cooking oats – These create the soft, crumbly structure of both the crust and topping while baking evenly.
- All-purpose flour – Gives the layers stability so the bars hold together when sliced.
- Light brown sugar – Adds sweetness and a slight caramel note that complements the tart lemon.
- Baking soda – Helps the crust stay tender instead of dense.
- Baking powder – Provides a gentle lift to keep the texture light.
- Unsalted butter, melted – Binds the crumb mixture and creates that rich, buttery flavor.
- Sweetened condensed milk – Forms the creamy base of the lemon filling and adds smooth sweetness.
- Freshly squeezed lemon juice – Brings the bright, natural citrus flavor that defines the bars.
- Egg yolks – Thicken the filling and give it a luscious consistency.
- Lemon zest – Intensifies the citrus aroma and adds freshness to every bite.
- Kosher salt – Balances the sweetness and sharpens the lemon flavor.
How to make Lemon Crumb Bars?
Step 1 – Prepare the Pan and Oven
Start by preheating your oven to 350°F. Line a 9×9-inch baking pan with parchment paper, leaving a little overhang so you can lift the bars out easily later.
This small step saves so much effort when it comes time to slice. Trust me, you do not want to wrestle these out of the pan once they are chilled.
Step 2 – Mix the Dry Ingredients
In a large bowl, combine the quick oats, flour, brown sugar, baking soda, and baking powder. Stir until everything looks evenly distributed.
You want the mixture to look uniform, with no clumps of sugar hiding inside. This ensures the crust bakes evenly and tastes balanced.
Step 3 – Add the Melted Butter
Pour the melted butter over the oat mixture and stir gently until it forms a crumbly texture. The goal is moist crumbs, not a paste.
Avoid overmixing here. Keeping the mixture loose is what gives the topping that irresistible crumble instead of turning it dense.
Step 4 – Reserve the Crumble Topping
Measure out about half of the mixture and set it aside. This will become the golden, slightly crisp topping later.
It may feel unusual to split it now, but this is what creates those distinct layers that make the bars so satisfying.
Step 5 – Form and Bake the Base
Press the remaining mixture firmly into the bottom of the lined pan. Use your hands or the back of a spoon to create an even layer.
Bake for 12 to 15 minutes, just until it turns lightly golden. Let it cool slightly while you prepare the filling.
Step 6 – Prepare the Lemon Filling
In a clean bowl, whisk together the sweetened condensed milk, freshly squeezed lemon juice, egg yolks, lemon zest, and salt. Mix until smooth and creamy.
The filling should look glossy and thick, with a bright citrus scent that already hints at how good these will taste.
Step 7 – Assemble the Layers
Pour the lemon filling over the warm crust and spread it evenly. Make sure it reaches all the corners so every slice has that luscious center.
Sprinkle the reserved crumb mixture over the top, letting it fall naturally. Do not press it down.
Step 8 – Bake Until Golden
Return the pan to the oven and bake for 20 to 25 minutes, until the edges are golden brown and the top looks lightly toasted.
Your kitchen will smell buttery and citrusy at the same time. That is how you know you are on the right track.
Step 9 – Cool and Chill
Allow the bars to cool to room temperature before transferring them to the refrigerator. Chill for at least one hour to set completely.
This step matters more than you think. The texture firms up, the flavors settle, and slicing becomes clean and easy.
Tips
- Use freshly squeezed lemon juice whenever possible for the brightest, most natural flavor.
- Do not substitute evaporated milk for sweetened condensed milk, as it will not thicken properly.
- Measure the flour correctly by spooning it into the cup to avoid a dry crust.
- Let the crust cool slightly before adding the filling so the layers stay distinct.
- For neat slices, chill the bars thoroughly and use a sharp knife wiped clean between cuts.
- A light hand when sprinkling the topping keeps the crumble texture delicate.
- If you enjoy a stronger citrus note, add a little extra zest without increasing the juice.
- Parchment paper makes lifting and slicing much easier, so do not skip lining the pan.
Serving Ideas
These bars are wonderful straight from the fridge, where the filling is cool and creamy. I often serve them slightly chilled because the lemon flavor tastes sharper and more refreshing that way.
They also pair beautifully with a warm drink. Coffee balances the sweetness, while tea highlights the citrus notes. It is a simple combination that feels thoughtful without trying too hard.
For gatherings, I like cutting them into smaller squares and arranging them on a platter. Their crumbly tops give them a homemade look that always draws people in.
You can even dust them lightly with powdered sugar if you want a softer presentation. Not necessary, but it adds a gentle finish.
Storing and Freezing
Once cooled, store the bars in an airtight container at room temperature for up to two days. They stay tender, and the crumble remains pleasantly soft.
If you prefer a firmer texture, keep them in the refrigerator. They will last up to five days and taste even more developed as the flavors meld together.
These bars also freeze surprisingly well. Wrap them tightly and store for up to three months, then thaw in the refrigerator before serving.
Having a batch tucked away in the freezer feels like a small gift to your future self. Especially on days when you want dessert without starting from scratch.
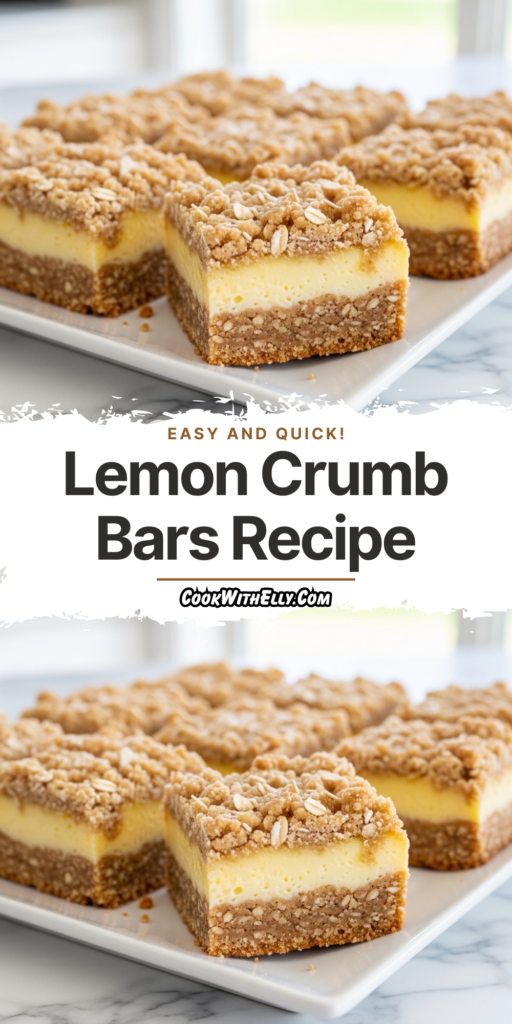
Lemon Crumb Bars Recipe
Description
These Lemon Crumb Bars are dessert bars filled with bright, tangy lemon filling nestled between two layers of buttery oatmeal crust. They're one of the BEST lemon desserts you'll ever try! With a fantastic fusion of texture and flavor, these bars feature a crisp oat base, creamy lemon center, and crumbly topping that melts in your mouth. Perfect for spring gatherings, summer picnics, or anytime you need a citrusy treat.
ingredients
Oat Crust
Lemon Filling
Instructions
-
Preheat & Prep
Preheat oven to 350°F (175°C) and line a 9×9-inch baking pan with parchment paper, leaving an overhang on two sides for easy removal. Set aside. -
Make Oat Crust Mixture
In a large bowl, combine quick-cooking oats, all-purpose flour, light brown sugar, baking powder, and baking soda. Pour melted butter over the mixture and stir until crumbly and well combined, being careful not to overmix.Mixture should resemble wet sand and hold together when pressed. -
Reserve Topping
Measure out approximately half of the oat mixture (about 2 cups) and set aside in a separate bowl to use as the crumb topping. -
Press Base Layer
Pour the remaining half of the oat mixture into the prepared baking pan. Press firmly and evenly into the bottom of the pan using the bottom of a measuring cup or your fingers.Pack tightly to prevent crumbling after baking. -
Par-bake Crust
Bake the crust for 12-15 minutes, or until the edges are lightly golden brown. Remove from oven and set aside to cool slightly while you prepare the lemon filling.Do not turn off the oven. -
Prepare Lemon Filling
In a large bowl, whisk together sweetened condensed milk, freshly squeezed lemon juice, egg yolks, lemon zest, and kosher salt until smooth, creamy, and well combined.Use freshly squeezed lemon juice for best flavor—bottled juice may taste artificial. -
Assemble Bars
Pour the lemon filling evenly over the slightly cooled par-baked oat crust. Then, evenly crumble the reserved oat mixture over the top of the lemon layer.Don't press the topping down—leave it loose for a crumbly texture. -
Final Bake
Return the pan to the oven and bake for 20-25 minutes, or until the edges are golden brown and the center is set with a slight jiggle.Avoid overbaking to keep the filling creamy. -
Cool & Chill
Let the bars cool completely to room temperature in the pan on a wire rack. Then, refrigerate for at least 1 hour before slicing and serving.Chilling helps the bars set cleanly for neat squares.
Nutrition Facts
Servings 9
Serving Size 1 bar (9 servings total)
- Amount Per Serving
- Calories 473kcal
- % Daily Value *
- Total Fat 20gg31%
- Saturated Fat 12gg60%
- Trans Fat 0gg
- Cholesterol 50mgmg17%
- Sodium 45mgmg2%
- Potassium 120mgmg4%
- Total Carbohydrate 66gg22%
- Dietary Fiber 1.5gg6%
- Sugars 47gg
- Protein 7gg15%
- Calcium 100mg mg
- Iron 1mg mg
* Percent Daily Values are based on a 2,000 calorie diet. Your daily value may be higher or lower depending on your calorie needs.
Note
- Use fresh lemon juice: Freshly squeezed lemon juice makes a noticeable difference in flavor compared to bottled juice. Aim for about 3 medium lemons.
- Don't skip the chill time: Refrigerating for at least 1 hour helps the bars set properly for clean, neat slices.
- Storage tips: Store bars at room temperature in an airtight container for up to 2 days, or refrigerate for up to 5 days. Freeze for up to 3 months.
- Make ahead: These bars can be made 1 day in advance. Keep refrigerated and bring to room temperature 15 minutes before serving.
- Extra lemon punch: Add an extra teaspoon of lemon zest to the filling for intensified citrus flavor.
Frequently Asked Questions
Can I use old-fashioned oats instead of quick-cooking oats?
Quick-cooking oats are recommended because they blend more smoothly into the crust. If using old-fashioned oats, pulse them briefly in a food processor to break them down slightly before using.
Can I make these bars gluten-free?
Yes! Substitute the all-purpose flour with a 1:1 gluten-free baking blend that contains xanthan gum. Ensure your oats are certified gluten-free as well.
Why did my filling curdle?
Curdling can happen if the lemon juice is added too quickly to the condensed milk. Whisk gently and steadily. Also, avoid overbaking—remove when the center still has a slight jiggle.
Can I double this recipe?
Absolutely! Double all ingredients and bake in a 9×13-inch pan. You may need to add 5-10 minutes to the final bake time. Keep an eye on the edges for doneness.