
This is the kind of bread that feels like home the second it comes out of the oven. It is simple, honest, and deeply comforting, the sort of loaf you make without overthinking. I have baked it on busy mornings, slow afternoons, and even when I just needed something warm in the kitchen.
b-ad-placeholder-119" data-inserter-version="2" data-placement-location="under_page_title">What I love most is how unfussy it is. There is no yeast, no waiting around, no complicated steps. You mix, shape, and bake, and somehow that simplicity turns into something incredibly satisfying.
The texture is hearty but still tender, with a gentle wheat flavor that makes it perfect for both sweet and savory spreads. A slice with butter feels like enough, yet it happily sits beside soups, eggs, or tea.
This bread carries a bit of tradition too, especially with the cross scored on top before baking. I always pause for a second when I do that, not out of ritual exactly, but because it connects me to generations of bakers who made this same loaf.
Why This Bread Matters to Me
I learned early that good food does not need to be complicated to be meaningful. This recipe reminds me that some of the best things come together with just a bowl, your hands, and a little confidence.
It is the kind of baking that invites you to slow down without demanding too much time. You can make it on a weekday, without planning, and still feel like you created something special.
Ingredients Needed for the Recipe
- Whole wheat flour – gives the bread its hearty texture and nutty flavor.
- All purpose flour – balances the density so the loaf is not too heavy.
- Baking soda – acts as the leavening, helping the bread rise without yeast.
- Salt – enhances flavor and keeps the loaf from tasting flat.
- Cold butter – creates small pockets that add tenderness to the crumb.
- Egg – enriches the dough and adds structure, though it can be left out if needed.
- Buttermilk – reacts with the baking soda to help the bread rise and stay soft.
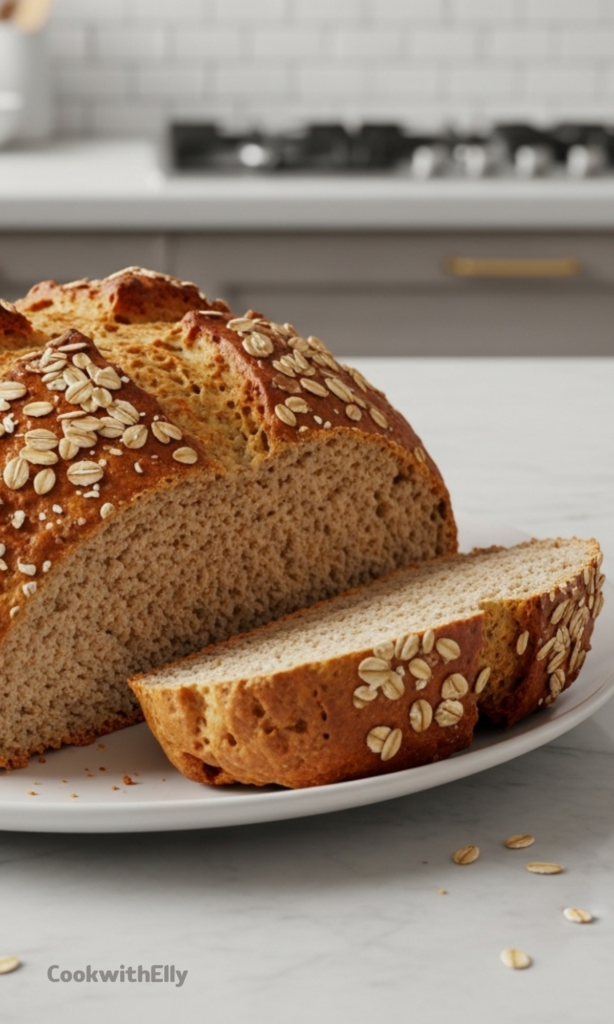
- Rolled oats – add texture and a rustic finish on top.
How to make Irish Brown Soda Bread Recipe?
Step 1 – Prepare the Oven and Pan
Start by preheating your oven to 425°F or 215°C. Line a baking tray with parchment paper so the loaf does not stick and cleanup stays easy.
This bread depends on a hot oven right from the beginning. That burst of heat helps it rise quickly and form its signature crust.
Step 2 – Mix the Dry Ingredients
In a large bowl, whisk together the whole wheat flour, all purpose flour, baking soda, and salt. Make sure everything is evenly combined so the bread rises properly.
Using a bigger bowl than you think you need actually helps here. It gives you space to mix gently without compressing the dough.
Step 3 – Rub in the Butter
Add the cold butter and use your fingertips to rub it into the flour mixture. Keep going until it looks like coarse crumbs with no large chunks remaining.
This step should feel light and quick. You are not trying to melt the butter, just distribute it so it creates softness later.
Step 4 – Combine the Wet Ingredients
In a separate jug, whisk together the egg and buttermilk until smooth. The mixture should look creamy and fully blended.
The buttermilk is essential because its acidity activates the baking soda. That reaction is what replaces yeast in this recipe.
Step 5 – Bring the Dough Together
Make a well in the center of the dry ingredients and pour in the liquid. Using an open hand, gently mix everything until it forms a soft dough.
The dough will feel slightly sticky, and that is exactly right. Overmixing is the one thing that can make this bread tough, so stop as soon as it comes together.
Step 6 – Shape the Loaf
Turn the dough onto a lightly floured surface and gently form it into a round. Flatten it into a circle about 8 inches wide and roughly 1 1/2 inches thick.
Do not knead it like traditional bread. Just guide it into shape with soft movements.
Step 7 – Score the Top
Place the dough onto the prepared tray and cut a deep cross across the top. This helps the bread bake evenly and gives it that classic look.
I always poke a small hole into each corner as well. It is an old tradition said to let the fairies escape, and honestly, I like keeping that bit of charm alive.
Step 8 – Add the Finishing Touch
Brush the top with a little leftover buttermilk, then scatter rolled oats over it. This adds texture and gives the crust a beautiful rustic finish.
It also signals that this is not a delicate loaf. It is meant to be sliced thick and enjoyed generously.
Step 9 – Bake Until Golden
Bake for 15 minutes, then reduce the oven temperature to 400°F or 200°C and continue baking for about 30 minutes more.
The loaf is done when it sounds hollow when tapped on the bottom. Let it cool on a wire rack before slicing so the texture sets properly.
Tips
- Handle the dough as little as possible to keep the bread tender.
- Always level your baking soda carefully to avoid a bitter flavor.
- Use cold butter so it creates light pockets inside the loaf.
- If the dough feels dry, add a small splash of buttermilk rather than forcing it together.
- Do not open the oven door while baking or you may lose that beautiful rise.
- Shape the dough quickly once the liquid is added because the baking soda starts working immediately.
- Let the bread cool fully before slicing to prevent a gummy texture.
Serving and Storing
This bread is best enjoyed slightly warm with a generous spread of butter. The crumb soaks it up in the nicest way, making each bite rich without feeling heavy.
I also love it alongside soups or with a bit of jam in the morning. It is versatile enough to move between meals without ever feeling out of place.
To store it, wrap the cooled loaf tightly or keep it in an airtight container at room temperature. It will stay fresh for about three days, though in my house it rarely lasts that long.
If you want to keep it longer, slice the bread and freeze it. That way you can toast a piece whenever the craving hits, which is often.
Simple Variations to Try
Once you are comfortable with the basic loaf, you can adjust it slightly to suit your taste. The structure stays the same, but small additions can make it feel new.
A handful of seeds, a sprinkle of oats inside the dough, or even a touch more salt can shift the flavor without changing the character of the bread.
You can also make it dairy free by using plant based butter and a milk mixed with a little acid as a buttermilk substitute. The results are still wonderfully satisfying.
However you adapt it, try to keep the spirit of the recipe intact. It is meant to be quick, rustic, and made with a light hand.
This Irish Brown Soda Bread Recipe is less about perfection and more about connection. Mix it, bake it, slice it thick, and share it. That is where its real magic lives.
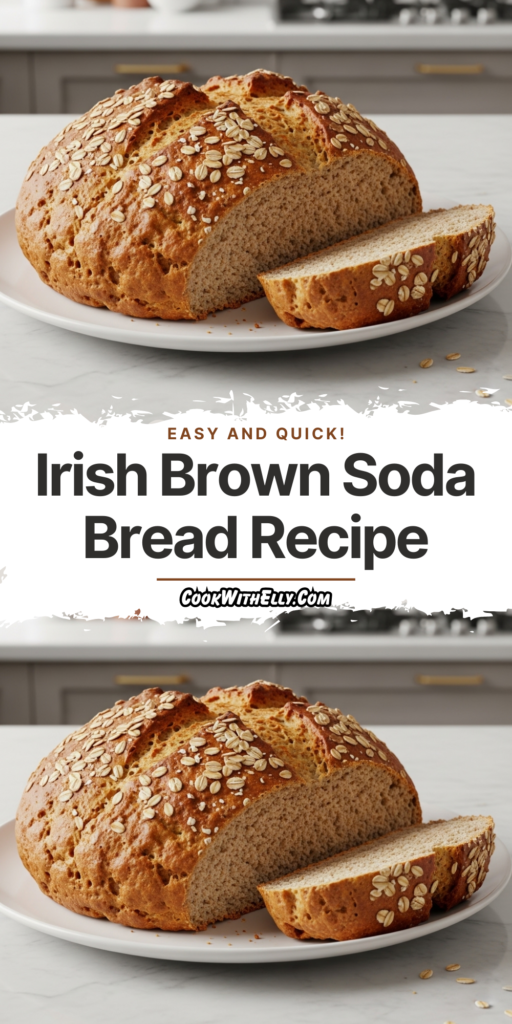
Irish Brown Soda Bread Recipe
Description
This authentic Irish Brown Soda Bread is hearty, healthy, and bursting with lovely wheat flavor—no yeast or proofing required! Made with just 7 simple ingredients, this quick bread comes together in under an hour and delivers a beautiful crust, tender crumb, and memories of home in every slice. Perfect for breakfast, afternoon tea, or celebrating St. Patrick's Day with family.
ingredients
Instructions
-
Preheat & Prep
Preheat the oven to 425°F (215°C). Line a baking tray with parchment paper and set aside. -
Mix Dry Ingredients
Whisk together the whole wheat flour, all-purpose flour, baking soda, and salt in a large bowl. Add the cold cubed butter and rub it into the flour mixture with your fingertips until it resembles coarse breadcrumbs.Use a large bowl to avoid over-mixing -
Combine Wet Ingredients
In a separate jug, whisk the egg and buttermilk together until well combined. -
Form the Dough
Make a well in the center of the dry ingredients and pour in the buttermilk mixture. Using an open hand, gently bring the flour and liquid together to form a loose, soft, slightly sticky dough. Add a splash more buttermilk if too dry.Mix lightly—over-mixing toughens the bread -
Shape the Loaf
Turn the dough onto a floured work surface and gently bring it together into a ball. Flatten into an 8-inch round, about 1½ inches (4 cm) thick.Handle gently for a lighter texture -
Score & Decorate
Place on the prepared baking sheet. Score a deep cross on top to bless the bread. Poke a small hole in each of the 4 corners to release the fairies. Brush with leftover buttermilk and scatter rolled oats on top.Traditional Irish blessing technique -
Bake
Bake for 15 minutes at 425°F (215°C), then reduce oven temperature to 400°F (200°C) and bake for 30 minutes more. The loaf is done when it sounds slightly hollow when tapped on the bottom.Do not open the oven door while baking for best crust -
Cool & Serve
Remove from the baking sheet and place on a wire rack to cool completely. Slice and enjoy with butter. Store leftovers covered at room temperature for up to 3 days.
Nutrition Facts
Servings 8
Serving Size 1 slice (approx. 85g)
- Amount Per Serving
- Calories 183kcal
- % Daily Value *
- Total Fat 4g7%
- Saturated Fat 2g10%
- Cholesterol 33mg11%
- Sodium 583mg25%
- Potassium 150mg5%
- Total Carbohydrate 28g10%
- Dietary Fiber 2g8%
- Sugars 3g
- Protein 7g15%
- Calcium 6 mg
- Iron 8 mg
* Percent Daily Values are based on a 2,000 calorie diet. Your daily value may be higher or lower depending on your calorie needs.
Note
- Buttermilk substitute: Mix 1 cup regular milk with 2 tbsp lemon juice or white vinegar; let stand 30 minutes before using.
- Don't over-mix: Use an open hand and mix just until the dough comes together to keep the bread tender.
- Level your baking soda: Too much can tint bread green and create an acidic taste—always use a level teaspoon.
- Freeze flour: Store whole wheat flour in the freezer to prevent the oils from turning rancid.
- Vegan option: Use vegan butter and plant-based buttermilk (made with your favorite non-dairy milk + acid).
Frequently Asked Questions
Why is my soda bread dense?
Over-mixing toughens the gluten. Bring wet and dry ingredients together gently with an open hand just until a ball forms. Add a splash more buttermilk if the dough seems dry.
Why is my soda bread bitter or dark inside?
Too much baking soda can cause bitterness and a greenish tint. Always use a level teaspoon and break up any lumps before measuring.
Can I make this bread ahead of time?
Yes! Shape the dough, wrap tightly in plastic, and refrigerate up to 24 hours. Let sit at room temperature 15-20 minutes before baking.
How do I store leftover Irish Soda Bread?
Cool completely, then store in an airtight container or wrapped in plastic at room temperature for up to 3 days. For longer storage, slice and freeze wrapped in foil for up to 1 month.
Can I make this dairy-free or vegan?
Absolutely! Use vegan butter and make dairy-free buttermilk by combining plant-based milk with lemon juice or vinegar. Follow the same method for best results.