
I’ll be honest, this is the kind of cake I come back to when I don’t want to overthink baking. A soft vanilla sponge, simple buttercream, and just enough decoration to feel festive without stress. It’s easy, forgiving, and honestly pretty fun to make.
And if you’ve baked before, well, sometimes it’s nice to go back to something simple and comforting. This cake does exactly that, without trying too hard.
Ingredients Needed for the Recipe
- Self-raising flour (200 g) – gives the cake its structure and helps it rise without extra effort.
- Caster sugar (180 g) – adds sweetness and keeps the sponge light and soft.
- Eggs (3 medium) – bind everything together and create that tender texture.
- Neutral oil (120 ml) – keeps the cake moist for days, which I really appreciate.
- Milk (120 ml) – smooths out the batter and adds richness.
- Vanilla extract (2 tsp) – the main flavor here, warm and classic.
- Salt (¼ tsp) – optional, but it balances the sweetness nicely.
- Unsalted butter (115 g, softened) – the base for the buttercream, creamy and rich.
- Icing sugar (300 g, sifted) – sweetens and thickens the frosting.
- Vanilla extract (1½ tsp) – adds flavor to the buttercream.
- Milk (1–2 tbsp) – helps adjust the buttercream consistency.
- Pinch of salt – cuts through the sweetness in the frosting.
- Filling of choice – like lemon curd or jam for extra flavor.
- Food coloring (lemon, orange, sage) – for soft Easter tones in decorations.
- Easter sprinkles or mini eggs – adds texture and a festive touch.
- Pastel nonpareils – tiny pops of color that make the cake look finished.
How to make An Easy Easter Sheet Cake Recipe?
Step 1 – Prepare the Pan and Oven
I always start by lining my 9×9-inch pan with baking paper and giving it a light oiling. It makes removal so much easier later, and you don’t want your cake sticking after all that effort.
Preheat the oven to 170°C fan or 180°C conventional. I like to do this first so the oven is fully ready when the batter is done.
Step 2 – Whisk Eggs and Sugar
In a large bowl, whisk the eggs and sugar together for about 30 to 45 seconds. You’ll notice the mixture becoming slightly pale and a bit airy.
It’s a small step, but it helps create that soft sponge texture. Don’t skip it or rush too much.
Step 3 – Add the Liquid Ingredients
Pour in the oil, milk, and vanilla extract. Then whisk until everything looks smooth and combined.
This is where the batter starts to feel silky. I always pause here for a second, just to make sure there are no streaks left.
Step 4 – Fold in the Dry Ingredients
Sift in the self-raising flour and salt. Then gently fold everything together using a spatula.
Try not to overmix. Once the flour disappears, stop. Overmixing can make the cake dense, and we want it light.
Step 5 – Bake the Cake
Pour the batter into your prepared pan and level the top. Slide it into the oven and bake for 30 to 35 minutes.
You’ll know it’s ready when the top springs back and a skewer comes out clean. That’s my favorite test, simple and reliable.
Step 6 – Cool the Cake
Let the cake sit in the pan for about 10 minutes. Then carefully lift it out and place it on a rack to cool completely.
This part takes patience. Decorating a warm cake never ends well, trust me.
Step 7 – Beat the Butter
In a bowl, beat the softened butter for 2 to 3 minutes until it looks pale and creamy. It should feel light, not heavy.
I usually scrape the sides once or twice to keep everything even.
Step 8 – Add Half the Icing Sugar
Add half the icing sugar and start mixing on low speed. Once it’s combined, increase the speed slightly.
This prevents that cloud of sugar that always seems to happen if you rush it.
Step 9 – Add Flavor and Milk
Mix in the vanilla extract, one tablespoon of milk, and a pinch of salt. It should start to look smoother now.
If it feels too stiff already, that extra milk really helps loosen things up.
Step 10 – Add Remaining Icing Sugar
Add the rest of the icing sugar and beat until smooth. Adjust the consistency if needed.
If it’s too thick, add milk a little at a time. If too soft, a bit more sugar fixes it quickly.
Step 11 – Whip Until Fluffy
Beat the buttercream for another 2 to 3 minutes. It should look light, fluffy, and easy to spread.
This step makes a big difference. It turns the frosting from heavy to airy.
Step 12 – Add Filling
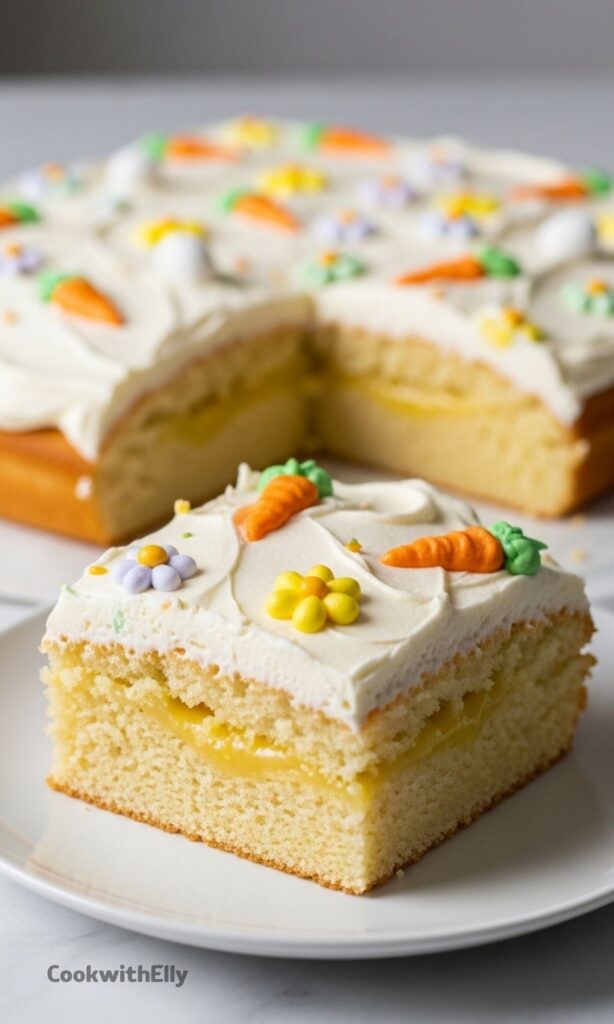
Place your cooled sponge onto a cake board. Poke small holes and spoon in your chosen filling like lemon curd or jam.
I like this step because it adds little pockets of flavor. It’s a nice surprise when you slice into it.
Step 13 – Spread the Buttercream
Scoop the buttercream onto the cake and spread it evenly with a palette knife. Don’t stress about making it perfectly smooth.
A slightly textured finish actually looks more relaxed and homemade, which I love.
Step 14 – Pipe the Flowers
Using colored buttercream, pipe simple 5-petal flowers across the cake. Keep it loose and playful.
I don’t aim for perfection here. The uneven shapes somehow make it look better.
Step 15 – Pipe Mini Carrots
Pipe small carrot shapes using orange and green buttercream. They don’t have to be detailed.
Even simple shapes give that Easter vibe instantly.
Step 16 – Add Final Decorations
Sprinkle on pastel decorations, mini eggs, or anything festive you like. Scatter them lightly.
And that’s it. The cake suddenly looks bright, fun, and ready to share.
Simple Decoration Ideas That Always Work
If you’re not into piping flowers, that’s completely fine. I’ve skipped it before and just added a layer of pastel sprinkles, and it still looked great.
You could also drizzle melted chocolate, swirl the buttercream for a textured finish, or press mini eggs gently into the top. It doesn’t need to be complicated to feel special.
Sometimes I even divide the frosting into two colors and just spread them loosely for a marbled look. It takes seconds, and honestly, it looks like you tried harder than you did.
Tips
- Make sure your butter is soft, not melted, for the best buttercream texture.
- Don’t overmix the batter once the flour is added, or the cake can turn dense.
- Use room temperature eggs for a smoother batter.
- Let the cake cool completely before frosting, or the buttercream will melt.
- Start with less milk in the frosting and add more slowly if needed.
- Keep decorations simple if you’re new to piping.
- Use a skewer to test the cake instead of guessing doneness.
- Sift icing sugar to avoid lumps in the buttercream.
- Work slowly when decorating, there’s no rush.
- If something looks messy, just add sprinkles, it usually fixes everything.
Storage and Serving Ideas
This cake keeps really well at room temperature for a day or two, especially if it’s covered. The oil in the sponge helps it stay soft longer than butter-based cakes.
If you need to store it longer, pop it in the fridge. Just let it sit out for a bit before serving so the buttercream softens again.
For serving, I like cutting it into neat squares. It’s simple, easy to share, and honestly perfect for casual gatherings or little celebrations.
You can also dress it up with a scoop of vanilla ice cream or a drizzle of extra sauce if you want to make it feel a bit more special.
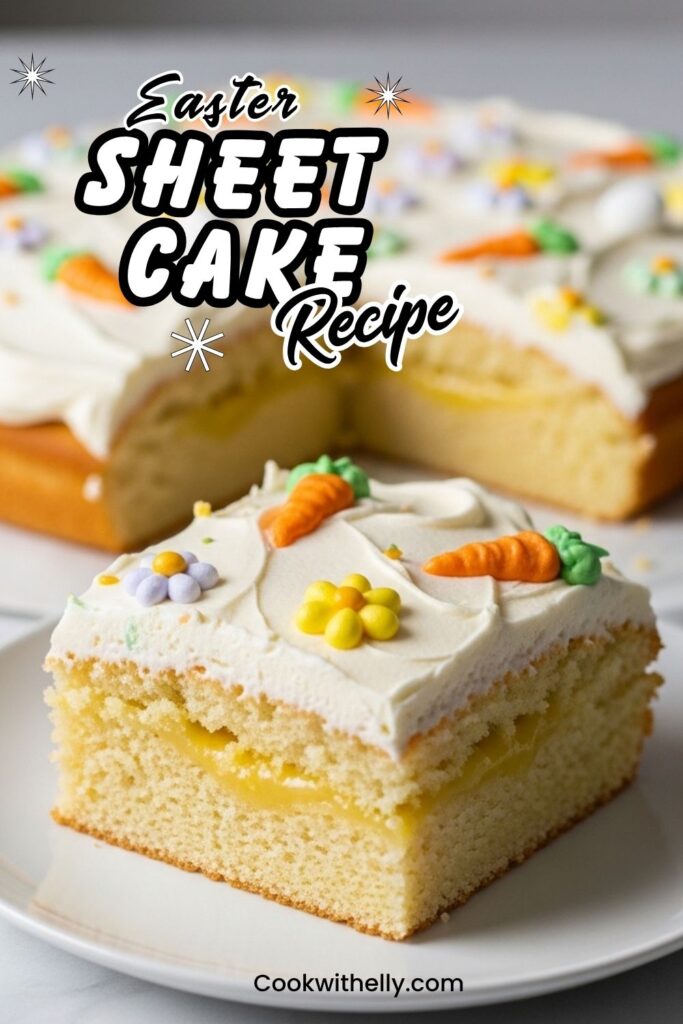
Easter Sheet Cake Recipe for Beginner Bakers!
Description
This classic vanilla sheet cake features a delicate, moist sponge paired with sweet, fluffy American buttercream. Created by Sarah (@by.sarahteresa), this beginner-friendly recipe is perfect for Easter celebrations but versatile enough for any season just by changing the decorations. With bright floral and citrus notes from lemon curd filling and colorful buttercream flowers, it brings a fresh, festive vibe to your table.
ingredients
Vanilla Sheet Cake
American Vanilla Buttercream
Filling & Decoration
Instructions
Making the Cake
-
Prep the Tin and Oven
Line a 9×9-inch square tin with baking paper and lightly oil it. Preheat your oven to 170°C (fan) or 180°C (conventional).Ensure the paper overhangs slightly for easy removal later. -
Whisk Wet Ingredients
In a large mixing bowl, whisk the eggs and caster sugar together for about 30–45 seconds until the mixture becomes slightly pale and frothy.This incorporates air for a lighter sponge. -
Add Liquids
Whisk in the neutral oil, milk, and vanilla extract until the mixture is smooth and fully combined. -
Fold in Flour
Sift in the self-raising flour and salt. Gently fold using a spatula until just combined. Stop mixing as soon as no dry flour is visible.Overmixing can make the cake tough. -
Bake the Cake
Pour the batter into the prepared tin and level the top. Bake for 30–35 minutes until the top springs back when touched and a skewer inserted comes out clean.Rotate the tin halfway through baking for even browning. -
Cool Completely
Let the cake cool in the tin for 10 minutes, then lift it out using the paper lining and transfer to a wire rack to cool completely before decorating.Decorating a warm cake will melt the buttercream.
Making the Buttercream
-
Beat the Butter
In a bowl, beat the softened unsalted butter with a mixer or whisk for 2–3 minutes until it is pale, creamy, and increased in volume. -
Add Sugar Gradually
Add half of the sifted icing sugar and beat on low speed first to avoid a sugar cloud, then increase the speed. Once incorporated, add the remaining sugar. -
Flavor and Whip
Mix in the vanilla extract, 1 tbsp milk, and a pinch of salt. Beat for another 2–3 minutes until light and fluffy. Adjust consistency with more milk if too thick or more sugar if too soft.Whipping creates the signature fluffy texture.
Decoration
-
Add Filling
Place the cooled sponge on your cake board. Poke holes all over the surface with a skewer and spoon over the lemon curd (or your chosen filling), letting it soak in.Lemon curd adds a bright, fresh citrus flavor perfect for spring. -
Apply Buttercream Base
Scoop the buttercream onto the cake and spread it evenly to the edges using a palette knife. A slightly textured look adds charm, so don't worry about perfect smoothing. -
Pipe Flowers
Tint a portion of the buttercream yellow (Lemon). Using a Wilton 2A piping tip, pipe 5-petal flowers across the cake.Hold the bag perpendicular to the cake for best results. -
Pipe Mini Carrots
Tint small amounts of buttercream orange and sage green. Using Wilton tips 102 (petal) and 4 (round), pipe mini carrots with green tops scattered among the flowers.Pipe the orange body first, then add green leaves on top. -
Finishing Touches
Sprinkle with Easter sprinkles, mini eggs, or pastel non-pareils to complete the festive look.
Nutrition Facts
Servings 12
Serving Size 1 slice (1/12th of cake)
- Amount Per Serving
- Calories 485kcal
- % Daily Value *
- Total Fat 23gg36%
- Saturated Fat 8gg40%
- Trans Fat 0gg
- Cholesterol 65mgmg22%
- Sodium 240mgmg10%
- Potassium 95mgmg3%
- Total Carbohydrate 68gg23%
- Dietary Fiber 0.5gg2%
- Sugars 48gg
- Protein 4.5gg9%
- Calcium 65 mg
- Iron 1.1 mg
* Percent Daily Values are based on a 2,000 calorie diet. Your daily value may be higher or lower depending on your calorie needs.
Note
- Make Ahead: The cake sponge can be baked a day in advance. Wrap tightly in cling film and store at room temperature. Frost on the day of serving.
- Dietary Variation: For a gluten-free version, substitute the self-raising flour with a 1:1 gluten-free baking blend that includes xanthan gum.
- Flavor Twist: Swap the lemon curd for raspberry jam or chocolate ganache for a different flavor profile while keeping the same decoration style.
- Storage: Store leftovers in an airtight container in the fridge for up to 3 days. Let come to room temperature before serving for the best texture.
Frequently Asked Questions
Can I make this cake without lemon curd?
Absolutely! While the lemon curd adds a lovely fresh citrus zing that pairs well with the vanilla, you can use strawberry jam, chocolate spread, or simply leave it plain. The cake and buttercream are delicious on their own.
My buttercream is too soft, what should I do?
If your kitchen is warm, the butter might have softened too much. Try adding a little more sifted icing sugar (1 tablespoon at a time) and beating until stiff peaks form. You can also chill the bowl in the fridge for 10 minutes before whipping again.
Can I freeze this sheet cake?
Yes, you can freeze the undecorated sponge. Wrap it tightly in plastic wrap and then foil. Freeze for up to 3 months. Thaw overnight in the fridge before decorating. It is not recommended to freeze the cake once decorated with buttercream as the texture may change upon thawing.
Do I need oil-based food coloring?
For buttercream, oil-based colors are preferred because they don't alter the consistency of the frosting like water-based gels might. However, high-quality gel pastes can work if used sparingly.