
There’s just something about Easter desserts, you know? They get to be a little extra, a little more colorful, and honestly? A whole lot more fun. I absolutely love making treats for this holiday because it’s the perfect excuse to break out all those cute candy eggs and pastel colors. And these little cakes? They’re the star of the show, no question about it.
I don’t know about you, but I adore making Easter desserts so much. Especially when you get to use those adorable little chocolate-covered eggs. They look like Robin’s eggs and they are ridiculously cute and tasty.
They just look so dang good on decorated desserts, man. Every time I make these, I can’t help but smile when I see them all lined up on the serving dish.
Can You Prepare These Easter Mini Cakes in Advance?
Yes absolutely! But you have to be a little careful with how you store them. Since these fun and easy Easter mini cakes are made by cutting circles out of your prepared cake, you’ll want to store them in an airtight container. This is the only way to prevent the cake and icing from drying out and getting stale.
I’d even go as far as to wrap each individual cake circle in wax paper or parchment paper. Then put them inside that storage container. It sounds like a lot, but it really ensures they stay as fresh and soft as possible, which is exactly what you want when you pull them out for your guests.
Kitchen Tools Needed to Make Easter Mini Cakes
Before you get started, it helps to have everything gathered. Here are the key tools you’ll want to have on hand for this recipe:
- Baking sheets
- Parchment paper or silicone baking mats
- A good bowl set
- A sifter for the dry ingredients
- An electric mixer, stand mixer, or a strong whisk
- A cake spatula for spreading the batter
- Toothpicks for testing doneness
- A circular cookie cutter, about 3 inches in diameter
- Piping bags
- Wilton round piping tip #10
- Wilton tip #233, which is the grass tip
Having these ready before you mix the batter makes the whole process so much smoother. I always feel more relaxed when I’m not scrambling to find a specific tip halfway through frosting.
Ingredients Needed for the Recipe
For the cake part, you’ll need some basic pantry staples and a few special items to get that gorgeous pink color. Here’s what you’ll be grabbing:
- All-purpose flour: This is the base of our cake, giving it structure and that soft crumb.
- Baking powder and salt: These work together to help the cake rise and balance the sweetness.
- Large eggs (room temperature): They add richness and help bind everything together. Room temperature is key for a smooth batter.
- Granulated sugar: For sweetness and that tender texture.
- Vanilla extract: A must for that classic, warm cake flavor.
- Canola oil: This is what makes the cake so incredibly moist.
- Whole milk: Adds richness and helps create a smooth batter.
- Pink gel food coloring: This gives our cake that beautiful pastel pink color, perfect for Easter.
For the assembly and decorating, you’ll need a few more things. The buttercream is what really makes these mini cakes special.
- Butter, softened: The foundation of our buttercream. It needs to be soft to get that fluffy texture.
- Icing sugar: Also known as powdered sugar, this sweetens and thickens our frosting.
- Milk: Helps to thin out the buttercream to the perfect piping consistency.
- Kelly green gel food coloring: This is for the grass on top. It gives that bright, fresh spring green.
- Teal green gel food coloring: For the middle layer of frosting. It’s a beautiful, unique color that makes the cakes pop.
- Candy-covered chocolate eggs: The star of the show! These little speckled eggs are what make the cakes so festive.
Keep in mind, all of the ingredient amounts you’ll need are in the printable recipe card below. This list is just to give you a good idea of what to look for at the store.
How to Make Easter Mini Cakes Recipe?
Alright, let’s get into the fun part. I’ve broken this down into simple steps so you can follow along easily. It’s a little bit of a project, but every step is so worth it when you see the final result.
Step 1 – Prepare Your Oven and Dry Ingredients
First thing’s first, preheat your oven to 350 degrees F. You want it nice and hot and ready to go. While that’s heating up, line your 13×9 baking sheets with parchment paper or silicone baking mats. Set those aside for now.
Now, grab a medium-sized bowl and use your sifter to sift together your flour, baking powder, and salt. Sifting helps to aerate the flour and ensures there are no lumps, which gives us a lighter cake.
Step 2 – Mix the Wet Ingredients and Combine
Using your electric mixer, stand mixer, or just a good old-fashioned whisk, beat together your eggs and granulated sugar. You want this to be creamy and well blended, which usually takes a couple of minutes. You’re looking for it to be pale and a little frothy.
Add your vanilla extract and canola oil to this mixture and continue mixing. The oil is going to make this cake unbelievably moist. Now comes the important part: slowly add your dry ingredients and your milk into the wet ingredients. Do this in alternating batches if you can, starting and ending with the dry. Mix just until everything is well combined.
Step 3 – Add Color and Bake
This is where the magic happens. Add your pink gel food coloring and beat until the batter is completely and thoroughly tinted. I like to add a little at a time until I get the shade I’m happy with. Spread the cake batter onto your prepared baking sheet, using a cake spatula to get it nice and even.
Bake for about 15 minutes, or until a toothpick inserted in the center comes out clean. The edges should be just starting to pull away from the sides of the pan. Let the cake cool completely before you even think about decorating. A warm cake will just melt your buttercream.
Step 4 – Cut Out Your Cake Circles
Once your cake is completely cool, it’s time for the fun part. Use your 3-inch round cookie cutter to cut out 24 circles from your cake. You can fit quite a few in that big sheet pan. Here’s a little tip: you can save what you trim from the cake for later and enjoy it as a snack. I always do, it’s one of the best parts of baking.
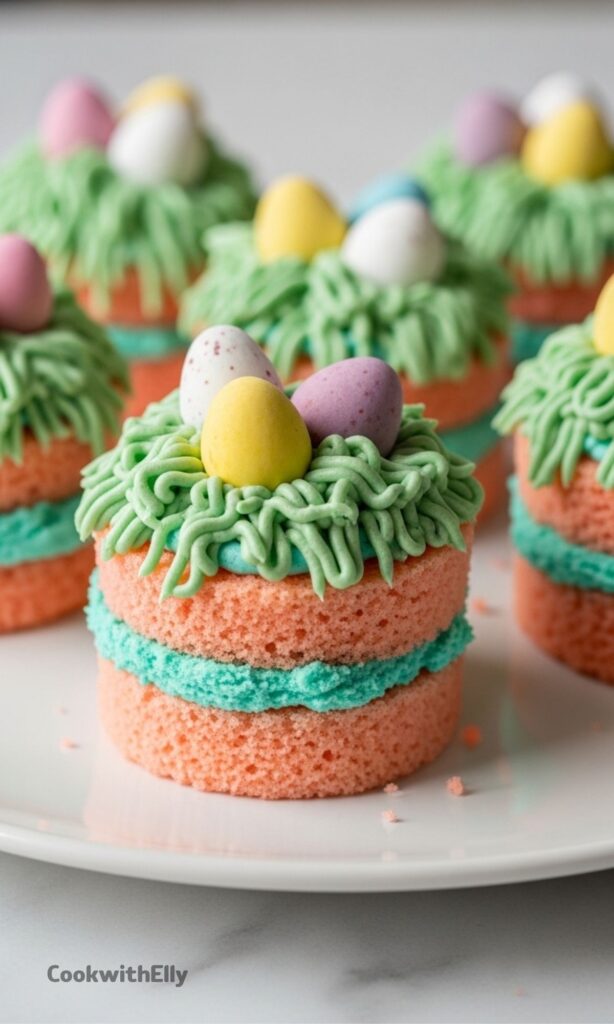
You’ll end up with 24 cake circles. We’re going to use 12 as the bottoms and 12 as the tops, creating little sandwich cakes.
Step 5 – Make and Pipe the Teal Buttercream
Now for the buttercream. Start with the teal frosting. Beat together 2 sticks of butter, 4 cups of icing sugar, and 4 tablespoons of milk with your electric mixer. Beat it until it’s smooth and creamy. Then add your teal gel food coloring and mix until the color is completely uniform.
Scoop this teal buttercream into a piping bag fitted with your Wilton #10 round piping tip. Now, take 12 of your cake circles and pipe a nice layer of teal frosting onto each one. Top each of these frosted cakes with one of the remaining 12 unfrosted cakes. You’re basically building a little cake sandwich.
Step 6 – Create the Easter Grass Topping
For the final touch, make your green buttercream. Beat together 1 stick of butter, 2 cups of icing sugar, and 3 to 4 tablespoons of milk. Once it’s smooth, add your Kelly green gel food coloring and mix well until the color is evenly distributed.
Scoop this green buttercream into a separate piping bag with the Wilton tip #233 attached. This is the grass tip. Now, frost the top of each stacked mini cake with the green buttercream. Start at the cake and pull away in quick, sweeping motions. This creates that perfect “Easter grass” appearance.
Step 7 – Add the Finishing Touch
This is the best part. Take your candy-covered chocolate eggs and place 4 or 5 on top of each mini cake. Nestle them right into the green “grass” so they look like little hidden treasures. And that’s it!
Serve them up and enjoy the smiles. I promise, these little cakes are always a hit.
My Best Tips for Perfect Easter Mini Cakes
I’ve made these a few times now, and I’ve picked up a few things that really make a difference. Here are my best tips to ensure yours turn out just as beautiful.
- Room temperature ingredients are your friend. When your eggs and butter are at room temperature, they cream together much more smoothly, giving you a better texture in both the cake and the buttercream.
- Don’t overmix your cake batter. Once you add the flour, mix just until it’s combined. Overmixing can develop the gluten too much and make your cake tough instead of tender.
- Let the cake cool completely. I know it’s tempting, but trying to cut or frost a warm cake is a recipe for disaster. The cake will crumble, and the frosting will melt. Patience is key here.
- Use gel food coloring, not liquid. Liquid food coloring can thin out your batter and buttercream too much. Gel colors are concentrated and will give you those vibrant pastel shades without changing the consistency.
- Practice the grass piping technique. If you’ve never used a grass tip before, give it a quick practice on a plate or piece of parchment. The trick is to apply pressure, pipe a small star, then pull the tip away quickly.
How to Store Your Mini Cakes
These cakes are best enjoyed the day they’re made, but I know that’s not always possible. If you have leftovers or are making them ahead, here’s the best way to keep them fresh. I already mentioned using an airtight container, but it’s worth repeating.
Place the finished cakes in a single layer in a container with a tight-fitting lid. If you need to stack them, put a layer of parchment paper or wax paper between each layer. They’ll keep well in the refrigerator for up to three days, but let them come to room temperature before serving for the best flavor and texture.
Fun Variations to Try
One of the best things about this recipe is how easy it is to switch things up. You can really make it your own. For the cake itself, you could try a lemon or vanilla bean flavor instead of the plain vanilla. A little lemon zest in the batter would be amazing with the pastel colors.
You can also change up the colors to match your party theme. Maybe use a lavender or yellow buttercream for the middle layer instead of teal. The green grass is a must, but you could swap the candy eggs for mini chocolate bunnies or even pastel sprinkles for a different look. The possibilities are endless, and it’s a great way to make the recipe your own.
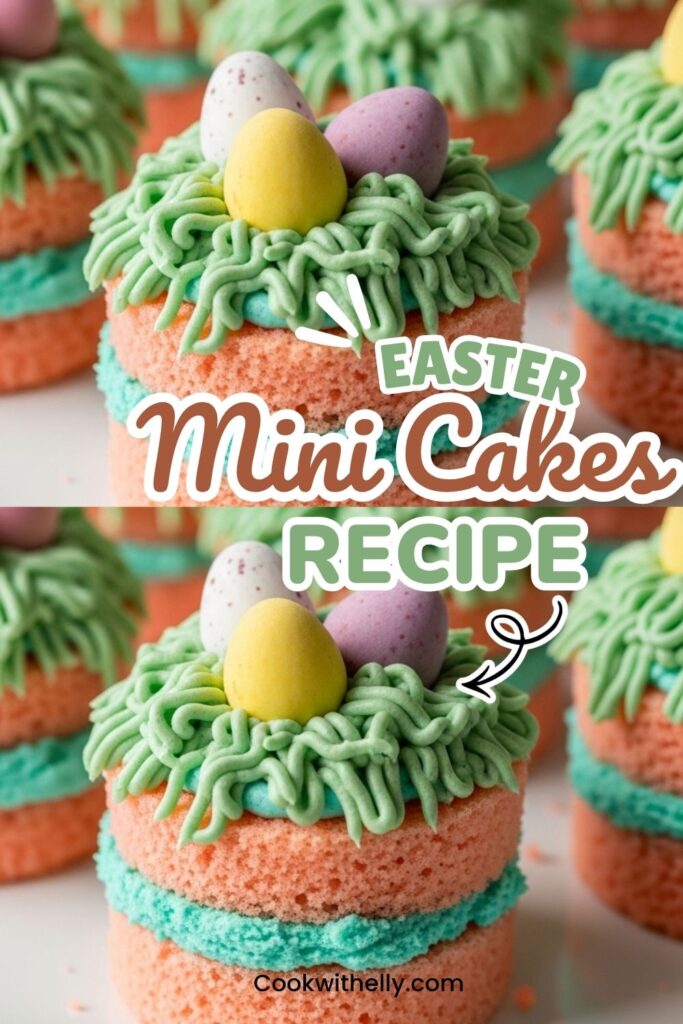
Easter Mini Cakes Recipe
Description
These gorgeous Easter Mini Cakes are the perfect fresh and out-of-the-box idea for your Easter dessert table! Made by cutting circles from a sheet cake, stacking them with teal buttercream, and topping them with green "grass" frosting and candy-covered chocolate eggs, they look like little bird nests. They are not only pretty to look at but taste amazing too, making them the talk of any Easter celebration.
ingredients
For the Cake
To Assemble + Decorate
Instructions
Directions to Make the Easter Mini Cakes
-
Preheat and Prepare
Preheat oven to 350°F (175°C). Line two 13×9 baking sheets with parchment paper or silicone baking mats and set aside. -
Mix Dry Ingredients
In a medium-sized bowl, use a sifter to sift together your flour, baking powder, and salt. -
Cream Wet Ingredients
Using an electric mixer, stand mixer, or whisk, beat together the eggs and granulated sugar until creamy and well blended. Add vanilla extract and canola oil and continue mixing. -
Combine Batter
Slowly add your dry ingredients and milk into your wet ingredients, continuing to blend until well combined. Add pink gel food coloring and beat until completely tinted thoroughly. -
Bake
Spread cake batter onto your lined baking sheets, spreading evenly with a cake spatula. Bake for approximately 15 minutes or until a toothpick comes out clean when inserted in the center of the cake. -
Cool
Allow the cakes to cool completely on the pans before decorating.
Directions to Assemble Easter Mini Cakes
-
Cut Circles
Use a 3-inch round cookie cutter to cut out 24 circles from your cooled cakes. (Save the trimmings for a snack!) -
Make Teal Buttercream
Beat together 2 sticks of softened butter, 4 cups of icing sugar, and 4 tbsps of milk with an electric mixer. Once smooth, add teal gel food coloring and mix until completely tinted. -
Fill and Stack
Scoop teal buttercream into a piping bag fitted with a Wilton #10 round piping tip. Frost 12 of your mini cakes. Top each frosted cake with one of the unfrosted cakes to create a sandwich. -
Make Green Buttercream
In a separate bowl, beat 1 stick of butter, 2 cups of icing sugar, and 3-4 tbsps of milk. Add Kelly green gel food coloring and mix until well blended and the color is evenly distributed. -
Create Grass Effect
Scoop green buttercream into a piping bag fitted with Wilton icing tip #233 (grass tip). Frost the top of each mini cake, starting at the cake and pulling away in sweeping motions to create an 'Easter grass' appearance. -
Decorate and Serve
Add 4-5 candy-covered chocolate eggs on top of the green grass of each mini cake. Serve immediately or store in an airtight container.
Nutrition Facts
Servings 12
Serving Size 1 mini cake
- Amount Per Serving
- Calories 485kcal
- % Daily Value *
- Total Fat 27gg42%
- Saturated Fat 9gg45%
- Trans Fat 0gg
- Cholesterol 85mgmg29%
- Sodium 195mgmg9%
- Potassium 145mgmg5%
- Total Carbohydrate 58gg20%
- Dietary Fiber 0.5gg2%
- Sugars 42gg
- Protein 4gg8%
- Calcium 12% mg
- Iron 6% mg
* Percent Daily Values are based on a 2,000 calorie diet. Your daily value may be higher or lower depending on your calorie needs.
Note
- Make Ahead: You can bake the cake layers a day in advance. Wrap tightly in plastic wrap and store at room temperature. Assemble and decorate on the day of serving.
- Storage: Store finished cakes in an airtight container in the refrigerator for up to 3 days. Let them come to room temperature before serving for the best texture.
- Cake Scraps: Don't throw away the leftover cake scraps! Crumble them up and mix with a little frosting for cake pops, or simply enjoy them as a chef's treat.
- Color Variations: Feel free to swap the pink cake for yellow or blue if you prefer different pastel tones for your Easter table.
Frequently Asked Questions
Can I prepare these Easter Mini Cakes in advance?
Yes, absolutely! However, because these are assembled with buttercream, it is best to store them in an airtight cake storage container to prevent drying out. For best results, wrap the cut cake circles in wax or parchment paper before placing them in the container if assembling a day ahead. Add the fresh "grass" and eggs just before serving for the prettiest presentation.
What kind of cookie cutter do I need?
A 3-inch round cookie cutter works perfectly for this recipe to create the mini cake bases. If you don't have one, you can use a large drinking glass or a biscuit cutter of similar size.
Can I use a box cake mix instead?
Yes! You can use two boxes of white or vanilla cake mix prepared according to package directions. Spread the batter onto the lined baking sheets and bake until a toothpick comes out clean. The rest of the assembly instructions remain the same.
Where can I find candy-covered chocolate eggs?
These are widely available in the seasonal aisle of most grocery stores, big-box retailers, and candy shops during the Easter season. Brands like Cadbury Mini Eggs are popular choices.