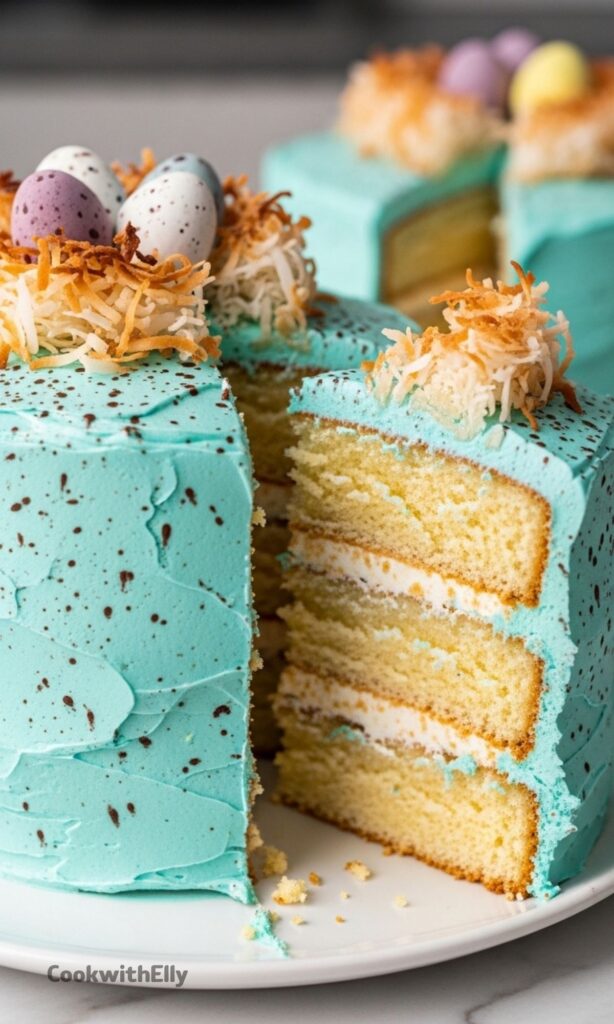

The first time I made it, I wasn’t aiming for anything fancy. But once I added that robin’s egg blue frosting and the speckled finish, it suddenly looked like something straight out of a bakery window. That’s when I knew this one was a keeper.
What I love most is how simple the base is. The texture stays moist for days, and the flavor is gentle but comforting. And if you’re into coconut, adding those toasted flakes between layers really changes the game in the best way.
It’s the kind of cake that feels playful but still tastes like a proper homemade dessert. Not overly sweet, not too heavy, just right.
Ingredients Needed for the Recipe
- All-purpose flour – gives the cake its structure and soft crumb.
- Sugar – adds sweetness and helps create a tender texture.
- Baking soda – helps the cake rise slightly and stay light.
- Baking powder – gives the cake a proper lift and fluffy texture.
- Salt – balances sweetness and enhances overall flavor.
- Unsalted butter – adds richness and keeps the cake moist.
- Egg whites – create a lighter texture and clean vanilla color.
- Vanilla extract – the main flavor, warm and fragrant.
- Sour cream – adds moisture and a slight tang for balance.
- Whole milk – keeps the batter smooth and soft.
- Confectioners sugar – used to make the buttercream smooth and sweet.
- Butter (for frosting) – creates a creamy, fluffy buttercream.
- Milk (for frosting) – adjusts the frosting consistency.
- Kosher salt – balances the sweetness in the frosting.
- Blue food coloring – creates that signature robin’s egg color.
- Toasted coconut – adds texture and a nest-like finish.
- Cocoa powder – used for the speckled effect on the cake.
- Extra vanilla – mixed with cocoa for speckling.
- Chocolate eggs – decorative topping that completes the Easter look.
Why This Cake Works So Well
There’s something about the combination of butter, sour cream, and milk that just works. The cake stays incredibly soft without feeling greasy, which is honestly not always easy to get right.
I also like that the vanilla flavor isn’t overpowering. It’s present, warm, and comforting without taking over everything else. That makes it perfect for layering with coconut or even adding your own twist later.
And the frosting? It’s classic, simple buttercream, but once you tint it and add that speckled finish, it suddenly looks like something much more elaborate.
How to make Easter Egg Cake?
Step 1 – Prepare the Oven and Coconut
Start by preheating your oven to 325°F. While that warms up, spread your coconut flakes on a baking tray and toast them for about 5 to 10 minutes, stirring once.
They brown quickly, so keep an eye on them. Once golden, set them aside to cool. This step adds such a nice texture later, so I never skip it.
Step 2 – Prepare the Cake Pans
Increase the oven temperature to 340°F. Butter and flour three 6-inch cake pans, making sure every corner is coated.
If you have cake strips, wrap them around the pans. They really help create flat layers, which makes assembling so much easier later on.
Step 3 – Mix the Dry Ingredients
Sift together the flour, sugar, baking soda, baking powder, and salt into a large bowl. Give it a quick whisk so everything is evenly combined.
This step helps avoid lumps and keeps the batter smooth, which makes a difference in the final texture.
Step 4 – Combine the Wet Ingredients
In another bowl, whisk together the milk, sour cream, vanilla, egg whites, and butter. The butter should be very soft or slightly melted but not hot.
If you notice little butter bits, don’t worry. They usually blend in once everything comes together.
Step 5 – Make the Batter
Pour the wet ingredients into the dry mixture. Stir gently until just combined, try not to overmix here.
The batter should look smooth but not overly worked. That’s the sweet spot for a soft cake.
Step 6 – Bake the Cake Layers
Divide the batter evenly into your prepared pans. Bake for about 25 to 30 minutes until the centers feel springy when touched.
Let the cakes cool completely before removing them. I usually let them sit for a bit, then turn them out onto a rack.
Step 7 – Make the Buttercream
Beat the butter until light and fluffy. Slowly add the confectioners sugar in batches, mixing well each time.
Add vanilla, salt, and a bit of milk. Keep mixing until smooth, then add blue food coloring gradually until you get that robin’s egg shade.
Step 8 – Assemble the Layers
Place the first cake layer on your stand and pipe a layer of buttercream on top. Add a sprinkle of toasted coconut if you like.
Repeat with the remaining layers, stacking them gently and evenly.
Step 9 – Frost the Cake
Cover the entire cake with buttercream. Smooth the sides and top using a spatula or scraper.
Take your time here. A smooth finish makes the final decoration really stand out.
Step 10 – Create the Speckled Effect
Mix cocoa powder with a bit of vanilla to form a thin paste. Dip a brush into it and flick small specks onto the cake.
This part can get messy, so I usually place some paper around. Practice once before going straight onto the cake.
Step 11 – Add the Nest Decoration
Pipe a ring of buttercream on top of the cake. Press toasted coconut into it to form a nest shape.
Place the chocolate eggs inside the nest gently. And that’s it, your Easter Egg Cake is ready.
Serving Ideas
I usually bring this cake out slightly chilled but not cold. That way the frosting holds its shape, but the cake still feels soft and tender when sliced.
It pairs really well with a simple cup of coffee or even a light tea. The vanilla flavor doesn’t compete, it just sits nicely in the background.
If you’re serving it at a gathering, I like to cut slightly smaller slices. It’s rich enough that a little goes a long way.
Tips
- Measure flour carefully – too much will make the cake dense.
- Use room temperature ingredients for a smoother batter.
- Don’t overmix the batter – it can make the cake tough.
- Toast coconut just until golden – it burns quickly.
- Use cake strips for flat, even layers.
- Add food coloring slowly – it’s easier to darken than fix.
- Practice the speckle technique before applying to the cake.
- Chill the cake briefly before decorating for cleaner results.
- Use yogurt instead of sour cream if needed.
- Keep frosting soft but not runny for easy spreading.
Storage and Make Ahead
This cake actually holds up really well if you make it ahead. I often bake the layers a day early and keep them wrapped at room temperature.
Once assembled, you can store it in the fridge. Just let it sit out for a bit before serving so the texture softens again.
If you want to freeze it, wrap the cake layers tightly before frosting. Then decorate fresh when you’re ready to serve.
The coconut nest is best added closer to serving time. It keeps its texture better that way, which I’ve learned the hard way.
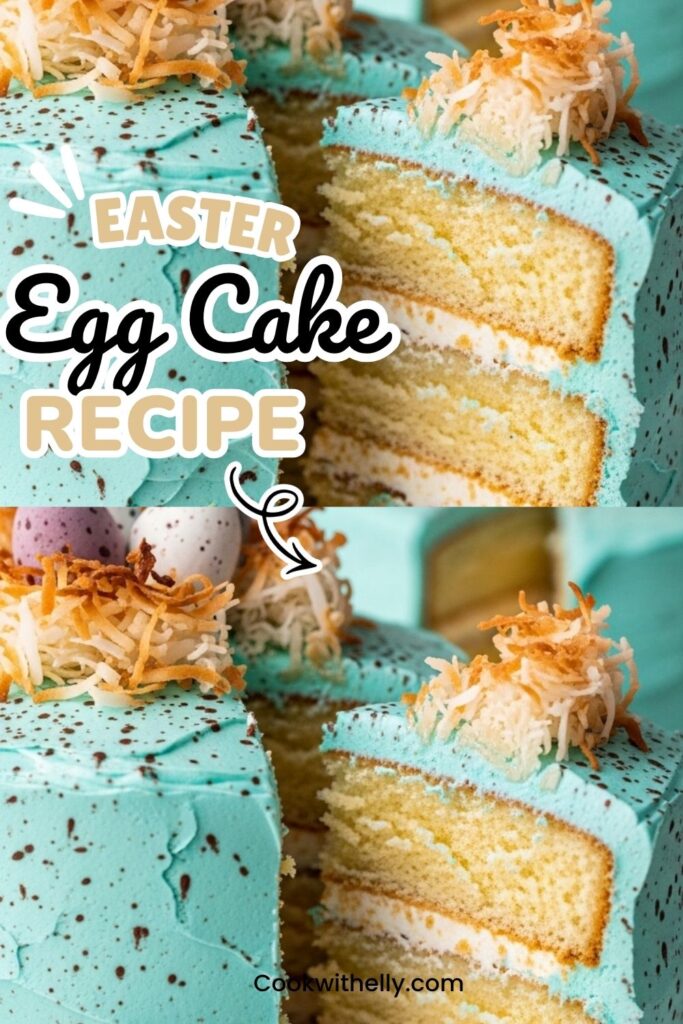
Easter Egg Cake Recipe
Description
This stunning Easter Egg Cake is a moist, vanilla-layered masterpiece topped with a robin's egg blue buttercream and a whimsical toasted coconut nest filled with chocolate eggs. Perfect for spring celebrations, this cake combines bright, fresh flavors with a fun, festive presentation that will delight guests of all ages. The vanilla sponge is incredibly tender, and the buttercream can be customized to achieve that perfect speckled egg look.
ingredients
For the Vanilla Cake
For the Vanilla Buttercream
For Assembly & Decoration
Instructions
Preparation & Cake Baking
-
Preheat and Prep Pans
Preheat your oven to 340°F (173°C). Grease and flour three 6-inch round cake pans. For perfectly flat layers, wrap cake strips around the outside of the pans.If you don't have cake strips, you can make your own with wet paper towels and foil. -
Toast Coconut
Spread the shredded coconut on a baking sheet. Bake for 5-10 minutes, stirring once, until golden brown. Watch closely as it burns quickly. Set aside to cool completely. -
Mix Dry Ingredients
In a large bowl, sift together the flour, sugar, baking soda, baking powder, and salt. Whisk to combine evenly.Sifting ensures a light, fluffy texture. -
Mix Wet Ingredients
In a medium bowl, whisk together the egg whites, vanilla extract, sour cream, and whole milk. Add the softened butter and mix until combined. Small clumps of butter are okay; they will incorporate later.Ensure ingredients are at room temperature for best emulsification. -
Combine Batter
Pour the wet mixture into the dry ingredients. Mix on low speed just until combined. Do not overmix.Overmixing leads to a tough cake. -
Bake
Divide the batter evenly among the three prepared pans. Bake for 25-30 minutes, or until the centers spring back when lightly touched and a toothpick comes out clean. -
Cool
Let the cakes cool in the pans for 10 minutes, then turn them out onto a wire rack to cool completely before frosting.
Making the Buttercream
-
Cream Butter
In a stand mixer fitted with a paddle attachment, beat the butter on medium-high speed until light and fluffy (about 3-5 minutes). -
Add Sugar and Flavor
Gradually add the sifted confectioners' sugar, one batch at a time, mixing on low until incorporated. Add the vanilla, salt, and 1 tablespoon of milk. Beat on high for 2 minutes until smooth.Add more milk if the frosting is too stiff. -
Color the Frosting
Add blue gel food coloring drop by drop until you achieve a robin's egg blue. If your butter is very white, add a tiny drop of yellow to warm the tone. Mix well.Gel coloring provides vibrant color without thinning the frosting.
Assembly and Decoration
-
Layer the Cake
Place one cake layer on a serving plate. Pipe a layer of buttercream over the top. Repeat with the second layer. Top with the final cake layer.Optional: Sprinkle toasted coconut between layers for extra texture. -
Crumb Coat and Frost
Apply a thin crumb coat of frosting to seal in crumbs. Chill for 15 minutes. Then, apply a thick, even layer of frosting over the entire cake. Use a bench scraper to smooth the sides and top.Rotate the cake while scraping for a smooth finish. -
Create Speckles
Mix the cocoa powder with vanilla extract (or vodka) to create a thin slurry. Dip a clean paintbrush into the mixture and flick the bristles with your finger over the cake and chocolate eggs to create a speckled 'robin's egg' effect.Practice on paper first to master the splatter technique. Lay down paper towels to catch stray drops. -
Make the Nest
Pipe a ring of buttercream on top of the cake. Gently press the toasted coconut into the ring to form a nest shape. -
Add Eggs
Place the mini chocolate eggs gently into the center of the coconut nest. Chill the cake for 15 minutes before serving to set the frosting.
Nutrition Facts
Servings 12
Serving Size 1 slice
- Amount Per Serving
- Calories 685kcal
- % Daily Value *
- Total Fat 38gg59%
- Saturated Fat 24gg120%
- Trans Fat 0gg
- Cholesterol 105mgmg35%
- Sodium 245mgmg11%
- Potassium 180mgmg6%
- Total Carbohydrate 82gg28%
- Dietary Fiber 1gg4%
- Sugars 64gg
- Protein 5gg10%
- Calcium 8% mg
- Iron 4% mg
* Percent Daily Values are based on a 2,000 calorie diet. Your daily value may be higher or lower depending on your calorie needs.
Note
- Pan Sizes: This recipe makes three 6-inch layers. Double the recipe for 8-inch pans or triple it for 9-inch pans.
- Flour Measurement: For the most accurate results, weigh your flour. If using cups, fluff the flour, spoon it into the cup, and level it off. Too much flour makes a dry cake.
- Substitutions: Whole milk yogurt can be substituted for sour cream with excellent results.
- Butter Clumps: If you see small butter clumps after mixing wet ingredients, don't worry; they will disappear once combined with the dry ingredients.
- Make Ahead: The cake layers can be baked, wrapped, and frozen up to a month in advance. Assemble and decorate the day before, adding the fresh coconut nest and eggs just before serving.
Frequently Asked Questions
How do you make robin egg blue icing?
Start with a turquoise blue gel food coloring. Since butter has a natural yellow tint, mixing blue into the buttercream often creates the perfect robin's egg shade. If your butter is very white, add a tiny drop of yellow food coloring to warm up the blue. Always mix in small increments.
Can you make this cake in advance?
Yes! The cake layers freeze beautifully. You can bake them weeks ahead, wrap them tightly in plastic wrap and foil, and freeze. Thaw before assembling. The fully decorated cake can be made a day ahead and refrigerated, but add the coconut nest and chocolate eggs closer to serving time to maintain crunch and prevent color bleeding.
Where can I find Robin's Egg blue chocolate eggs?
Cadbury Mini Eggs are widely available during the Easter season. Hershey's also produces pastel-colored mini eggs that often include a bright blue similar to a robin's egg. Check local grocery stores or online retailers in early spring.
Can I make cupcakes instead?
Absolutely. Fill cupcake liners 2/3 full and bake for 18-20 minutes. Once cooled, frost with the blue buttercream, roll the edges in toasted coconut to mimic a nest, and place a mini egg on top.