
 View Gallery
1 photo
View Gallery
1 photo
You know that feeling when you want something deeply, intensely chocolate, but you can’t decide between a brownie, a piece of cake, and a cookie?
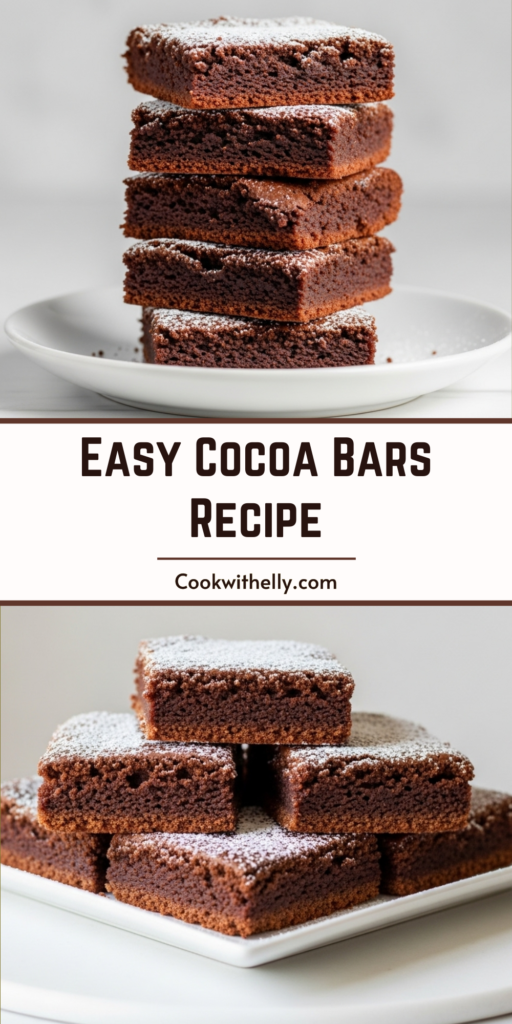
That’s exactly where these Cocoa Bars live, in that perfect, happy middle ground where all the best chocolate dreams meet.
Why These Bars Feel Like a Secret
Most bar cookies are happy to be just that, a cookie you can pick up with your fingers.
These, though, they have a different ambition—they bake up with the tender, delicate crumb of a fine chocolate cake, just dense enough to hold its shape in a neat little square.
It’s a wonderful trick, one that makes them feel incredibly special.
You’re essentially making a stunningly simple sheet cake, and then cutting it into these elegant, portable portions.
Ingredients Needed for the Recipe
Gathering everything first is a quiet little ritual that sets you up for success, trust me.
- ½ cup shortening or butter: This is the backbone, giving the bars structure and that melt-in-your-mouth quality. I always use butter for its rich flavor.
- 1 cup granulated sugar: It sweetens, of course, but it also works with the butter to create that essential light and fluffy foundation when creamed.
- 1 large egg: Our binding agent, the glue that holds the texture together and adds a touch of richness.
- ¾ cup buttermilk or sour milk: This is the secret weapon for a tender crumb. The slight acidity reacts with the baking soda, giving the bars a beautiful, cakey lift.
- 1 teaspoon vanilla extract: The flavor enhancer, it rounds out the chocolate and makes it taste even more complex and, well, complete.
- 1 ½ cups all-purpose flour: The main structure-builder, giving the bars their body so they can be cut neatly.
- ½ teaspoon baking soda: Our leavening agent, waiting to activate with the buttermilk and create those lovely air pockets.
- ½ teaspoon salt: Never, ever skip this. It’s what makes the chocolate flavor pop and prevents the sweetness from being one-dimensional.
- ½ cup unsweetened cocoa powder: The star of the show. This generous amount is what delivers that deep, dark, almost fudgy chocolate intensity.
How to make ?
The process is beautifully straightforward, a few simple steps that lead to something magnificent.
Just follow along, and don’t overthink it.
Step 1 – Prep Your Pan and Oven
Start by preheating your oven to 350°F (175°C).
Take a 13×9-inch baking pan and give it a thorough greasing with butter or a non-stick spray, every corner covered.
Step 2 – Create the Buttermilk
If you don’t have store-bought buttermilk, make your sour milk now.
Simply stir 1 tablespoon of white vinegar or lemon juice into ¾ cup of regular milk, and let it sit for 5 minutes until it looks slightly curdled.
Step 3 – Cream the Foundation
In a large mixing bowl, beat the softened butter (or shortening) and sugar together until the mixture turns pale, fluffy, and well-combined.
This isn’t just mixing, it’s incorporating air, which is the first step toward a light texture.
Step 4 – Incorporate the Wet Ingredients
Beat in the egg until fully blended, followed by the vanilla extract.
Now, pour in your prepared buttermilk, and mix just until everything is smoothly combined—the mixture will look quite liquid at this stage, and that’s perfectly fine.
Step 5 – Sift the Dry Team
In a separate bowl, sift together the flour, cocoa powder, baking soda, and salt.
Sifting might feel old-fashioned, but it’s crucial here to break up any lumps in the cocoa and ensure the leavening is evenly distributed for a uniform bake.
Step 6 – Bring It All Together
Gradually add the sifted dry ingredients to the wet mixture, mixing on low speed just until the last streak of flour disappears.
The batter will transform into something wonderfully thick, glossy, and deeply chocolate—it’s a beautiful sight.
Step 7 – Spread and Bake
Pour this luxurious batter into your prepared pan, using a spatula to spread it into an even layer.
Slide the pan into the center of your preheated oven and bake for 20 to 25 minutes.
Step 8 – The Perfect Bake Test
You’ll know the bars are done when the top is set and the edges just begin to pull away from the sides of the pan.
A toothpick inserted into the center should come out with a few moist crumbs clinging to it, not wet batter.
Step 9 – The Frosting Decision Point
This is where your personal touch comes in. The recipe suggests frosting the bars while they are still lukewarm.
If you’re using frosting, this allows it to melt just slightly, creating a wonderfully seamless, almost glazed top.
The Great Topping Debate: Frosting vs. Dusting
Now, here’s the fun part, the finishing touch that’s entirely up to your mood.
A simple dusting of powdered sugar gives them an elegant, snowy look and lets the pure chocolate flavor shine through, undisturbed.
But a swath of vanilla frosting, oh, that creates a classic, almost nostalgic contrast.
The sweet, creamy vanilla against the dark, intense chocolate cake is a combination that never, ever fails to delight.
Don’t worry if a few cake crumbs mix into the frosting as you spread it.
I think it adds character, little chocolate flecks that tell the story of what’s underneath.
Tips
- For the absolute best texture and easiest mixing, ensure your butter and egg are at room temperature before you begin. Cold ingredients don’t incorporate as smoothly.
- When measuring your flour, fluff it up in the bag, then spoon it into your measuring cup and level it off with a knife. This prevents accidentally using too much, which can make the bars dry.
- Let the bars cool completely in the pan on a wire rack before cutting if you’re going the powdered sugar route. If you’re frosting them warm, let them cool just until the pan is safe to touch.
Making Them Your Own: Variations & Swaps
The basic recipe is a flawless canvas, but feel free to play.
Stir a cup of semi-sweet chocolate chips or chopped walnuts into the batter right before spreading for added texture.
Love a mocha note? Add a teaspoon of instant espresso powder to the dry ingredients—it won’t taste like coffee, just richer, more profound chocolate.
And for the frosting, a cream cheese frosting or a simple chocolate ganache are both spectacular choices.
Cocoa Bars Recipe
Description
These Cocoa Bars deliver an intensely chocolatey experience—more like a fudgy chocolate cake than a cookie! With a full ½ cup of cocoa and a soft, cake-like texture, they’re perfect for satisfying deep chocolate cravings. Serve them dusted with powdered sugar or frosted with your favorite vanilla buttercream for a stunning contrast.
Ingredients
Instructions
-
Preheat oven to 350°F (175°C). Grease a 13x9x2-inch baking pan.
-
In a large bowl, cream together shortening (or butter) and sugar until light and fluffy. Beat in the egg until well combined.
-
Stir in buttermilk (or sour milk) and vanilla extract until smooth.
-
In a separate bowl, sift together flour, baking soda, salt, and cocoa powder.
-
Gradually add the dry ingredients to the wet ingredients, mixing until just combined and a thick, rich batter forms.
-
Spread the batter evenly into the prepared pan.
-
Bake for 20–25 minutes, or until a toothpick inserted in the center comes out clean.
-
Cool in the pan for 10 minutes, then frost while still lukewarm—or cool completely and dust with powdered sugar.
Nutrition Facts
Servings 48
Serving Size 1 bar
- Amount Per Serving
- Calories 120kcal
- % Daily Value *
- Total Fat 5g8%
- Saturated Fat 1.5g8%
- Cholesterol 10mg4%
- Sodium 85mg4%
- Potassium 70mg2%
- Total Carbohydrate 18g6%
- Dietary Fiber 1g4%
- Sugars 12g
- Protein 2g4%
- Calcium 30 mg
- Iron 1 mg
* Percent Daily Values are based on a 2,000 calorie diet. Your daily value may be higher or lower depending on your calorie needs.
Note
- Buttermilk substitute: Mix ¾ cup milk + 1 tbsp vinegar or lemon juice. Let sit 5 minutes before using.
- Frosting tip: For best results, frost while bars are still slightly warm so the frosting melts slightly and adheres better.
- Storage: Keep unfrosted bars in an airtight container up to 5 days, or freeze for longer storage.
- Butter option: Butter adds richer flavor; shortening yields a softer, more cake-like texture.
Frequently Asked Questions
Can I use natural or Dutch-process cocoa?
Yes! Both work, but Dutch-process cocoa will give a smoother, deeper chocolate flavor and darker color.
How many bars does this recipe make?
Depending on how you cut them, you’ll get about 48 small bars (1.5x1.5 inches) from a standard 13x9-inch pan.