
 View Gallery
1 photo
View Gallery
1 photo
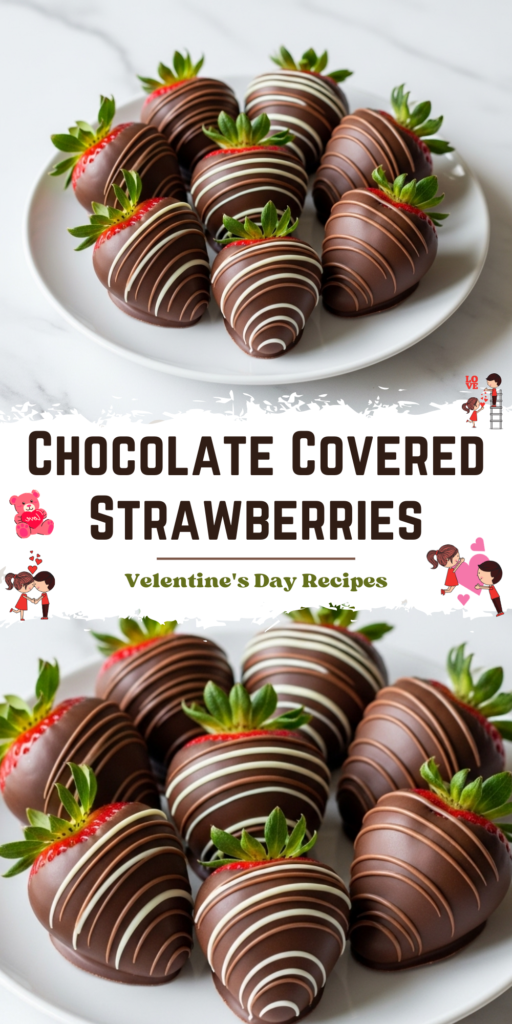
There’s something just magical about a chocolate covered strawberry, isn’t there? It’s that perfect little bite. You get the cool, sweet burst of a ripe berry, followed immediately by the rich, shattering snap of dark chocolate. It’s an experience, really. And here’s the best part—they are crazy simple to make at home. Seriously.
You don’t need a special occasion, though they certainly make any day feel like one. Valentine’s Day, a birthday, a random Tuesday that needs a pick-me-up… they’re always the right choice. I’m Elly, and this is my tried-and-true method. Let’s make some magic.
The Joy of a Homemade Treat
Store-bought versions can be lovely, of course. But have you seen the price? Ouch. When you make them yourself, you control everything. You pick the plumpest, reddest berries. You choose a really good chocolate that you love to eat. You get to decorate them exactly how you want. That feeling of handing someone a plate of these, knowing you made them with a little bit of care, that’s the real secret ingredient. It turns a simple dessert into a tiny gift.
Ingredients Needed for the Recipe
Here’s your short and sweet shopping list. Quality really sings here, so choose the best you can find.
- 1 pound of fresh strawberries: The stars of the show. Look for bright red color and perky green leaves.
- 6 ounces of semisweet chocolate, chopped: A good baking bar or wafers melt smoothly. This gives that perfect bittersweet balance against the sweet berry.
- 1 teaspoon of coconut oil or vegetable shortening, divided: Our little kitchen hack! This helps the chocolate set with a beautiful sheen and a satisfying snap.
- 3 ounces of white chocolate (optional, for drizzling): Purely for decoration, but that elegant drizzle makes them look professionally done.
- Toppings like mini chocolate chips, chopped nuts, or sprinkles (optional): For a bit of playful texture and extra flair.
How to make Chocolate Covered Strawberries Recipe?
The process is a joy, a little moment of calm, focused kitchen time. Just follow these steps, and you really can’t go wrong.
Step 1 – Prep Your Berries & Station
First, wash those strawberries gently but thoroughly. Then, and this is the most crucial step, dry them. Pat each one completely dry with a towel. Let them air-dry on a paper towel for a bit, even.
Any stray water droplet will make your smooth chocolate seize up and become grainy. While they dry, line a baking sheet with parchment paper. This is your landing pad.
Step 2 – Melt the Chocolate Carefully
Place your chopped semisweet chocolate and about 3/4 teaspoon of your coconut oil into a microwave-safe bowl. A tall, narrow one is ideal. Heat it in the microwave for 30 seconds. Stop. Stir it well. Heat for another 30 seconds. Stir again.
You want to melt it slowly, with the residual heat doing most of the work. Stop when there are just a few small lumps left—stirring will melt them completely. Overheating is the enemy of smooth chocolate.
Step 3 – The Art of the Dip
Take a dry strawberry and insert a toothpick into its stem end, right under the leaves. This is your little handle. Holding the toothpick, dip the berry into the melted chocolate. Swirl it gently to coat it fully. Lift it up, and give it a gentle tap or a slight scrape against the bowl’s edge to let the excess chocolate drip off.
Step 4 – Add Toppings or Set
If you’re using sprinkles or chopped nuts, now’s the time. Have them in a shallow dish, and just roll the wet chocolate berry in them right after dipping. Then, place the strawberry on your parchment-lined sheet. Gently slide it forward an inch as you set it down.
This prevents a big, flat chocolate “foot” from forming. Repeat with the rest. If your chocolate gets too thick, just zap it for 10 more seconds.
Step 5 – The Fancy Drizzle (Optional)
For that classic drizzle, melt the white chocolate with the remaining 1/4 teaspoon of oil, using the same careful method. Let it cool for just a minute, then transfer it to a small plastic bag. Snip a tiny, and I mean tiny, hole in one corner.
Lift a chocolate-dipped berry by its toothpick and drizzle the white chocolate back and forth over it. It feels like you’re painting. Place it back on the sheet.
Step 6 – Let Them Set
Now, patience. You can let them set at cool room temperature for about 30 minutes, or pop the whole tray in the fridge for 15. The chocolate will harden into that gorgeous, glossy shell.
Gently twist and pull out the toothpicks before serving. And there you have it.
Choosing Your Chocolate & Berries
Let’s talk ingredients for a second, because this is where you can truly customize. For chocolate, I swear by a good quality semisweet bar or baking wafers. They’re formulated to melt beautifully. Chocolate chips can be tempting, but they have stabilizers to keep their shape in cookies, so they don’t melt as smoothly.
As for the berries, seek out the fragrant ones. If you can find them at a farmers’ market in season, you’ll be rewarded with unbelievable sweetness.
Tips
These aren’t rules, just friendly advice from someone who’s made a few thousand of these.
- Dry berries are non-negotiable. Dampness is the only real pitfall here.
- Use a tall container for dipping. A small liquid measuring cup is perfect. It allows for a deep, even coat in one smooth motion.
- Room temperature berries are best. Don’t dip them straight from the fridge.
- If you want to keep them at room temperature for hours, look up tempering chocolate. Our coconut oil method is simpler but requires refrigeration for storage.
- Have fun with decorations! A little flaky sea salt after dipping is divine. So are crushed freeze-dried raspberries.
Serving & Storing Your Creation
These are best enjoyed the day they’re made, when the berry is at its peak freshness. Arrange them on a simple platter—they are the decoration. To store any leftovers, place them uncovered on their parchment-lined tray in the refrigerator.
An airtight container will create condensation, which leads to sad, sticky chocolate. They’ll keep for a day or two, but honestly, they never last that long around here.
And that’s everything. You’ve just made a decadent, beautiful treat that feels fancy but is wonderfully straightforward. Go on, take that first bite. Listen for the snap. That’s the sound of success.
Chocolate Covered Strawberries Recipe
Description
Homemade Chocolate-Covered Strawberries are a classic romantic treat that’s secretly SO easy to make! With just a few ingredients—fresh strawberries, high-quality semisweet chocolate, and a touch of coconut oil—you’ll have a gourmet dessert ready in minutes. Perfect for Valentine’s Day, anniversaries, birthdays, or just because, these sweet berries are beautiful, customizable, and utterly irresistible.
ingredients
Instructions
-
Line a rimmed baking sheet with parchment paper or a silicone baking mat.
-
Place the semisweet chocolate and ¾ teaspoon coconut oil in a small, deep microwave-safe bowl or measuring cup. Microwave in 30-second bursts, stirring between each, until just melted and smooth. Avoid overheating.
-
Insert a toothpick into the stem end of each strawberry, gently pushing leaves upward. Dip each berry completely into the melted chocolate, then tap lightly to remove excess. If using toppings like nuts or sprinkles, roll immediately after dipping while chocolate is still wet.
-
Place dipped strawberries on the prepared baking sheet, sliding slightly forward to prevent pooling. Repeat with remaining berries.
-
If adding a drizzle, melt white/milk chocolate with remaining ¼ teaspoon coconut oil in 15–30 second bursts until smooth. Transfer to a piping bag or zip-top bag, snip a tiny corner, and drizzle over set strawberries.
-
Let strawberries set at room temperature for about 30 minutes, or speed up in the fridge for 15 minutes. Remove toothpicks before serving.
Nutrition Facts
Servings 8
Serving Size 1 strawberry
- Amount Per Serving
- Calories 120kcal
- % Daily Value *
- Total Fat 7gg11%
- Saturated Fat 5gg25%
- Trans Fat 0gg
- Cholesterol 0mgmg0%
- Sodium 5mgmg1%
- Potassium 150mgmg5%
- Total Carbohydrate 14gg5%
- Dietary Fiber 2gg8%
- Sugars 11gg
- Protein 1gg2%
- Calcium 20 mg
- Iron 1 mg
* Percent Daily Values are based on a 2,000 calorie diet. Your daily value may be higher or lower depending on your calorie needs.
Note
- Always dry strawberries thoroughly—any moisture will cause chocolate to seize.
- Use baking chocolate, not chips, for smoother melting and better texture.
- Store uncovered in the fridge for up to 2 days; do not freeze.
- For room-temperature stability, temper the chocolate instead of using coconut oil (see tempering guide).
Frequently Asked Questions
Can I use chocolate chips instead of baking chocolate?
Not recommended. Chocolate chips contain stabilizers that prevent smooth melting, which can result in a grainy or dull coating. Use high-quality baking chocolate or wafers for best results.
How long do chocolate-covered strawberries last?
They’re best enjoyed within 1–2 days. Store them uncovered in the refrigerator to prevent condensation, which can make the chocolate sticky or cause the berries to weep.
Can I make these ahead of time?
Yes! Prepare them up to 24 hours in advance and keep refrigerated. Let them sit at room temperature for 10–15 minutes before serving for optimal flavor and texture.