 View Gallery
1 photo
View Gallery
1 photo
Sometimes you just need the right kind of easy. You know, the kind that quietly gets itself together while you’re off doing everything else.
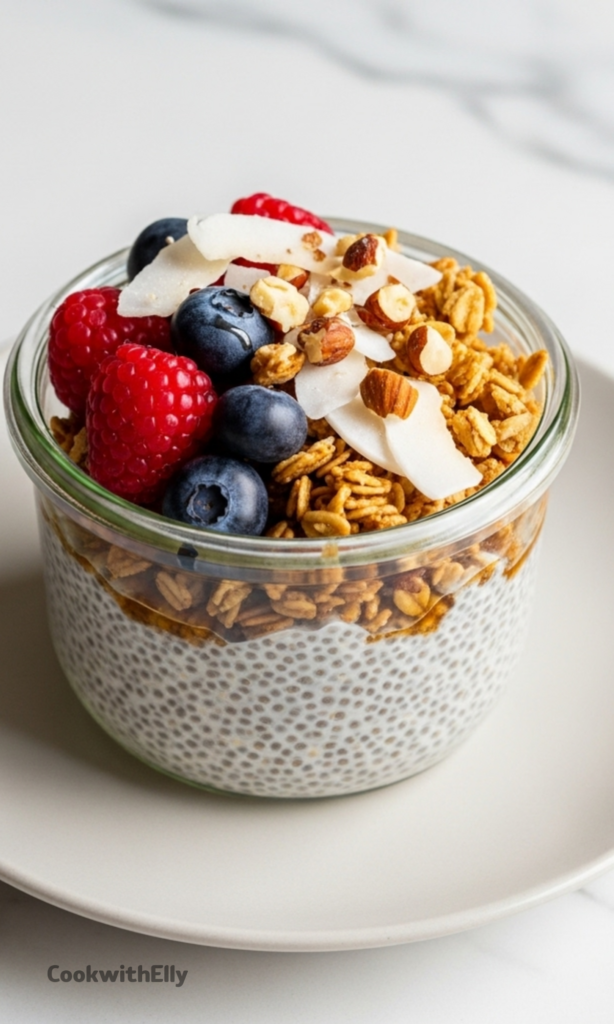
Chia seed pudding is exactly that kind of magic, a no-cook wonder that transforms simple ingredients into something rich and satisfying.
Why This Recipe Fits Your Life
As the days get warmer, I find myself reaching for this recipe more and more. It’s cool, creamy, and feels like a gentle start to the morning.
It also makes a brilliant afternoon pick-me-up, that sweet spot where you need something substantial but not heavy. The beauty is in its simplicity and its versatility.
Ingredients Needed for the Recipe
Gathering your ingredients is the first tiny step towards your perfect pudding. Each one plays a specific role.
- Chia Seeds: The star of the show. These tiny seeds absorb liquid and swell up, creating the unique, gelatinous texture that makes the pudding.
- Almond Milk: The liquid base that the chia seeds soak up. It keeps things light and adds a subtle nutty flavor.
- Maple Syrup: A natural sweetener that blends in seamlessly. It adds just the right amount of sweetness without overpowering.
- Cinnamon: A pinch provides a warm, comforting depth that makes the pudding taste special, a little like a treat.
- A Pinch of Salt (Optional): This isn’t just for show. A tiny bit of salt makes all the other flavors pop and become more defined.
How to make Chia Seed Pudding?
The process is almost laughably simple. But a few key steps ensure you get that perfect, creamy consistency every single time.
Step 1: Combine & Shake
Grab a lidded jar, a mason jar works perfectly. Pour in your almond milk, chia seeds, maple syrup, and cinnamon.
Secure that lid tightly, and give it a really good, vigorous shake. You want everything to be completely combined and the seeds evenly distributed.
Step 2: The Initial Chill
Place the jar in the refrigerator and let it sit undisturbed for about two to three hours. This gives the seeds a chance to start absorbing the liquid.
They’ll begin to swell and form a loose gel. You might see some separation, and that’s completely normal at this stage.
Step 3: The Crucial Stir
This step is the secret to a smooth pudding, not a lumpy one. After the initial chill, take the jar out and give it a very thorough stir.
You’re breaking up any clumps of chia seeds that have stuck together or sunk to the bottom. If they stay clumped, they can’t absorb liquid properly.
Step 4: The Final Set
Once stirred, cover the jar again and return it to the fridge. Let it set completely, preferably overnight or for at least eight hours.
Patience is your friend here. In the morning, you’ll find a beautifully thick, spoonable pudding ready for you.
The Magic of Meal Prep
If you’re someone who appreciates a ready-to-go breakfast, this recipe will become a fast favorite. It’s a meal-prep dream.
You can make a large batch in a big bowl or several individual portions in small jars. They’ll keep beautifully in the fridge for up to five days.
Tips
A few little pointers can make the difference between a good pudding and a great one. Keep these in mind.
- If your pudding seems too thin after its overnight rest, simply stir in an extra half tablespoon of chia seeds and chill for another few hours.
- Always wait to add your toppings until just before you eat. This keeps crunchy elements crisp and fresh fruit from getting soggy.
- Feel free to scale the recipe up or down. The golden ratio is typically two tablespoons of chia seeds for every half cup of liquid.
Your Topping Playground
This is where the real fun begins, and you can make it different every single day. The creamy, vanilla-and-cinnamon base is a perfect canvas.
Fresh berries, sliced peaches, or tart cherries add a juicy, bright contrast. For crunch, sprinkle on granola, chopped almonds, or coconut flakes.
A final drizzle of maple syrup or a sprinkle of dark chocolate chips turns it into a legitimate dessert. Don’t be shy about mixing and matching.
Choosing Your Vessel
While any airtight container works, I have a soft spot for using glass jars. There’s something satisfying about seeing the layers.
Small, clear jars with lids are ideal for individual portions. They’re portable, they look lovely, and they make your fridge feel organized.
If you’re making a big batch for the family, a simple mixing bowl with a cover is all you need. Just give it a good stir before serving.
How to Store
Keep your finished chia pudding covered in the refrigerator. It will stay fresh and delicious for about four to five days.
If it thickens up a bit more than you’d like over time, simply stir in a splash of extra milk to loosen it to your preferred consistency.
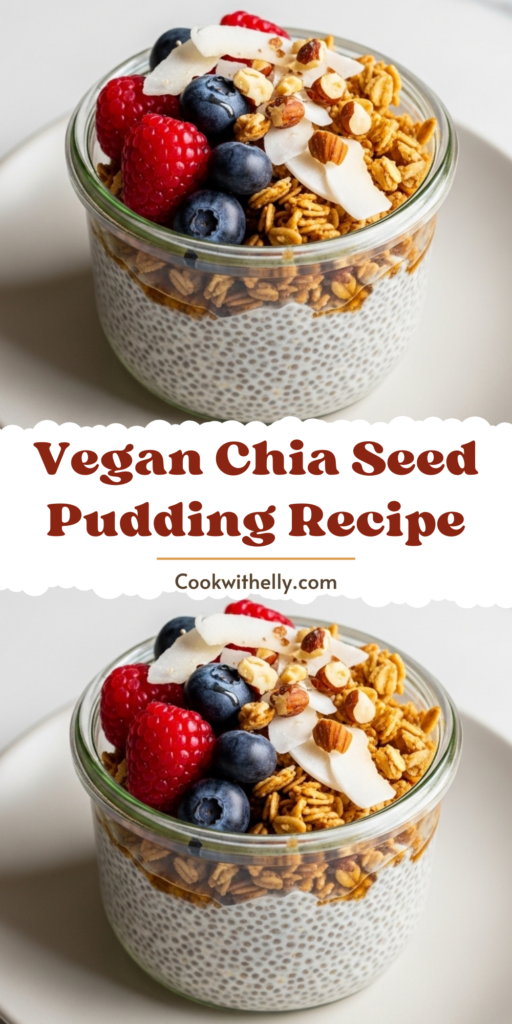
Chia Seed Pudding Recipe
Description
This easy chia seed pudding recipe is a perfect healthy breakfast or snack! It tastes like dessert, but it's filled with fiber, protein, and healthy fats. Cool, creamy, and lightly sweet with a hint of cinnamon, it’s ideal for meal prep and keeps well in the fridge for up to 5 days. Top it with fresh fruit, homemade granola, and a drizzle of maple syrup for a satisfying treat that’s both nourishing and delicious.
ingredients
Base Pudding
Optional Toppings
Instructions
-
In a lidded jar or airtight container, combine almond milk, chia seeds, maple syrup, cinnamon, and a pinch of salt (if using).
-
Secure the lid and shake vigorously for 20–30 seconds to combine thoroughly.
-
Refrigerate for 1–2 hours, then remove and stir well to break up any clumps of chia seeds.This step ensures even liquid absorption and a smooth texture.
-
Return to the refrigerator and chill for at least 6–8 hours or overnight until thick and pudding-like.
-
Before serving, stir again. If too thick, loosen with a splash of milk.
-
Top with fresh fruit, granola, coconut flakes, chopped nuts, and an extra drizzle of maple syrup as desired.Add toppings just before eating if meal prepping.
Nutrition Facts
Servings 1
Serving Size 1 serving (approx. 1 cup with toppings)
- Amount Per Serving
- Calories 220kcal
- % Daily Value *
- Total Fat 13 gg20%
- Saturated Fat 1.5 gg8%
- Trans Fat 0 gg
- Cholesterol 0 mgmg0%
- Sodium 95 mgmg4%
- Potassium 230 mgmg7%
- Total Carbohydrate 20 gg7%
- Dietary Fiber 10 gg40%
- Sugars 6 gg
- Protein 7 gg15%
- Calcium 180 mg
- Iron 2.5 mg
* Percent Daily Values are based on a 2,000 calorie diet. Your daily value may be higher or lower depending on your calorie needs.
Note
- Ratio tip: Use 2 tbsp chia seeds per ½ cup milk for ideal consistency.
- Too thin? Stir in ½–1 tsp more chia seeds and chill 2–3 hours longer.
- Meal prep friendly: Stores in airtight jars for up to 5 days. Add toppings just before eating.
- Milk options: Works with oat, coconut, soy, or dairy milk—choose your favorite!
Frequently Asked Questions
Can I make this chia pudding with regular milk instead of almond milk?
Yes! Any milk—dairy or plant-based—works well. Just note that using dairy milk makes it non-vegan.
Why is my chia pudding lumpy or too thin?
Lumpiness usually happens when seeds clump together before absorbing liquid. Be sure to stir after 1–2 hours of chilling. If too thin, add a bit more chia seeds and chill longer.
Can I scale this recipe for more servings?
Absolutely! This recipe doubles or triples easily—ideal for weekly meal prep.