 View Gallery
1 photo
View Gallery
1 photo
Okay, let me just say this: I used to think seared scallops were one of those fancy restaurant dishes that you couldn’t possibly nail at home. But then I tried this method, and honestly? It changed my mind. With just a few simple steps and the right timing, you can get that golden crust and tender interior that makes scallops feel like a special occasion, even on a random Tuesday.
The trick is really not to overthink it. Scallops are delicate, yes, but they’re also pretty forgiving if you follow a few key rules. I’ve tested this recipe enough times to know what works—and what doesn’t. If you’ve ever ended up with rubbery scallops or a pan full of stuck-on seafood, you’re going to love how clean and easy this technique is.
What I love most is how fast it comes together. You can have restaurant-quality scallops on the table in under 30 minutes, and they look like you spent way more time on them than you actually did. That’s the kind of dinner I want on repeat.
Ingredients Needed for the Recipe
- Large dry sea scallops – The star of the dish. Dry scallops sear better and stay juicy.
- Coarse sea salt or kosher salt – For seasoning the scallops and bringing out their natural sweetness.
- Freshly cracked black pepper – Adds a gentle bite without overpowering the scallops.
- Optional paprika – For a subtle smoky color and flavor.
- High heat oil (canola, grapeseed, peanut, vegetable, or light olive oil) – Helps achieve that perfect crust without burning.
- Unsalted butter – Added at the end for richness and that restaurant-style finish.
- Garlic – For the lemon butter sauce, providing aromatic depth.
- Lemon juice – Brightens the sauce and balances the richness.
- Red pepper flakes – Just a pinch for a touch of heat.
- Fresh flat-leaf parsley – Adds freshness and color to the sauce.
How to make Best Scallop Recipe?
Step 1 – Remove the Side Muscle
First, check each scallop for that little side muscle flap. It’s a tiny, tough piece on the side that can be chewy if left on. I just pinch it and gently pull it off. Sometimes it’s barely there, and other times it’s more noticeable, but either way, it should come off easily.
Removing it might feel like an extra step, but trust me, it makes the texture so much better. Once they’re clean, you’re ready to move on.
Step 2 – Dry and Season the Scallops
Pat the scallops very dry with paper towels. Like, really dry. This is the biggest difference between a good sear and a sad, soggy one. If the scallops are wet, they’ll steam instead of sear.
Then season the top side with half the salt and pepper. If you’re using paprika, sprinkle a little now too. I like doing it in two stages so the seasoning spreads evenly without drawing out moisture too early.
Step 3 – Heat the Pan Properly
Heat a heavy-bottom skillet (stainless steel or cast iron works best) over high heat for at least 5 minutes. This part is key because the pan needs to be seriously hot before the oil goes in. When you add the oil, it should ripple and almost smoke.
And don’t add the oil to a cold pan. That’s a quick way to end up with sticking scallops and a frustrating cleanup. A hot pan is a happy pan.
Step 4 – Sear the First Side
Place half the scallops in the pan, seasoned side down, spaced apart so they aren’t touching. You want room for that crust to form. Let them cook undisturbed for about 3 minutes. You’ll know they’re ready when the bottom turns golden brown.
While they’re searing, season the tops with the remaining salt and pepper and a touch more paprika if you’re using it. It’s like the final touch that makes them taste like a restaurant dish.
Step 5 – Flip and Finish with Butter
Use tongs to gently flip each scallop, then add half a tablespoon of butter. Cook for another 1–2 minutes, just until done. If they don’t release easily from the pan, give them a little more time. They’ll loosen once that crust is fully formed.
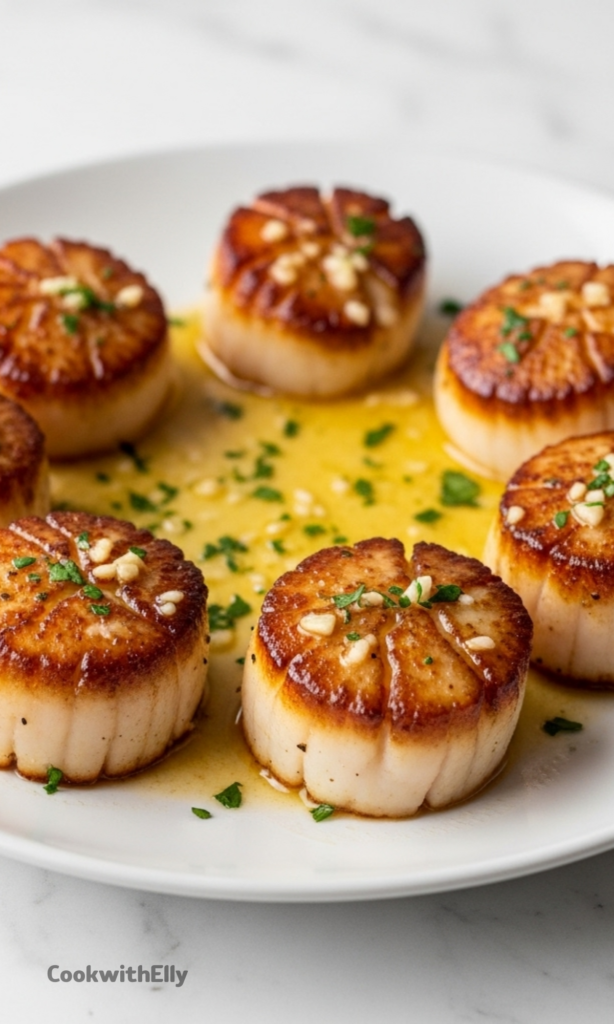
When they’re done, they should be golden brown on the outside and barely opaque on the sides. Slightly firm, springy in the center, not mushy or tough. If you’re unsure, err on the side of undercooking—they’ll keep cooking a bit from residual heat once removed.
Step 6 – Repeat the Process
Transfer the cooked scallops to a plate, then clean out the pan and repeat with the second batch. This keeps the pan hot and prevents overcrowding, which would cause steaming instead of searing.
It’s worth the extra minute, because crowded scallops just don’t get that same crispy crust.
Step 7 – Make the Garlic Lemon Butter Sauce
Lower the heat to medium-low and melt the butter in the same pan. Add the minced garlic, red pepper flakes, salt, and pepper. Sauté for about 30 seconds until fragrant, scraping up the brown bits from the pan.
Then add the lemon juice and parsley, stirring to combine. Taste and adjust with more lemon or salt if needed. This sauce is bright and buttery, and it really elevates the scallops without overwhelming them.
Step 8 – Serve Immediately
Drizzle the sauce over the scallops and serve right away. They’re best hot, with that crisp exterior still intact. If you wait too long, the texture starts to soften, and that’s just not the point of seared scallops.
I usually serve them right after plating, because I want that first bite to still have that perfect crunch.
Tips
- Use dry scallops: They sear better and don’t release water in the pan.
- Pat them dry: Moisture is the enemy of a good crust.
- Don’t overcrowd the pan: Give them space so they sear instead of steam.
- Heat the pan well: A hot pan is essential for a golden crust.
- Season right before cooking: Salt too early draws out moisture.
- Err on undercooking: Scallops can toughen quickly, so add extra time only if needed.
- Use a heavy pan: Stainless steel or cast iron helps distribute heat evenly.
Serving Ideas That Make This Feel Like a Real Meal
I love pairing scallops with creamy sides like mashed potatoes or risotto because the richness balances the delicate sweetness of the scallops. It feels like a full dinner, not just a fancy appetizer.
If you want something lighter, a lemon garlic pasta works beautifully. The citrus notes echo the sauce, and the scallops sit on top like the star they are. And if you’re in a veggie mood, roasted asparagus or a fresh Mediterranean salad makes the whole plate feel bright and balanced.
Storage & Reheating (If You Have Leftovers)
If you have leftovers, let the scallops cool completely before storing them. I keep them in an airtight container in the fridge for 1–2 days. They don’t stay quite as crisp, but they’re still delicious.
To reheat, warm them gently in a pan over low heat or microwave in short bursts. The goal is just to warm them through without overcooking, because that’s when they turn tough.
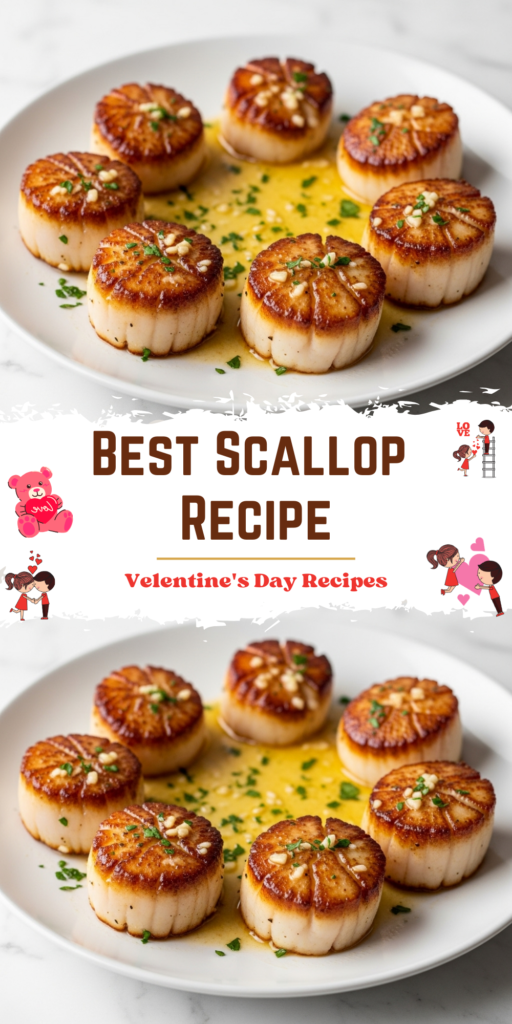
Best Scallop Recipe
Description
You will be shocked at how easy it is to make restaurant-quality seared scallops at home with the right recipe and techniques! Golden crust, juicy interior, and infused with a rich Garlic Lemon Butter Sauce—this foolproof recipe delivers impressive results in under 30 minutes.
Ingredients
Scallops
Garlic Lemon Butter Sauce
Instructions
Pan Seared Scallops
-
Remove side muscle
Pinch the small, tough flap on the side of each scallop and gently pull it away—it should peel off easily. Not all scallops will have them. -
Prep scallops
Pat the scallops very dry on both sides with paper towels. Season the top sides with half of the salt and pepper and sprinkle with paprika if using. -
Heat the pan
Heat a large, heavy-bottom skillet (stainless steel or cast iron) over high heat. Once hot, add 1½ tablespoons of oil and swirl to coat. Heat until rippling and just about smoking. -
Sear and season
Add half the scallops, seasoned side down, spaced so they aren’t touching. Sear for about 3 minutes until golden brown. While searing, season the tops with half of the remaining salt and pepper and optional paprika. -
Sear the other side
Gently flip each scallop using tongs and add ½ tablespoon butter. Cook another 1–2 minutes until just done—golden outside, slightly opaque on the sides, and springy in the center. Transfer to a plate.Scallops are done when they have a golden-brown crust and are barely opaque on the sides. They should be slightly firm but springy in the center, not mushy or tough. Always err on undercooking—they continue cooking from residual heat. -
Repeat
Clean the pan, then repeat with remaining scallops and oil/butter.
Garlic Lemon Butter Sauce
-
Sauté
Heat the same pan over medium-low. Add 3 tbsp butter. Once melted, add garlic, red pepper flakes, salt, and pepper. Sauté ~30 seconds until fragrant, scraping up browned bits. -
Finish sauce
Stir in lemon juice and parsley. Season to taste with more lemon, salt, or pepper if needed. -
Serve
Drizzle sauce over scallops and serve immediately.
Nutrition Facts
Servings 4
Serving Size 4 oz
- Amount Per Serving
- Calories 280kcal
- % Daily Value *
- Total Fat 18gg28%
- Saturated Fat 7gg35%
- Trans Fat 0gg
- Cholesterol 60mgmg20%
- Sodium 320mgmg14%
- Potassium 380mgmg11%
- Total Carbohydrate 2gg1%
- Dietary Fiber 0gg0%
- Sugars 0gg
- Protein 27gg54%
- Calcium 2 mg
- Iron 4 mg
* Percent Daily Values are based on a 2,000 calorie diet. Your daily value may be higher or lower depending on your calorie needs.
Note
- Use dry scallops: Wet scallops won’t sear properly due to added preservatives and excess moisture.
- Don’t overcrowd the pan: Cook in batches to ensure proper browning and avoid steaming.
- Resting isn’t needed: Serve immediately—scallops lose texture if held too long.
- Pairing ideas: Mashed potatoes, risotto, roasted asparagus, or a fresh Mediterranean salad.
Frequently Asked Questions
Can I use frozen scallops?
Yes! Use individually quick-frozen (IQF) dry scallops. Thaw overnight in the refrigerator or in a sealed bag submerged in cold water for 30 minutes.
How do I know when scallops are done?
They should have a golden-brown crust, be barely opaque on the sides, and feel slightly firm but springy in the center. Overcooking makes them rubbery.
Can I eat scallops raw?
Yes, but only if they’re sushi-grade or freshly harvested from a trusted source. Raw scallops are commonly used in ceviche or crudo.