
 View Gallery
1 photo
View Gallery
1 photo
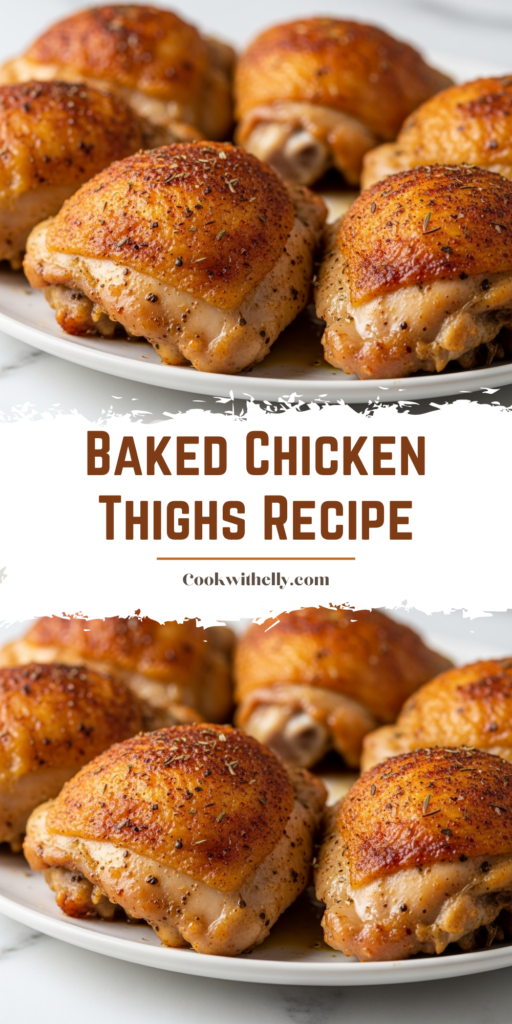
There’s a kind of magic that happens when you bake chicken thighs, a simple, forgiving alchemy that turns humble ingredients into a show-stopping dinner.
You get this incredible contrast: skin that crackles with each bite, giving way to meat that’s unbelievably juicy and tender.
Why This Recipe Earns a Permanent Spot in Your Rotation
Let’s be honest, weeknights can be hectic, and the last thing you need is a fussy recipe that dirties every pan in the kitchen.
This one is your reliable friend, with fast prep, pantry-staple seasonings, and results that feel anything but basic.
It’s the perfect foundation, too, ready to adapt to your mood or what’s sitting in the spice drawer.
You can make a big batch on Sunday and enjoy the rewards all week long, in salads, wraps, or just reheated with a quick zap.
Ingredients Needed for the Recipe
Gathering these items is the quickest part of the whole process, honestly.
Each one has a specific role in building that perfect flavor and texture we’re after.
- Bone-in, Skin-on Chicken Thighs (about 6 ounces each): The stars of the show. The bone keeps the meat incredibly moist during the high-heat bake, while the skin is our crispy prize waiting to happen.
- Olive Oil: This isn’t just to prevent sticking. It helps the seasoning cling to the chicken and promotes that beautiful, even browning and crisping we crave.
- Paprika: It adds a warm, sweet depth and a gorgeous color. Using a mix of sweet and smoked paprika is a fantastic trick for a more complex flavor.
- Garlic Powder: It delivers a steady, savory garlic note that won’t burn in the hot oven like fresh garlic might.
- Salt: The essential flavor enhancer. It seasons the meat from the surface inward, making every bite taste complete.
- Black Pepper: That little bite of heat and aromatic spice that rounds everything out perfectly.
- Dried Thyme (or Rosemary/Basil): The herbal whisper. Thyme is earthy and classic, but feel free to let your herb garden or cupboard guide you here.
The Simple Tools That Make a Difference
You don’t need anything fancy, but a couple of key items will elevate your results from good to exceptional.
A rimmed baking sheet contains any drips and makes cleanup a breeze, especially when lined with foil.
A wire baking rack is the secret weapon for ultimate crispiness.
Lifting the thighs up allows hot air to circulate all around, so the skin crisps evenly instead of sitting in rendered fat.
And finally, an instant-read thermometer takes all the guesswork out.
No more cutting into the meat to check, which lets those precious juices escape. You just know.
How to make Baked Chicken Thighs?
The process is wonderfully straightforward, with each step building towards that perfect final result.
Just follow along, and you’ll have a kitchen filled with the most tempting aroma in no time.
Step 1- Prep Your Pan and Oven
Start by preheating your oven to 425°F. This high heat is crucial for crisp skin.
Line a rimmed baking sheet with aluminum foil for easy cleanup, and place a wire rack on top.
Step 2- Dry the Skin Thoroughly
Take a paper towel and firmly pat the skin of each chicken thigh until it’s completely dry.
This might seem small, but moisture is the enemy of crispness, so this step is non-negotiable.
Step 3- Season Generously
Drizzle the olive oil over the thighs, then sprinkle your mixed seasoning all over, front and back.
Use your hands to rub the oil and seasoning into every nook and cranny of the skin, really massaging it in.
Step 4- Bake to Perfection
Place the thighs skin-side-up on the prepared rack, giving them a little space between each.
Bake them, uncovered, for about 35 to 40 minutes. The high heat will render the fat and crisp the skin beautifully.
Step 5- The Crispy Finish
Once the internal temperature hits 165°F, turn your broiler to high.
Broil the thighs for just 2-3 minutes, watching closely, to get the skin extra golden and crackly.
Flavor Twists to Keep Things Exciting
The basic seasoning blend is a masterpiece on its own, but the chicken thigh is a glorious canvas.
Don’t be afraid to play around and make it your own, depending on what you’re serving it with.
For a sticky, sweet-and-smoky version, brush on your favorite barbecue sauce during the last 15 minutes of baking.
If you’re craving something bright and zesty, toss the dried herbs and mix in a tablespoon of lemon zest with the seasoning.
A homemade lemon pepper blend is fantastic here, too. Really, any pre-made seasoning blend you love, from Italian to Cajun, will work wonderfully.
Start with about two to three teaspoons and adjust from there.
Tips
These little nuggets of advice come from making this recipe, well, a lot.
They’re the small things that ensure big success every single time.
- Stick with the high oven temperature. It seems hot, but it’s what gives you that ideal crispy-on-the-outside, juicy-on-the-inside texture.
- Always use a meat thermometer. Chicken sizes can vary, so time is not a reliable indicator. 165°F in the thickest part, without touching the bone, is your goal.
- If you don’t have a rack, you can bake the thighs directly on the foiled pan. The skin where it contacts the pan will be super crispy, though the overall crispness might be slightly less uniform.
Serving Your Masterpiece
Now for the best part, getting that glorious chicken from the pan to your plate with the perfect companions.
It’s a versatile centerpiece that pairs beautifully with so many sides.
For a classic, comforting plate, serve it alongside some creamy mashed potatoes and steamed green beans.
The juices from the chicken make an incredible impromptu gravy. If you want a hands-off meal, throw some chopped potatoes and carrots on the pan underneath the rack.
They’ll roast in the flavorful drippings. For a lighter touch, a simple, crisp salad with a tangy vinaigrette cuts through the richness beautifully.
Storing and Savoring Later
Leftovers are not a consolation prize here, they’re a planned blessing for future-you.
Let the thighs cool completely, then store them in a covered container in the refrigerator for up to four days.
The cold chicken is fantastic sliced over a salad or tucked into a sandwich. To reheat, use the microwave for a minute or two until warm.
For the crispiest leftover skin, a quick stint in a toaster oven or air fryer works wonders. You can also freeze the cooled thighs in a freezer bag for up to a month.
Just thaw them overnight in the fridge before reheating. Shredded, this leftover chicken is perfect for adding to soups, dips, or quick pasta dishes.
Baked Chicken Thighs Recipe
Description
Oven baked chicken thighs always come out juicy, tender, and delicious. This recipe couldn’t be easier to prep—bone-in thighs are seasoned, baked, and then popped under the broiler for crispy, crunchy skin and succulent meat. Perfect for weeknight dinners or meal prep, and endlessly customizable with your favorite spices!
ingredients
Instructions
-
Preheat the oven to 425°F (220°C). Line a rimmed baking pan with foil and place a wire baking rack on top.
-
Pat the chicken skin dry with a paper towel to remove excess moisture—this helps crisp the skin.
-
Drizzle the chicken thighs with olive oil. In a small bowl, mix paprika, garlic powder, salt, pepper, and thyme. Season the chicken generously and rub the mixture into the skin.
-
Place the chicken thighs on the rack, skin side up. Bake uncovered for 35–40 minutes, or until the internal temperature reaches 165°F (74°C).
-
Turn the broiler to high and broil the chicken for 2–3 minutes to crisp the skin, watching closely to prevent burning.
-
Let rest for 5 minutes before serving.
Nutrition Facts
Servings 6
Serving Size 1 thigh
- Amount Per Serving
- Calories 380kcal
- % Daily Value *
- Total Fat 25g39%
- Saturated Fat 7g35%
- Cholesterol 135mg45%
- Sodium 420mg18%
- Potassium 380mg11%
- Total Carbohydrate 1g1%
- Protein 36g72%
- Calcium 20 mg
- Iron 2 mg
* Percent Daily Values are based on a 2,000 calorie diet. Your daily value may be higher or lower depending on your calorie needs.
Note
- Want even crispier skin? Let the seasoned chicken sit uncovered in the fridge for 30–60 minutes before baking.
- Make it your own: Swap the seasoning blend for Italian, poultry, lemon pepper, or your favorite spice mix.
- Serve with: Roasted potatoes and green beans for a complete meal.
- Storage: Keep leftovers in an airtight container in the fridge for up to 4 days or freeze for up to 1 month.
Frequently Asked Questions
Can I use boneless chicken thighs?
Yes! Boneless thighs will cook faster—check for doneness around 20–25 minutes. Keep an eye on them to avoid overcooking.
How do I know when chicken thighs are done?
Use a meat thermometer! Chicken thighs are safe to eat at 165°F (74°C). They may look slightly pink near the bone—that’s normal for dark meat.