 View Gallery
1 photo
View Gallery
1 photo
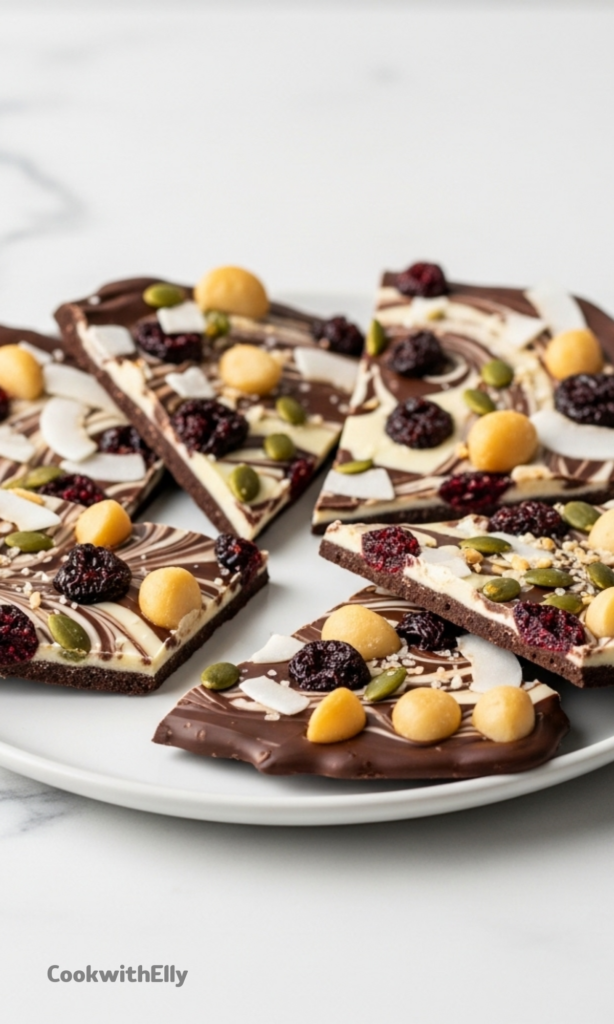
This 5-ingredient homemade chocolate bark is the kind of recipe I come back to over and over, especially when I want something sweet without committing to a whole baking project. It’s fast, forgiving, and honestly a little therapeutic to make. Melt, swirl, sprinkle, done.
I love recipes like this because they don’t demand perfection. If your swirls aren’t museum-worthy, nobody cares. It still tastes amazing, and that’s the whole point. Plus, it looks way fancier than the effort it takes.
This bark also happens to be my go-to “I need a gift by tomorrow” solution. A little parchment, a ribbon, and suddenly it looks intentional. People never guess it took less than an hour, including fridge time.
What really makes this recipe shine is how customizable it is. The base stays simple, but you can tweak the toppings based on what’s in your pantry or what mood you’re in. Sweet, salty, crunchy, chewy, it’s all fair game.
Ingredients Needed for the Recipe
- Chocolate (milk, dark, or semi-sweet) – This is the main base of the bark and where most of the flavor comes from, so quality matters.
- White chocolate – Used for contrast and swirls, adding sweetness and a pretty marbled look.
- Dried cherries – These add a chewy texture and a pop of tartness that balances the chocolate.
- Salted macadamia nuts – Rich, buttery, and slightly salty, they bring crunch and depth.
- Salted pepitas – Light, crisp, and nutty, they add texture without overpowering everything else.
- Coconut chips – Toasty and slightly sweet, these round out the bark with extra crunch.
Even though the ingredient list is short, each one pulls its weight. That balance of sweet chocolate, salty nuts, and chewy fruit is what keeps you reaching back for another piece.
I usually keep the measurements loose in my head. As long as the chocolate layer is generous and the toppings are evenly scattered, it works. This is not a recipe that needs a ruler.
Why this chocolate bark works every single time
Some recipes succeed because they’re precise. This one succeeds because it’s flexible. The chocolate doesn’t need tempering, the toppings don’t need exact placement, and the fridge does most of the work.
I also love that there’s no baking involved. When the oven is already busy or it’s just too hot to turn it on, this recipe feels like a small win. Minimal cleanup doesn’t hurt either.
Another reason this bark is so reliable is the contrast in textures. Soft melt-in-your-mouth chocolate against crunchy nuts and chewy fruit keeps it interesting. One-note desserts get boring fast, this one doesn’t.
How to make 5-ingredient homemade chocolate bark?

Step 1 – Prep the pan
Line a large cookie sheet with parchment paper or foil. Make sure it lays flat so the chocolate spreads evenly later. This step seems small, but it saves you from peeling chocolate off the pan later.
I usually grab parchment because it releases the cleanest, but foil works just fine if that’s what you have. Just smooth out the wrinkles as best you can.
Step 2 – Melt the chocolate
Chop your chocolate into small pieces so it melts evenly. Melt the darker chocolate first, either in the microwave in short bursts or over gentle simmering water. Stir often and stop when it’s mostly melted.
Let the residual heat finish the job. This keeps the chocolate glossy and smooth instead of thick or grainy. White chocolate melts faster, so use shorter intervals and a little patience.
Step 3 – Spread and swirl
Pour the melted darker chocolate onto your prepared pan and spread it into a thin, even layer. Don’t stress about perfect edges. Rustic is part of the charm here.
Pour the white chocolate over the top and gently spread it just inside the darker layer. Use a butter knife or toothpick to swirl the two together. A light hand gives the prettiest patterns.
Step 4 – Add the toppings
Sprinkle the dried cherries, macadamia nuts, pepitas, and coconut chips evenly over the chocolate. Press them down lightly so they stick once the chocolate sets.
This is the fun part, so take your time. If one corner gets more toppings than another, that just means someone gets lucky later.
Step 5 – Chill and set
Slide the pan into the fridge and let the bark chill until fully set, about 30 minutes to an hour. You’ll know it’s ready when the surface looks matte and firm.
Once set, lift it out using the parchment and break it into pieces by hand. No knives needed, and uneven shards actually look better.
Flavor variations I actually make
One of my favorite things about this bark is how easy it is to change the flavor without changing the process. The base stays the same, but the personality shifts completely.
During the holidays, I lean toward dried cranberries, pistachios, and a sprinkle of flaky salt. It feels festive without being overly sweet.
In summer, I like dried mango or pineapple with toasted coconut and dark chocolate. It’s rich but still feels light enough for warm weather snacking.
If I’m cleaning out the pantry, I’ll toss in pretzel pieces or toffee bits. Sweet and salty always wins, no debate.
How to store and gift chocolate bark
Once the bark is broken into pieces, store it in an airtight container. It keeps well at room temperature if your kitchen isn’t too warm, but I usually pop it in the fridge to be safe.
Cold storage also keeps the layers snappy and clean. Nobody likes chocolate that melts onto their fingers before the first bite.
For gifting, I stack pieces between parchment and tuck them into a tin or small box. A ribbon or handwritten tag makes it feel personal without much effort.
I’ve even wrapped pieces in clear bags for teachers and neighbors. It’s simple, but people genuinely appreciate a homemade treat.
Tips
- Use good quality chocolate bars instead of chips for smoother melting.
- Melt chocolate slowly to avoid seizing or overheating.
- Keep the chocolate layer thin so it’s easy to break later.
- Press toppings gently into the chocolate so they don’t fall off.
- Let the bark fully set before breaking for cleaner pieces.
- Store in a cool place to keep the texture just right.
This 5-ingredient homemade chocolate bark has saved me more times than I can count. It’s the kind of recipe that feels low-effort but still thoughtful, which is honestly my favorite category.
If you’re making it for the first time, don’t overthink it. Melt the chocolate, have fun with the toppings, and trust the process. It’s hard to mess this one up.
Every batch turns out a little different, and that’s part of the charm. No two pieces look the same, and somehow that makes it taste even better.
I hope this becomes one of those recipes you keep in your back pocket. The kind you make once, then forever after without needing instructions. That’s when you know it’s a keeper.
5-Ingredient Homemade Chocolate Bark Recipe
Description
This easy chocolate bark recipe requires just 5 simple, customizable ingredients and minimal effort—perfect for gifting or satisfying your sweet tooth! Made with quality chocolate and your favorite mix-ins like nuts, dried fruit, and seeds, it’s a festive, no-bake treat that sets in under an hour.
ingredients
Instructions
-
Prep
Line a large baking sheet (half-sheet pan) with parchment paper or foil. -
Melt Chocolate
Chop chocolate bars finely. Melt dark/milk chocolate in a microwave-safe bowl in 30-second intervals, stirring between each, until mostly melted. Stir to finish melting using residual heat. For white chocolate, use 15-second intervals to prevent seizing. Alternatively, use a double boiler.Do not use chocolate chips—they contain stabilizers that hinder smooth melting. -
Spread & Swirl
Pour the melted dark/milk chocolate onto the prepared pan and spread into an even layer. Pour melted white chocolate on top and spread within the edges of the first layer. Use a butter knife or toothpick to create decorative swirls. -
Add Toppings
Immediately sprinkle dried cherries, macadamia nuts, pepitas, and coconut chips evenly over the chocolate. Press lightly so toppings adhere.Customize with your favorite nuts, seeds, dried fruits, or candy! -
Chill
Refrigerate for 30–60 minutes, or until completely set. -
Break & Store
Once hardened, break into rustic pieces of desired size. Store in an airtight container at room temperature (cool place) or refrigerated for up to 3 weeks.Ideal for gifting in tins or jars with a ribbon!
Nutrition Facts
Servings 16
Serving Size 1 piece (approx. 28g)
- Amount Per Serving
- Calories 180kcal
- % Daily Value *
- Total Fat 12g19%
- Saturated Fat 7g35%
- Cholesterol 5mg2%
- Sodium 45mg2%
- Potassium 120mg4%
- Total Carbohydrate 18g6%
- Dietary Fiber 2g8%
- Sugars 14g
- Protein 2g4%
- Calcium 20 mg
- Iron 1 mg
* Percent Daily Values are based on a 2,000 calorie diet. Your daily value may be higher or lower depending on your calorie needs.
Note
- Chocolate Tip: Use high-quality bars like Ghirardelli or Baker’s—avoid chocolate chips for best texture.
- Dairy-Free/Vegan Option: Substitute with certified dairy-free chocolate bars.
- Customize Freely: Swap cherries for cranberries, macadamias for pecans, or add toffee, pretzels, or sprinkles!
- Gifting Idea: Package in mason jars or festive tins with a handwritten tag.
Frequently Asked Questions
Can I make this without white chocolate?
Absolutely! Use only one type of chocolate (dark, milk, or semi-sweet) for a simpler version. The bark will still be delicious and easier to prepare.
How long does chocolate bark last?
Stored in an airtight container in a cool, dry place, it lasts 2–3 weeks. In the fridge, it can last up to 1 month. Avoid humidity to prevent blooming (white streaks on chocolate).
Is this recipe gluten-free?
Yes! As long as all ingredients (especially chocolate and mix-ins) are certified gluten-free, this bark is naturally gluten-free—perfect for gluten-sensitive friends.
Can I freeze chocolate bark?
Yes! Place between layers of parchment in a freezer-safe container. It will keep for up to 3 months. Thaw at room temperature before serving to avoid condensation.