Every year, Valentine’s Day sneaks up on me faster than expected, and somehow I always end up in the kitchen with kids hovering nearby. That is exactly how these Valentine’s Day Cupcakes became a tradition in my house. They are cheerful, a little messy, and honestly more fun than they have any right to be.
What I love most is that they do not require perfection. The cupcakes bake up rich and chocolatey, the Nutella filling is a surprise kids genuinely gasp over, and the raspberry buttercream adds just enough color to feel festive. No stress. Just good vibes and sticky fingers.
This recipe leans into joy. One bowl for the batter, a swirl of frosting that does not need to be fancy, and decorations that kids can take full ownership of. Some end up covered in sprinkles, some barely have frosting left by the time they reach the table.
I make these when I want baking to feel like a shared moment, not a performance. The steps are simple, but the end result feels special enough for classroom parties, family dinners, or a cozy afternoon treat. They are sweet without being overwhelming.
Ingredients Needed for the Recipe
All-purpose flour - gives the cupcakes structure while keeping them soft.
Granulated sugar - sweetens the batter and balances the cocoa.
Cocoa powder - creates that deep chocolate flavor kids love.
Baking powder - helps the cupcakes rise evenly.
Baking soda - adds extra lift and tenderness.
Salt - sharpens the chocolate flavor.
Egg - binds everything together.
Milk - keeps the crumb moist and smooth.
Vegetable oil - makes the cupcakes soft for days.
Vanilla extract - rounds out the sweetness.
Hot water - blooms the cocoa for richer flavor.
Chocolate-hazelnut spread - the gooey surprise inside each cupcake.
Unsalted butter - the base for fluffy buttercream.
Powdered sugar - sweetens and thickens the frosting.
Raspberry jam - adds fruity flavor and pink color.
Heavy cream - helps the frosting whip up light.
Valentine’s candy and sprinkles - for decorating and fun.
Before getting into the steps, I always like to set expectations. This batter is thinner than most, and that is a good thing. Kids usually question it, and I reassure them every single time that it will bake beautifully.
Another small note that matters in real kitchens. Let an adult handle the hot water step. Everything else is fair game for little helpers, especially stirring and decorating, which are the highlights anyway.
How to make Valentine’s Day Cupcakes {kid-friendly}?
Make this recipe yours—just save it to your Pinterest board!”
Step 1 - Prep the baking space
Start by preheating the oven and lining the cupcake pan with paper liners. This is the easiest way to involve kids right away. Let them choose the liners, because that small choice somehow makes everything more exciting.
I set the pan aside and clear the counter before mixing. A little organization goes a long way when small hands are involved. Less chaos means more fun.
Step 2 - Mix the dry ingredients
In a large bowl, whisk together the flour, sugar, cocoa powder, baking powder, baking soda, and salt. This is a great step for kids since there is no risk and plenty of stirring.
Make sure everything looks evenly blended, with no cocoa pockets hiding at the bottom. The color should be consistent and rich.
Step 3 - Add the wet ingredients
Add the egg, milk, oil, and vanilla to the bowl. Stir until the mixture turns thick and glossy. It will look almost like pudding at this stage.
This part always surprises people because it comes together so fast. No mixer needed, just a spoon and a bit of patience.
Step 4 - Stir in the hot water
Slowly pour in the hot water while stirring. The batter will thin out quickly, and that is exactly what you want. This step deepens the chocolate flavor.
I usually take over here, just to be safe. Once it is smooth, the batter is ready to bake.
Step 5 - Fill and bake
Pour the batter into the liners, filling them about three-quarters full. Try not to overfill, even though it is tempting to use every last drop.
Bake until a toothpick inserted in the center comes out clean. Let them cool briefly in the pan before moving to a rack.
Step 6 - Make the raspberry buttercream
Beat the softened butter with powdered sugar until fluffy. Add vanilla, raspberry jam, and heavy cream, then continue mixing until light and spreadable.
The color should be soft pink, not neon. I like the frosting to taste slightly tangy, which balances the sweet cupcake.
Step 7 - Fill the cupcakes
Once the cupcakes are completely cool, cut a small hole in the center of each one. Save the tops, because they go back on later.
Spoon or pipe a teaspoon of chocolate-hazelnut spread into the center. This is the moment kids usually cheer.
Step 8 - Frost and decorate
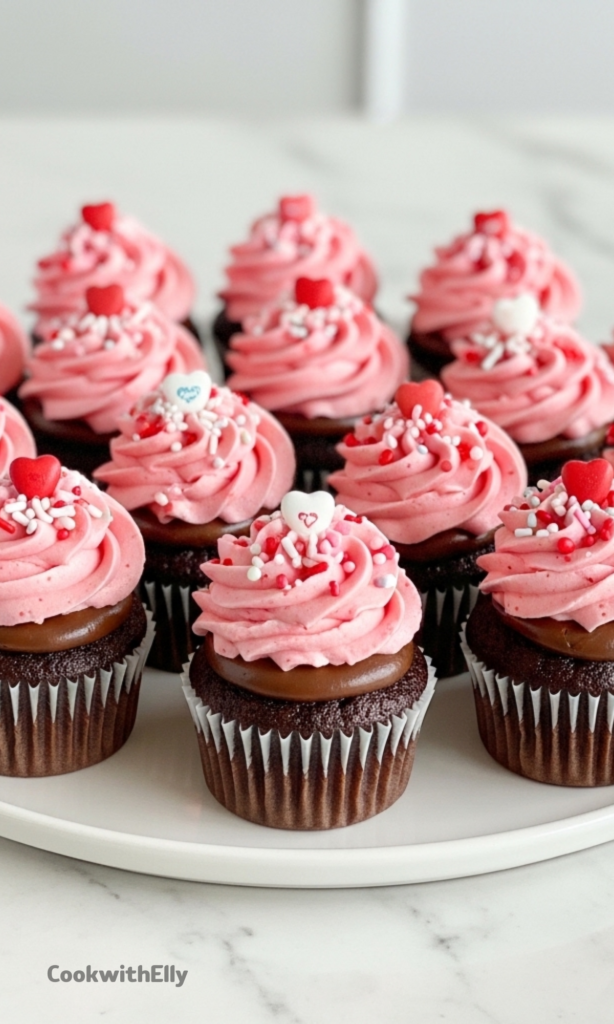
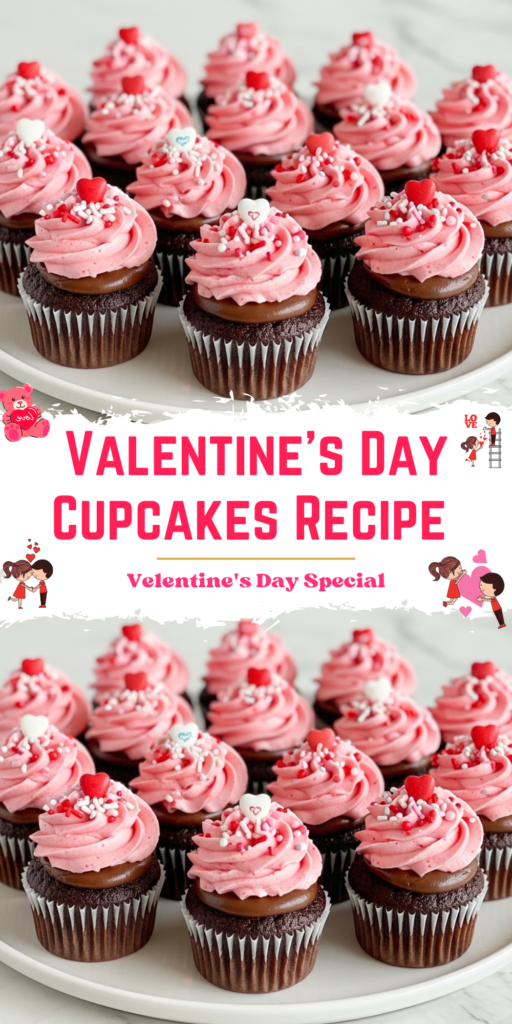
Replace the cupcake tops, then frost generously with raspberry buttercream. Swirls, swoops, or simple spreads all work.
Finish with candy and sprinkles. This part should feel joyful and unstructured. There is no wrong way to decorate.
Creative Decorating Ideas for Kids
Decorating is where personalities really shine. Some kids go all out with color, while others keep it minimal. I try not to guide too much here.
Heart-shaped candies are an obvious choice, but gummies and chocolate pieces work just as well. Mixing textures makes the cupcakes more fun to eat.
I also like setting out small bowls of toppings instead of one big pile. It slows things down and keeps everyone from grabbing everything at once.
Tips
Let cupcakes cool completely before filling or frosting.
Use a piping bag for cleaner Nutella filling.
Do not overfill the cupcake liners.
Adjust frosting thickness with small amounts of cream.
Keep decorations simple for younger kids.
Make-Ahead and Storage Notes
These cupcakes fit easily into busy schedules. I often bake the cupcakes a day ahead and leave them unfrosted at room temperature.
Frost and decorate closer to serving time for the freshest look. Once assembled, they keep well in an airtight container for a couple of days.
If refrigerating, let them come back to room temperature before serving. The frosting softens, and the flavors shine more.
Simple Variations Kids Love
If Nutella is not your thing, peanut butter or cookie spread works beautifully. The filling is flexible and forgiving.
For a different frosting vibe, strawberry jam swaps in easily for raspberry. The color stays playful, and the flavor remains kid-approved.
Vanilla cupcakes can also replace chocolate if you want a lighter base. The filling still brings the surprise.
These Valentine’s Day Cupcakes are not about showing off. They are about togetherness, laughter, and a little sugar-fueled happiness.
I keep coming back to this recipe because it never fails to create a moment. Kids feel proud, adults feel relaxed, and everyone gets dessert.
That, to me, is exactly what a kid-friendly Valentine’s Day treat should be.
Colourful, fun, and gooey—what better way to say “I love you” than with a homemade cupcake? These Valentine’s Day Cupcakes are super easy to make, perfect for baking with kids, and feature a one-bowl chocolate cupcake base, a surprise Nutella filling, and a fluffy raspberry buttercream. Decorate with sprinkles, heart candies, or festive toppers for an extra-special treat!
ingredients
Chocolate Cupcakes
1cup all-purpose flour
1cup granulated sugar
1/3cup Dutch-processed cocoa powder
1tsp baking powder
3/4tsp baking soda
1/2tsp salt
3/4tsp instant espresso powder (optional, for enhanced chocolate flavor)
1large egg
1/2cup milk (any kind)
1/4cup canola oil (or other light vegetable oil)
1tsp vanilla extract
1/2cup hot water (just boiled)
Raspberry Buttercream
3/4cup unsalted butter (softened)
3cups powdered sugar
1–2tbsp seedless raspberry jam (to taste)
4–5tbsp heavy cream
1tsp vanilla extract
1/2tsp flaky sea salt
Assembly
1/2cup chocolate-hazelnut spread (such as Nutella)
1/2cup Valentine’s Day candy (e.g., candy hearts, gummies, chocolate pieces)
sprinkles (your favorite colors and textures)
Instructions
One-Bowl Chocolate Cupcakes
1
Preheat your oven to 175°C (350°F). Line 1–2 cupcake pans with paper liners.
2
In a large mixing bowl, whisk together flour, sugar, cocoa powder, espresso powder (if using), baking powder, baking soda, and salt until well combined.
3
Add the egg, oil, vanilla, and milk. Mix until smooth—a thick, glossy batter will form.
4
Slowly stir in the hot water (adult supervision recommended). The batter will become thin—that’s normal!
5
Fill each liner about ¾ full (≈¼ cup batter per cupcake).
6
Bake for 22–25 minutes, or until a toothpick inserted in the center comes out clean.
7
Cool in pans for 5 minutes, then transfer to a wire rack to cool completely.
Raspberry Buttercream
8
In a large bowl, beat softened butter with 1 cup of powdered sugar on low speed.
9
Gradually add remaining powdered sugar, then increase speed. Add 2 tbsp heavy cream and vanilla; beat until smooth.
10
Mix in raspberry jam and another 2 tbsp heavy cream. Beat until light and fluffy, adding more cream if needed.
11
Transfer frosting to a piping bag fitted with a star tip. Set aside.
Assembly
12
Using a small knife (adult step), carefully cut a cone-shaped hole in the center of each cooled cupcake and remove the core.
13
Fill each hole with about 1 tsp of chocolate-hazelnut spread.
14
Replace the cake top over the filling.
15
Pipe raspberry buttercream swirls on top. Decorate with Valentine’s candies and sprinkles.
16
Enjoy immediately or store as directed.
Nutrition Facts
Servings 15
Serving Size 1 cupcake
Amount Per Serving
Calories369kcal
% Daily Value *
Total Fat18.7g29%
Saturated Fat5g25%
Cholesterol30mg10%
Sodium120mg5%
Potassium120mg4%
Total Carbohydrate51.7g18%
Dietary Fiber1.5g6%
Sugars25g
Protein2.6g6%
Calcium 30 mg
Iron 1 mg
* Percent Daily Values are based on a 2,000 calorie diet. Your daily value may be higher or lower depending on your calorie needs.
Note
Mess-Free Filling: Use a piping bag to neatly fill cupcakes with Nutella.
Freezing Tip: Unfrosted cupcakes freeze well for up to 3 months. Thaw at room temperature before filling and decorating.
Kid Helpers: Let little ones mix dry ingredients, scoop batter (with help), and decorate with sprinkles!
No Raspberry Jam? Substitute strawberry jam or omit for plain vanilla buttercream.