There's something quietly magical about a cookie that comes with its own little bowl, a perfect dip just waiting to be filled. It’s an invitation, really.
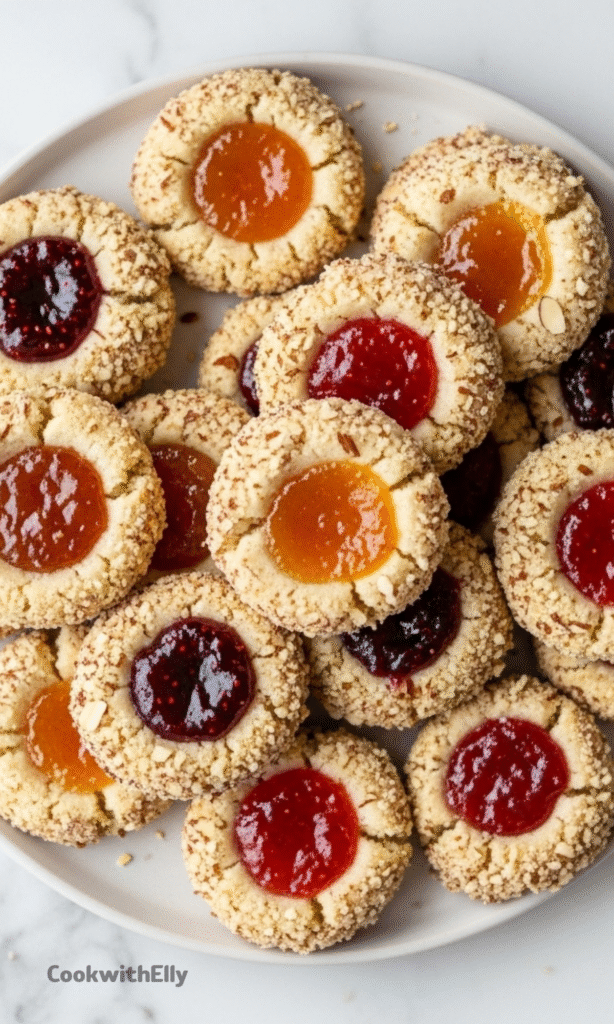
These thumbprint cookies are like tiny, edible canvases, and you’re the artist holding the jar of jam.
They bridge the gap between the buttery richness of a shortbread and the bright, fruity burst of a preserve, and honestly, they’re just a joy to hold in your hand.
The history is charming, too, you know? They were once called thimble cookies, pressed with the tiny cup of a tailor’s tool.
Now, we use our thumbs, which feels wonderfully personal and a bit imperfect in the best way. Every batch carries your own signature press, a direct connection from your kitchen to the cookie jar.
Ingredients Needed for the Recipe
Let’s talk about the players in this buttery little drama. Each one has a specific role, and together, they create pure harmony.
Brown Sugar: It’s not just for sweetness; that hint of molasses brings a warm, caramel-like depth that white sugar simply can’t manage.
Shortening & Butter: This is the dream team for texture. The shortening ensures the cookies hold their shape beautifully, while the butter delivers that irreplaceable, rich flavor we all love.
Vanilla: The classic supporting actor, it rounds out all the other flavors and makes the whole kitchen smell like home.
One Single Egg: We’re going to separate it, using the yolk to enrich and bind the dough, and the white as a magical glue for the nuts.
All-Purpose Flour: The trusty foundation, it gives the dough structure without making it tough.
A Pinch of Salt: This is the secret weapon, the background note that makes every other flavor pop and prevents the cookie from tasting flat.
Finely Chopped Nuts: Typically almonds or walnuts, they create a delightful, toasty crunch that contrasts the tender cookie and soft jam.
Your Jam or Jelly: The star of the show. This is where your personality shines through—choose something you genuinely love to eat by the spoonful.
Getting Your Kitchen Ready
Before you even think about turning on the oven, let’s set the stage for a smooth, enjoyable bake. Trust me, a little prep makes the whole process feel like a calm ritual, not a frantic race.
First, get your butter and egg out. They need to come to room temperature, which takes about 30 minutes on the counter. Room-temperature butter creams seamlessly with the sugars, and a room-temp egg yolk incorporates much more evenly.
While you wait, chop your nuts until they’re fine, like coarse sand, and line up your measuring cups. Read the recipe through once, all the way. It’s the best habit a baker can have.
How to make ?
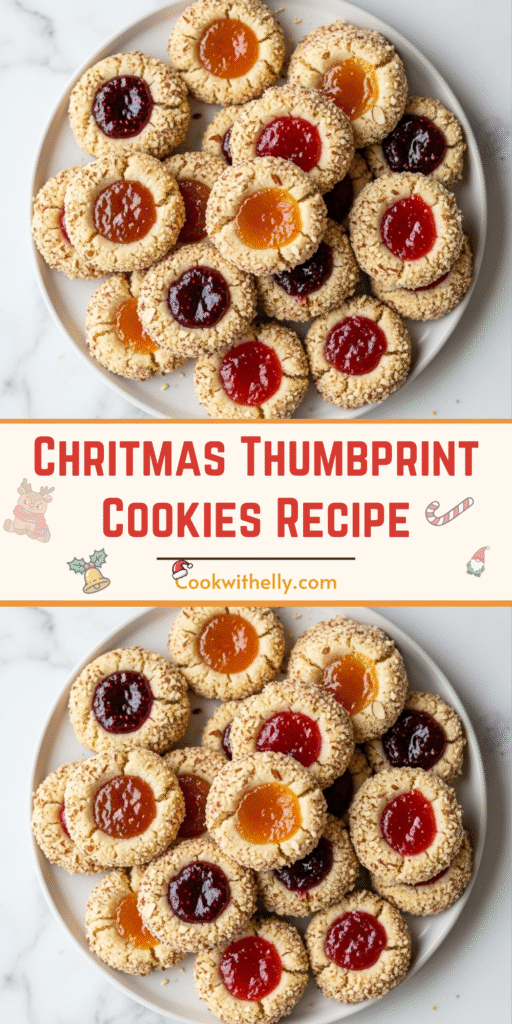
Make this recipe yours—just save it to your Pinterest board!”
Step 1 - Heat & Prep
Go ahead and preheat your oven to 350°F. It needs time to settle at the perfect, steady temperature. This isn't just a preheat; it's your oven warming up for its performance.
As it hums to life, grab your medium-sized mixing bowl, a baking sheet (no need to grease it), and a wire rack for cooling. Having everything within arm's reach turns baking into a flowing dance.
Step 2 - Mix the Dough
In your bowl, combine the brown sugar, softened butter, and shortening. Beat them together until the mixture is smooth, pale, and fluffy. This takes a minute or two of good stirring. Now, mix in the vanilla and that single egg yolk.
See how the dough is already coming together, turning a lovely golden shade? Finally, gently stir in the flour and salt. Stop as soon as no dry streaks remain; overmixing is the enemy of a tender shortbread.
Step 3 - Shape & Roll
Here comes the fun, hands-on part. Pinch off pieces of dough and roll them into smooth, one-inch balls. If the dough feels too soft or sticky, don't fret. Just pop the whole bowl into the refrigerator for about 10 minutes.
Now, in a small dish, give the egg white a quick beat with a fork until it’s frothy. In another dish, spread out your chopped nuts.
Dip each dough ball lightly in the egg white, then roll it in the nuts, pressing gently so they adhere. Place each little jewel about an inch apart on your baking sheet.
Step 4 - The Signature Press
This is the step that gives the cookie its name and its heart. Firmly press your thumb straight down into the center of each dough ball.
Don’t be shy. You want a good, deep well—about halfway through the ball—otherwise, it might bake shut. A confident press ensures a perfect pocket for all that glorious jam later.
Step 5 - Bake & Cool
Slide the sheet into your preheated oven. Bake for about 10 to 12 minutes, just until the cookies are set and the nuts are taking on a light, toasty brown color. They might not look dramatically different, but they’re done.
Use a spatula to immediately transfer them to the wire rack. Let them cool completely, I mean entirely, before even looking at the jam jar. This is crucial for that perfect, crumbly texture.
Step 6 - The Filling Finale
The grand finale. Once the cookies are stone-cold, take your jam. You can use it straight from the jar, but for easier, neater filling, warm a few tablespoons in the microwave for just 10-15 seconds. Give it a vigorous stir to loosen it up.
Then, using a small spoon, fill each thumbprint indent to the brim. The jam will glisten, a shiny jewel in a buttery setting. And you’re done.
A World of Flavor Variations
The classic jam filling is just the beginning. This dough is a wonderfully neutral base, ready to embrace all sorts of adventures. Think of it as your favorite plain canvas.
Instead of jam, try a dollop of lemon curd for a sunny, tart twist. In the fall, a bit of spiced apple butter feels incredibly cozy. For a decadent turn, after baking and cooling, fill the indent with a pinch of chocolate ganache and let it set.
You could even roll the dough balls in shredded coconut or sprinkles instead of nuts for a different kind of party.
Tips
A few little nudges from someone who’s been there can make all the difference between good cookies and great ones.
For perfectly uniform cookies, use a small cookie scoop or even a measuring tablespoon to portion the dough before rolling.
If your nuts aren’t sticking well, your egg white might be too beaten. Just a light froth is all you need—it should still be loose and liquidy.
Resist the urge to fill the thumbprints before baking. The jam will bubble over, melt, and can even prevent the cookie from setting properly.
Storing & Gifting Your Creations
These cookies are fantastic make-ahead treats. Once filled, store them in a single layer in an airtight container at room temperature for up to a week. If you stack them, place parchment paper between layers to protect their delicate jam tops.
They also freeze beautifully, unfilled. Bake and cool the cookies, then freeze them in a sturdy container for up to two months.
When you’re ready, thaw them on the counter, fill, and serve. They make wonderful gifts, too. Tuck a few into a small box lined with parchment, and you’re giving someone a little jar of homemade happiness. It’s a gift that always, always fits.
The Simple Joy of Baking Them
Beyond the ingredients and steps, baking these cookies offers something else: a moment of calm, focused creation. There’s a rhythmic pleasure in rolling the dough balls, a tactile satisfaction in pressing your thumb into each one. It’s a recipe that welcomes you to slow down, just for an hour.
It’s also a lovely recipe to share. Kids adore the rolling and pressing, and choosing the jam becomes a family event. In the end, you’re left with more than just cookies.
You’re left with a tangible, edible reminder that the simplest actions—a mix, a roll, a press—can create something truly special. And that’s a pretty sweet lesson, don’t you think?
These jam-packed Thumbprint Cookies are a timeless favorite—yummy, easy to make, and endlessly customizable! Featuring a subtly sweet shortbread-style base rolled in finely chopped almonds and filled with your choice of jelly (raspberry, apricot, or mint are classics), these bite-sized treats are perfect for holiday trays, special events, or a cozy baking session. Originally called “thimble cookies,” they now get their signature indent from your thumb—hence the name!
Ingredients
1/4cup packed brown sugar
1/4cup shortening
1/4cup butter or margarine (softened)
1/2tsp vanilla extract
1 egg (separated (yolk and white used separately))
1cup all-purpose flour (e.g., Gold Medal™)
1/4tsp salt
3/4cup finely chopped nuts (almonds recommended)
to fill jelly or jam (raspberry, apricot, strawberry, or mint)
Instructions
1
Preheat oven to 175°C (350°F).
2
In a medium bowl, mix brown sugar, shortening, butter, vanilla, and egg yolk until well combined.
3
Stir in flour and salt until the dough comes together and holds its shape.
4
Shape dough into 1-inch balls.
5
Slightly beat the egg white. Dip each dough ball into the egg white, then roll in finely chopped nuts to coat.
6
Place coated balls about 1 inch apart on an ungreased cookie sheet. Press your thumb deeply into the center of each to create an indent.
7
Bake for about 10 minutes, or until cookies are light golden brown.
8
Immediately transfer cookies to a wire rack and let cool completely (about 30 minutes).
9
Once cooled, fill each thumbprint with your favorite jelly or jam. For easier filling, gently warm the jelly in the microwave for 10–15 seconds and stir well before spooning.
Nutrition Facts
Servings 36
Serving Size 1 cookie
Amount Per Serving
Calories90kcal
% Daily Value *
Total Fat5 gg8%
Saturated Fat1.5 gg8%
Trans Fat0 gg
Cholesterol10 mgmg4%
Sodium45 mgmg2%
Potassium30 mgmg1%
Total Carbohydrate10 gg4%
Dietary Fiber0.5 gg2%
Sugars6 gg
Protein1 gg2%
Calcium 10 mg
Iron 0.4 mg
* Percent Daily Values are based on a 2,000 calorie diet. Your daily value may be higher or lower depending on your calorie needs.
Note
Make ahead? Bake and cool cookies without filling. Freeze in an airtight container for up to 2 months. Thaw at room temperature, then fill with jelly before serving.
Storage tip: Keep filled cookies in a single layer in an airtight container at room temperature for up to 1 week. Store separately from other cookies to avoid flavor transfer.
Dough too soft? Chill for 10–15 minutes before shaping into balls.
Customize: Try different nuts (pecans, walnuts) or fillings (chocolate ganache, lemon curd) for a twist!