Let’s talk about that beautiful, smooth, hard-drying icing that turns simple cookies into little canvases.
The magic is, it's far easier than you might think, and you probably have everything you need right now.
Why This Icing Feels Like a Win
You know that satisfying feeling of a perfectly iced cookie? It’s not out of reach.
This recipe, which I’ve worked on for years, creates a surface that sets without turning into a crunchy, tooth-breaking shell.
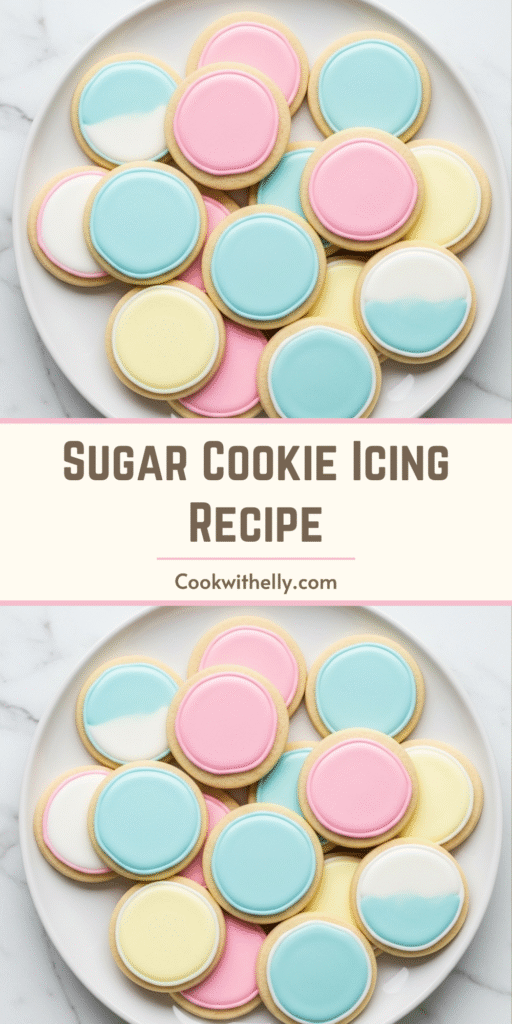
It’s got a lovely shine, a subtle vanilla sweetness, and it holds its color brilliantly.
Honestly, once you see how simple the process is, you’ll never look at a tub of store-bought frosting the same way again.
Ingredients Needed for the Recipe
Just four core ingredients build this whole wonderful world of decorating potential.
Here’s what you’ll need, and why each one plays its part.
Powdered Sugar: This is the foundation, the structure of your icing. It’s also called confectioners’ sugar, and its fine texture dissolves easily for that sleek finish. We’ll start with 4 cups.
Milk: This is our liquid, the element that brings everything together and lets us control the icing’s thickness. Any milk you have works—dairy, almond, even water in a pinch.
Vanilla Extract: Pure vanilla gives the best flavor, but if you want a stark white icing, clear vanilla is your secret weapon. It makes all the difference.
Light Corn Syrup: A little bit of this is the magic touch. It adds a lovely sheen and helps the icing set with a smooth, slightly firm finish. You can skip it, but I really love what it does.
Food Coloring: This is where the fun begins. Gel colors are my go-to for vibrant, deep hues without thinning the icing, but liquid drops work perfectly too.
How to Make Easy Sugar Cookie Icing?
The process is all about adjusting one simple mixture into two perfect consistencies: one for outlining, one for flooding.
Let's break it down, step by comfortable step.
Step 1 - The Base Mix
Grab a large bowl and combine your 4 cups of powdered sugar, 5 tablespoons of milk, 4 teaspoons of corn syrup, and that teaspoon of vanilla.
Whisk it all together with real enthusiasm until every last lump of sugar has surrendered.
Step 2 - Finding "Outline" Consistency
Now, the mixture will be quite thick, almost like a very stiff paste. This is good! We're going to thin it carefully.
Start adding more milk, just one teaspoon at a time, whisking thoroughly after each addition.
You're looking for what’s called “outline consistency.” To test it, lift your whisk or spoon out of the bowl and let the icing drizzle back in.
If the ribbon of icing holds its shape for a good 3 to 4 seconds before melting back into the bowl, you’ve nailed it.
Step 3 - Divide and Color
This is when you’d stir in your food coloring, if you’re using it.
Once your icing is a uniform, beautiful color (or a pristine white), it’s time to separate it.
Scoop out about one-third of the icing into a separate bowl. This smaller portion will be your outline icing.
The remaining two-thirds will become your flood icing, which we'll thin out next.
Step 4 - Creating "Flood" Consistency
Take the larger bowl of icing. We’re going to thin this one out a bit more.
Again, add milk just half a teaspoon at a time now, whisking well after each bit.
The test is different here. Lift your whisk—the icing should flow off quickly and smooth itself back into the surface of the icing in the bowl almost immediately.
It should look pourable, but not runny like water. Think of the consistency of a thick maple syrup.
Step 5 - Bag and Prepare
Now, transfer each icing consistency into its own piping bag. If you don’t have piping bags, sturdy zip-top bags with a tiny corner snipped off work beautifully.
The key here is to snip a *very* small hole at the tip. You can always make it bigger, but you can’t make it smaller.
A tiny opening gives you so much more control for those clean lines.
Your Icing Toolkit: Substitutions & Swaps
Don’t let a missing ingredient stop you. This recipe is wonderfully forgiving.
If you’re out of corn syrup, you can simply leave it out. You might need a tiny splash more milk to get the right consistency.
The icing will still set, it just won’t have that signature glossy shine.
For the milk, as I mentioned, any liquid works. Water, oat milk, soy milk—they all do the job.
Just know that milk adds a tiny bit of richness that water doesn’t.
And for a fun flavor twist, try swapping the vanilla for a drop of almond or lemon extract. It’s a subtle change that can make your cookies really unique.
Tips
A few little insights from my own decorating sessions can make your first try feel like your tenth.
If your icing ever gets too thin, don’t panic. Just sift in a little more powdered sugar, a tablespoon at a time, until it thickens back up.
Gel food coloring is a powerhouse. It gives intense color without altering the icing’s texture, which is why I reach for it for dark colors like red, black, or deep blue.
To make multiple colors, mix your entire batch to outline consistency first, then divide it into separate bowls before coloring. Then, thin each colored portion as needed for its flood consistency.
The Simple Art of Decorating
With your bags ready, the real joy begins. Lay out your completely cooled sugar cookies.
Using the outline icing, carefully trace the border of your cookie. This creates a little dam to hold the flood icing in place.
Next, switch to the flood icing bag. Gently fill the outlined area, guiding the icing to the edges.
If it doesn’t spread perfectly, a toothpick is your best friend. Use it to nudge the icing into corners and smooth out any gaps.
If you’re using sprinkles or sanding sugar, sprinkle them on immediately, while the flood icing is still wet.
Then, the hardest part: patience. Let the cookies sit, undisturbed and in a single layer, for a full day.
The surface will be dry to the touch in a few hours, but they need that full 24 hours to set completely before you can stack or package them.
Storage & Make-Ahead Magic
This icing is a fantastic candidate for getting ahead of the game.
You can make it 1 to 2 days before you plan to decorate. Just store it in an airtight container in the refrigerator.
When you’re ready, let it come to room temperature and give it a good stir. It might have thickened up a bit, so a few drops of milk can bring it back to the perfect texture.
Once your cookies are decorated and fully set, they store beautifully. Keep them in an airtight container at room temperature for up to a week.
They also freeze wonderfully for up to three months. Just thaw them in the single layer on your counter.
So, there you have it. A simple bowl, a few pantry staples, and a little bit of patience are all it takes.
The transformation from plain cookie to decorated delight is one of the most satisfying little projects, and it starts with this easy icing.
This truly is the best ever sugar cookie icing! It hardens without becoming too crunchy, is full of vanilla flavor, and can be colored to suit any holiday.
Ingredients
4cups powdered sugar ((480 grams))
5 to 6tablespoons milk (divided, plus more if needed (75 to 90 ml); any type including almond milk or water)
4teaspoons light corn syrup
1teaspoon pure or clear vanilla extract (use clear for pure white icing)
Optional: Gel or liquid food coloring (gel recommended for vibrant colors)
Instructions
To make the outline icing:
1
In a large mixing bowl, whisk together the powdered sugar, 5 tablespoons of milk, light corn syrup, and vanilla extract until well combined and no lumps remain. The mixture will be pretty thick at this point.
2
Mix in 1 additional teaspoon of milk at a time until the icing has thinned out and reached an outline consistency.
To test the icing, lift the whisk or spoon from the mixing bowl; you should see ribbons of icing that fall back into the bowl for 3 to 4 seconds.
3
Mix in the food coloring (if using) until fully combined. Remove ⅓ of the mixture for the outline icing and set aside.
To make the flood icing:
4
Add ½ to 1 teaspoon of milk at a time to the remaining two-thirds of the mixture until the icing reaches a flood consistency.
When you lift your whisk or spoon from the bowl, the icing should quickly melt back into the bowl of icing.
To decorate your cookies:
5
Place the outline icing and flood icing in separate piping bags, and cut a small piece of the tip off each one.
6
Outline each cookie with the outline icing, then use the flood icing to fill in the cookie. Use a toothpick if needed to move the icing around and fill in any empty spots.
7
Place the cookies in a single layer in an airtight container, and allow the icing to harden fully for about 20 to 24 hours before stacking the cookies.
Nutrition Facts
Servings 24
Serving Size 1 cookie with icing
Amount Per Serving
Calories110kcal
% Daily Value *
Total Fat0.2g1%
Saturated Fat0.1g1%
Cholesterol1mg1%
Sodium10mg1%
Potassium12mg1%
Total Carbohydrate27g9%
Sugars26g
Protein0.3g1%
Calcium 15 mg
* Percent Daily Values are based on a 2,000 calorie diet. Your daily value may be higher or lower depending on your calorie needs.
Note
This recipe makes about 1¾ cups of icing, enough to decorate 2 dozen sugar cookies.
Storage: Store iced cookies in a single layer in an airtight container. Allow icing to harden fully (20–24 hours) before stacking.
To make several colors: Once at outline consistency, divide icing into bowls, add food coloring, then split each color into outline/flood portions.
Make ahead: Icing can be stored airtight in the fridge for 1–2 days. Bring to room temp and stir before use; thin with milk if needed.
Corn syrup: Optional but recommended—it adds shine and helps icing set faster.
Keywords:
sugar cookie icing, easy icing recipe, vanilla icing, cookie decorating, royal icing alternative