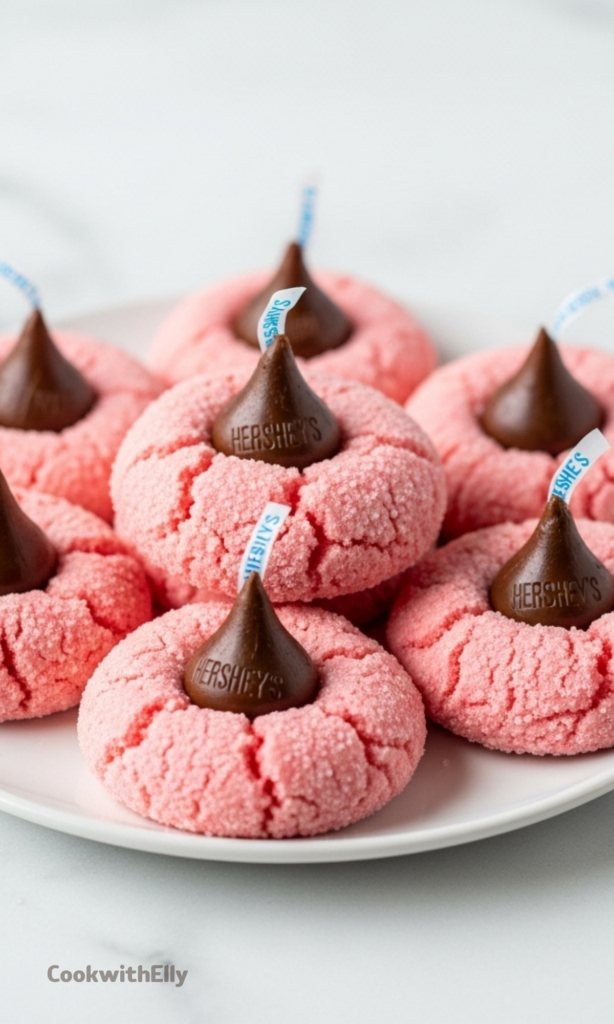
There's a certain kind of magic in a cookie that winks at you. These Strawberry Kiss Cookies do exactly that. They are a cheerful, pink-hued delight with a sweet little secret waiting right in the center.
They feel festive, like a celebration in your hand. And the best part? They come together with a simplicity that feels like a kitchen hug.
This recipe is my twist on the classic peanut butter blossom. It swaps out that rich nuttiness for the sunny, berry-sweet flavor of strawberry. The result is a tender, cake-like cookie that melts just a bit against the smooth chocolate kiss. It’s a perfect pairing.
A Little Backstory on These Sweet Treats
I’ve always loved the tradition of blossom cookies. You know the ones, with the chocolate candy pressed warmly into the middle right after baking. They’re a staple for good reason.
But one Valentine’s Day, I wanted something different. Something pink, and playful, and just as easy. I had a box of strawberry cake mix sitting on the shelf, and the idea just clicked.
What if we gave that classic cookie a berry-flavored makeover? The experiment was a roaring success. The strawberry dough bakes up soft and fragrant, creating the ideal little nest for that chocolate kiss.
It’s become my go-to for spreading a little extra joy. These cookies don't just taste good, they look like happiness on a plate.
Ingredients Needed for the Recipe
Gathering your ingredients is the first step to cookie bliss. Here’s what you’ll need to create these sweet, simple treats.
Strawberry Cake Mix: This is the star. It gives the cookies their vibrant flavor and pretty pink color, all in one convenient box.
All-Purpose Flour: Just a couple of tablespoons are needed to give the dough the perfect structure, so your cookies hold their shape.
Vegetable Oil: This keeps the cookies wonderfully moist and tender, creating that soft, almost cakey texture we love.
Eggs: They bind everything together, adding richness and helping the dough rise just a touch in the oven.
Milk: A single tablespoon is the magic touch to bring the dry and wet ingredients into a cohesive, scoopable dough.
Granulated Sugar (for rolling): Rolling the dough balls in sugar creates a delicate, sparkling crust and a lovely subtle crunch.
Hershey's Kisses: The grand finale. That cool, creamy chocolate center is the signature "kiss" that makes these cookies so special and fun.
How to Make Strawberry Kiss Cookies?
Now for the fun part. Let's roll up our sleeves and make some cookie magic happen. It’s a straightforward process, with a few key tips to ensure perfection.
Step 1 - Create Your Dough Base
Start by grabbing a large mixing bowl. Pour in the vegetable oil and crack in the eggs.
Use a hand mixer or a good sturdy whisk to beat them together. You just want them smoothly combined, no need to overdo it.
Step 2 - Bring in the Dry Ingredients
Now, sprinkle the all-purpose flour over your wet mixture. Follow it with the entire box of strawberry cake mix.
Mix on a low speed at first, unless you want a pink cloud of powder. Once it's incorporated, you can increase the speed slightly.
Step 3 - Finish the Dough
With the mixer running, drizzle in that single tablespoon of milk. It might not seem like much, but it works wonders.
Mix just until a soft, pliable cookie dough forms. It will be a beautiful shade of pink and smell absolutely wonderful.
Step 4 - Scoop and Sugar
Use a #30 cookie scoop or two tablespoons to portion the dough. Roll each portion between your palms to form a neat ball.
Pour some granulated sugar into a shallow bowl. Roll each dough ball in the sugar until it's completely coated. This adds a lovely sparkle and texture.
Step 5 - The Essential Chill
This step is crucial, so don't skip it. Cover the bowl of sugared dough balls and place it in the refrigerator.
Let them chill for at least one hour. This firms up the dough, preventing the cookies from spreading too thin in the oven.
Step 6 - Prep and Bake
While the dough chills, or just before you're ready to bake, preheat your oven to 375°F. Line your baking sheets with parchment paper for easy cleanup.
Place the chilled dough balls about two inches apart on the sheets. Bake one sheet at a time for 8 to 10 minutes.
The edges should just be set, and the tops will look soft and slightly cracked. Keep the unused dough in the fridge between batches.
Step 7 - The Grand Finale: The Kiss
As soon as the cookies come out of the oven, work quickly. Unwrap your Hershey's Kisses.
Gently but firmly press one kiss into the center of each warm cookie. You'll feel it nestle perfectly into the soft dough.
Let the cookies cool completely on the baking sheet. The chocolate will set, and the cookie will firm up to the ideal texture.
Choosing Your Equipment
You don't need fancy tools to make great cookies. A few simple items, though, can make the process smoother and more consistent.
A hand mixer is fantastic for bringing the dough together quickly and without arm strain. A rimmed baking sheet is my go-to; it’s sturdy and conducts heat evenly.
If you bake cookies often, a #30 cookie scoop is a game-changer. It ensures every cookie is the same size, which means they bake evenly. No more guessing with spoons.
And always, always use parchment paper. It guarantees no sticking and makes transferring the cookies an absolute breeze.
Tips
Chilling the dough is non-negotiable. It makes the dough easier to handle and gives you a thicker, prettier cookie. Trust me on this one.
Press the kiss in immediately after baking. The cookies are soft and pliable then, creating a perfect little pocket for the chocolate to sit in.
Don't overbake. The cookies will look soft in the center when they come out. They firm up as they cool, leaving you with a wonderfully tender bite.
Let the cookies cool fully on the sheet. Moving them too early can cause them to break, and the chocolate kiss needs time to reset after melting slightly.
Unwrap all your Hershey's Kisses before you start baking. This way, you're ready to go the second those hot cookies emerge from the oven.
Endless Flavor Adventures
The beauty of this recipe lies in its flexibility. Once you master the basic strawberry version, a whole world of flavor combinations opens up.
You can start with the cake mix. Swap the strawberry for red velvet for a deep, cocoa-rich cookie. Lemon cake mix creates a bright, zesty treat that's wonderful in spring.
And of course, a chocolate cake mix base is always a crowd-pleaser. It’s like a brownie and a cookie had a delicious baby.
Then, consider the chocolate center. While classic Hershey's Kisses are perfect, you can use chocolate hearts for Valentine's Day.
Brach's chocolate stars add a festive touch. A Dove chocolate promise piece melts into an incredibly decadent pool of smooth chocolate. The possibilities are truly sweet and endless.
Storing Your Sweet Creations
To keep your Strawberry Kiss Cookies tasting their absolute best, proper storage is key. They are at their peak within the first two days, but will stay delicious for longer.
Once completely cooled, store them in a single layer in an airtight container at room temperature. If you need to stack them, place a sheet of parchment paper between the layers to protect the chocolate kisses.
They will stay fresh and soft for about 5 days. For longer storage, you can freeze them. Place the cooled cookies in a freezer-safe bag or container.
They can be frozen for up to 2 months. Just let them thaw at room temperature when you're ready for a sweet treat. The chocolate may lose a little of its sheen, but the flavor will be just as wonderful.
These Strawberry Kiss Cookies are easy to make and use strawberry cake mix with a Hershey's Kiss pressed into the center of each cookie. Perfect for Valentine’s Day or any occasion that calls for a sweet, festive treat! These cookies are a fun twist on classic peanut butter blossoms—soft, slightly chewy, and bursting with strawberry flavor.
ingredients
1box strawberry cake mix (approximately 15.25 oz)
2tablespoons all purpose flour
¼cup vegetable oil
2 eggs (large, room temperature)
1tablespoon milk (any kind)
granulated sugar (for rolling)
22 Hershey Kisses (unwrapped)
Instructions
1
Preheat the oven to 375°F (190°C) and line two cookie sheets with parchment paper. Set aside.
2
In a large bowl, mix the vegetable oil and eggs together until well combined.
3
Slowly mix in the all-purpose flour and the strawberry cake mix until incorporated.
4
Add the tablespoon of milk and mix just until a soft cookie dough forms.
5
Scoop the dough into balls using a #30 cookie scoop or about 2 tablespoons per ball.
6
Roll each dough ball in granulated sugar to coat evenly.
7
Cover the bowl and chill the dough for at least 1 hour in the refrigerator.
8
Bake one cookie sheet at a time for 8–10 minutes, keeping remaining dough chilled between batches.
9
Immediately after removing from the oven, gently press a Hershey Kiss into the center of each cookie.
10
Allow cookies to cool on the baking sheet for 5 minutes before transferring to a wire rack to cool completely.
Nutrition Facts
Servings 22
Serving Size 1 cookie
Amount Per Serving
Calories120kcal
% Daily Value *
Total Fat5gg8%
Saturated Fat1.5gg8%
Trans Fat0gg
Cholesterol15mgmg5%
Sodium135mgmg6%
Potassium40mgmg2%
Total Carbohydrate18gg6%
Dietary Fiber0gg0%
Sugars12gg
Protein1gg2%
Calcium 20mg mg
Iron 0.5mg mg
* Percent Daily Values are based on a 2,000 calorie diet. Your daily value may be higher or lower depending on your calorie needs.
Note
Cake Mix Swap: Try red velvet, lemon, or chocolate cake mix for fun flavor variations.
Chocolate Options: Use chocolate hearts, Brach’s stars, or Dove chocolates instead of Hershey Kisses.
Storage Tip: Keep in an airtight container at room temperature for up to 5 days.
Keywords:
strawberry kiss cookies, valentine's day cookies, cake mix cookies, hershey kiss cookies, easy strawberry cookies