Let's be honest, the best part of keeping a sourdough starter isn't always the bread. It’s that little container in the fridge, full of tangy potential that you just can't bear to pour down the drain. I get it, I’ve been there.
My starter was a gift, a happy little pet that I mostly neglected, and for the longest time, I had no idea what to do with the discard.
Pancakes were fine, but I craved something more, well, *celebratory*. That’s how these cookies were born.
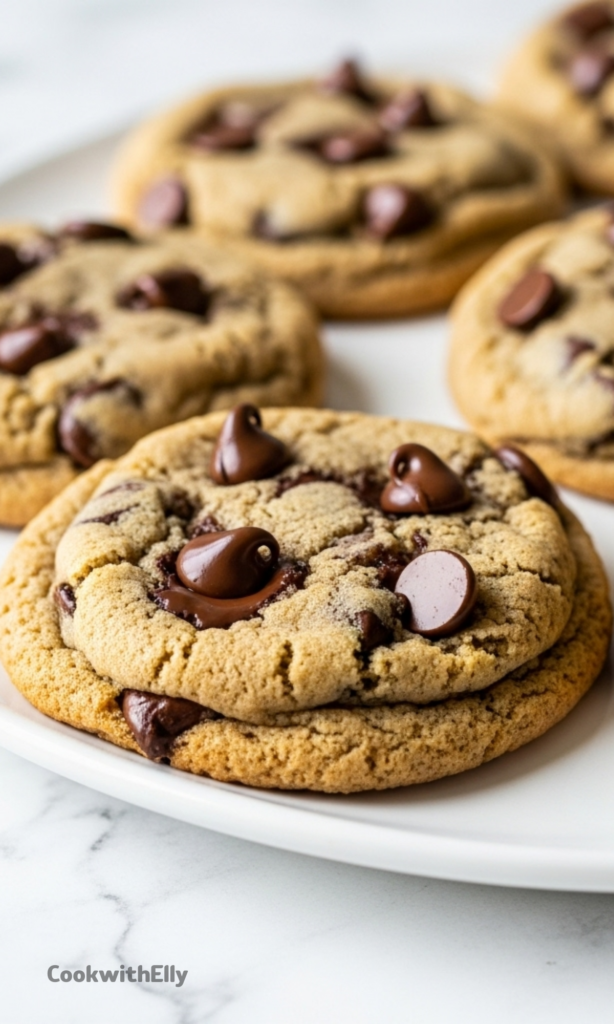
They’re the answer to the guilt of wasting a spoonful of starter. A small-batch miracle that turns your fridge leftovers into what one of my friends swears are the best chocolate chip cookies he’s ever eaten.
They’re soft, deeply chewy, and have this incredible balance where the sweetness doesn’t overwhelm.
he discard adds a subtle, sophisticated tang that makes you pause and think, “What *is* that amazing flavor?” It’s the magic of using something up in the most delicious way possible.
Why Your Starter Will Thank You
This recipe is a celebration of simplicity and smart baking. You don’t need any special bread flours or complicated techniques.
We’re using standard pantry staples alongside that unfed starter, transforming what was destined for the compost into a truly special treat.
The recipe makes about nine perfect cookies, which is just enough to share (or not, no judgment here) without committing to a giant batch.
It’s also remarkably forgiving. Every starter has its own personality—some are thicker, some are more liquid—and this dough accommodates them.
The result is a cookie with a fantastic texture, a beautiful golden edge, and pockets of melty chocolate that perfectly contrast the slight savoriness from the discard. It’s a fun, clever twist on a classic that genuinely earns its place in your recipe rotation.
Ingredients Needed for the Recipe
Here’s everything you’ll need to gather. The beauty of this list is its simplicity; you likely have most of it already.
All-Purpose Flour: The base structure for our cookies. Measuring it correctly is key for the perfect chewy texture.
Baking Soda: Our leavening agent, it gives the cookies their lift and spread.
Salt: A scant half-teaspoon to enhance all the other flavors and balance the sweetness.
Unsalted Butter, room temperature: Provides rich flavor and tenderness. It should be softened but still slightly firm to the touch.
Brown Sugar: I prefer dark brown for its deeper molasses flavor and extra chew, but light brown works beautifully too.
Sourdough Starter Discard (unfed): The star of the show! This is the leftover, unfed starter from your fridge. Using it unfed is crucial for the right flavor.
Large Egg Yolk: Adds richness, tenderness, and helps bind the dough without making it cakey.
Vanilla Extract: The essential flavor backbone of any great chocolate chip cookie.
Semi-Sweet Chocolate Chips: I love how they balance the sweetness, but feel free to use milk, dark, or even chopped chocolate bars.
The Heart of Your Sourdough Starter
Let's talk about that jar in your fridge for a second. Sourdough discard, sometimes called unfed starter, is simply the portion you remove before feeding the remaining starter fresh flour and water.
It’s at its peak of tangy, fermented flavor, but it’s no longer active enough to leaven bread reliably on its own. For years, bakers just threw it away.
What a waste, right? That discard is packed with complex flavor. In these cookies, it acts almost like a secret ingredient, bringing a slight tang that cuts through the richness and adds a whole new dimension.
It also introduces extra moisture, which contributes to that phenomenal soft and chewy interior. Think of it not as a discard, but as a free, flavor-packed bonus ingredient waiting for its moment.
How to make Sourdough Discard Chocolate Chip Cookies?
The process is straightforward and quick, perfect for a spontaneous baking session. Just remember to pull your cold ingredients (butter, egg, starter) out ahead of time so they can come to room temperature. It makes all the difference in getting a smooth, cohesive dough.
Make this recipe yours—just save it to your Pinterest board!”
Step 1- Prep and Cream
Start by preheating your oven to 350°F (177°C) and lining a baking sheet with parchment paper for easy cleanup. In a medium or large bowl, cream together the softened butter and packed brown sugar.
You want to beat them for a good 2-3 minutes until the mixture is fluffy, pale, and well combined. This step incorporates air, which is important for texture.
Step 2- Combine the Wet Ingredients
Mix in the sourdough discard until it’s fully incorporated into the butter-sugar base. Follow this with the egg yolk and vanilla extract, stirring until the batter is smooth and uniform.
I find a hand mixer perfect for this small batch, but a sturdy spatula and some elbow grease work just fine too.
Step 3- Bring in the Dry Ingredients
In a separate small bowl, whisk together the all-purpose flour, baking soda, and salt. This ensures the leavening and salt are evenly distributed.
Add these dry ingredients to the wet mixture, and stir gently—just until the last streaks of flour disappear. Over-mixing at this stage is the enemy of a tender cookie.
Step 4- Fold in the Chocolate
Now for the best part. Gently fold in the chocolate chips until they’re evenly distributed throughout the dough. The dough will be slightly sticky, and that’s exactly what you want. If your starter was particularly liquidy, the dough might be a bit softer; you can add a single tablespoon of extra flour if it feels unmanageable.
Step 5- Scoop and Bake
Using a cookie scoop or two tablespoons, portion the dough into balls and place them on your prepared baking sheet, spacing them about 2-3 inches apart.
They will spread. You can press a few extra chocolate chips on top for a bakery-style look. Bake on the middle rack for 8 to 11 minutes.
Step 6- The Finishing Touches
You’ll know they’re done when the edges are set and lightly golden, but the centers still look soft. They continue to cook on the hot sheet. As soon as they come out, you can do the famous “cookie scoot”—use a round cookie cutter or large glass to swirl around each cookie, nudging the edges into a perfect circle.
A sprinkle of flaky sea salt right now is heavenly. Let them cool on the sheet for 5-10 minutes before moving them to a wire rack.
Tips
These little pointers will help guarantee cookie success every single time.
Weigh your flour. It’s the single best way to ensure accuracy. Too much flour is the most common reason for dry, puffy cookies. If using cups, spoon the flour into the cup and level it off.
Don’t over-bake. Take them out when the edges are just tan. They’ll set up as they cool, staying soft and chewy in the middle.
Embrace the sticky dough. It’s meant to be that way! If it’s too sticky to scoop, chilling it for 15-20 minutes can help.
Use a cookie scoop. It creates evenly sized dough balls, which means your cookies will bake at the same rate.
Let them cool on the sheet. This final bit of carry-over cooking is essential for setting their structure without over-baking.
Creative Twists and Mix-Ins
The basic recipe is fantastic, but it’s also a wonderful canvas for your own ideas. Feel free to swap out the semi-sweet chips for an equal amount of dark chocolate chunks for melty puddles, or milk chocolate for a sweeter bite.
You could also replace a quarter-cup of the chocolate with a different mix-in, like toasted walnuts or pecans for crunch, or even chopped toffee bits for a buttery caramel flavor.
For a different flavor profile, try adding a teaspoon of ground cinnamon to the dry ingredients, or the zest of one orange for a bright, citrusy note.
The tang of the sourdough pairs wonderfully with these warmer, spicier, or fruitier additions. Just remember, the dough is a small batch, so a little extra mix-in goes a long way.
Storing Your Cookies for Lasting Freshness
Once completely cooled, store your cookies in an airtight container at room temperature. For genius-level softness, tuck a slice of plain bread into the container.
The cookies will draw moisture from the bread, staying wonderfully soft for up to a week. You can also freeze the baked cookies for up to a month; just wrap them well in plastic wrap and a freezer bag.
If you want to get a head start, the cookie dough balls freeze beautifully too. Scoop them onto a parchment-lined sheet, freeze until solid, then transfer to a freezer bag.
You can bake them straight from the freezer, adding just a minute or two to the baking time. This means fresh, warm cookies are never more than 15 minutes away.
This easy sourdough discard bread is soft and tender with a gorgeous crackly crust! You get a tiny burst of tang—slightly more than regular bread—with a bit of a chewy underbite. It’s not true sourdough (it uses yeast for a faster rise), but it’s a brilliant way to use up your sourdough starter discard while still enjoying artisanal-style bread with minimal effort.
In a small bowl, dissolve yeast and sugar in warm water. Let stand for 10–15 minutes until foamy.
2
In a large bowl, mix both flours and salt.
3
Make a well in the center and add the sourdough discard and the bubbly yeast mixture.
4
Mix well with a fork or your hand until a rough, shaggy dough forms.
5
Turn the dough onto a well-floured surface and knead for 8–10 minutes using the heel-of-hand technique: push, fold, turn, repeat—until the dough becomes smooth, supple, and slightly tacky.
6
Shape the dough into a ball, place it in a lightly oiled bowl, cover with a tea towel or cling film, and let rise in a warm, draft-free spot for 2–3 hours or until doubled.
7
After the first rise, gently punch down the dough and knead for 1–2 minutes on a floured surface.
8
Shape into a loaf (baguette or boule) and place on a parchment-lined baking tray.
9
Cover loosely and let rise again for 30–45 minutes until puffy.
10
While the dough proofs, preheat your oven to 250°C (482°F). Place an empty tray on the bottom rack.
11
Once risen, sprinkle the loaf with flour and score the top with a sharp knife.
12
Immediately place the bread in the oven, reduce temperature to 230°C (446°F), and pour 1 cup of hot water into the preheated tray below to create steam.
13
Bake for 35–40 minutes until golden brown and the bottom sounds hollow when tapped.
14
Let cool completely on a wire rack for at least 90 minutes before slicing to preserve structure and texture.
Nutrition Facts
Servings 8
Serving Size 1 slice
Amount Per Serving
Calories180kcal
% Daily Value *
Total Fat2gg4%
Saturated Fat0.3gg2%
Trans Fat0gg
Cholesterol0mgmg0%
Sodium370mgmg16%
Potassium120mgmg4%
Total Carbohydrate35gg12%
Dietary Fiber3gg12%
Sugars1gg
Protein6gg12%
Calcium 15 mg
Iron 1.8 mg
* Percent Daily Values are based on a 2,000 calorie diet. Your daily value may be higher or lower depending on your calorie needs.
Note
Flour flexibility: You can use 100% all-purpose or 100% whole wheat flour—just adjust water slightly for hydration.
Add-ins: After the first rise, fold in cheese, herbs, sun-dried tomatoes, nuts, seeds, or chocolate chips.
Oven spring secret: Steam is key! The water tray trick creates moisture for a crackly crust and better rise.
Not true sourdough: This loaf uses commercial yeast + discard for ease and speed—perfect for beginners!