That jar of sourdough discard on your counter doesn't have to feel like a daily chore, you know. It can be the secret to your new weekend obsession.
Let's turn that tangy, unfed starter into something spectacular, warm, and chewy. Something that makes your kitchen smell like a proper bakery.
The Magic of a Discard Transformation
There's something deeply satisfying about giving your discard a glorious purpose. You’re not just baking, you’re rescuing ingredients.
It feels thrifty and clever, transforming what might have gone down the drain into golden, puffy bagels. These bagels come together in one afternoon, with just one rise.
The timeline is friendly, truly. You can start after breakfast and be slathering cream cheese on your own creation by lunch.
Honestly, once you realize how simple the process is, that store-bought bagel run might just disappear from your routine.
Ingredients Needed for the Recipe
Gathering what you need is half the battle, and here, it's wonderfully simple. Everything is a pantry staple, aside from your precious discard.
Bread Flour: This is the backbone, providing the strong gluten structure needed for that iconic, chewy bagel texture.
Granulated Sugar: A little feeds the yeast in the dough, and more gets added to the boiling water for a perfect, shiny crust.
Instant Yeast: This works alongside your sourdough discard to guarantee a reliable, bubbly rise in just a few hours.
Kosher Salt: Crucial for balancing all the flavors and making the tangy, wheaty notes really sing in your mouth.
Sourdough Discard: Your star ingredient, unfed and at room temperature. It adds a subtle, complex tang and beautiful depth to the crumb.
Warm Water: It wakes up the yeast and brings the whole dough together into a smooth, workable mass.
Egg White & Water: Mixed together for the egg wash, this gives the bagels their inviting, golden-brown sheen after baking.
Toppings (Optional): This is your playground. Everything seasoning, sesame seeds, poppy seeds, or even a sprinkle of flaky salt.
How to make Sourdough Discard Bagels?
The journey from bowl to beautiful bagel is a series of small, satisfying steps. Just follow along, it’s easier than you think.
Make this recipe yours—just save it to your Pinterest board!”
Step 1- Mixing and Kneading the Dough
Combine your dry ingredients right in the bowl of a stand mixer fitted with a dough hook. Give them a quick stir to get acquainted.
With the mixer on low, pour in the water and add your sourdough discard. Let it all come together into a shaggy mass, then bump the speed to medium.
Step 2- The First Rise
Knead for a good 4 to 5 minutes, until the dough forms a smooth, cohesive ball that pulls away from the sides of the bowl. It should feel soft, but not sticky.
Place this ball into a lightly greased bowl, cover it tightly with plastic wrap, and find a cozy spot for it. Let it rise and double in size, which takes about 90 minutes.
Step 3- Shaping Your Bagels
Once risen, turn the puffy dough out onto a clean, un-floured surface. Divide it evenly into 8 pieces for standard bagels, or 10 for slightly smaller ones.
Roll each piece into a tight ball using the palm of your hand, creating a smooth top. This little seam on the bottom is perfectly fine, it’s the “ugly” side that no one will see.
Step 4- Creating the Hole
Now for the fun part. Press your thumb straight through the center of each ball. Gently stretch the hole with your fingers, rotating to make it about 1.5 to 2 inches wide.
Place your shaped bagels on a surface, cover them with a clean kitchen towel, and let them rest for 20 minutes. This short rest is important, I promise.
Step 5- The Boiling Bath
While they rest, preheat your oven and bring a wide pot of water to a boil, stirring in some sugar. This is the bagel magic trick.
Gently lower a few bagels into the boiling water—don’t crowd them. They should float to the top! Boil for 15-30 seconds per side for your desired chewiness.
Step 6- Topping and Glazing
Use a slotted spoon to lift the bagels out, letting excess water drip away. Place them on a parchment-lined baking sheet.
Brush each warm bagel lightly with the egg wash. This is the glue for your toppings, so sprinkle or dip your chosen seeds and seasonings now.
Step 7- Baking to Golden Perfection
Slide the baking sheets into your hot oven. Bake until the bagels are a deep, irresistible golden brown all over.
The smell will be incredible. Let them cool completely on a rack before you slice—this patience prevents a gummy interior.
Classic Flavor Twists to Try
The plain bagel is a beautiful canvas, but sometimes you want to paint with flavor. A few simple additions can transform your whole batch.
For a cinnamon-raisin version, knead a tablespoon of cinnamon and a handful of plump raisins into the dough during the final minute of mixing. Blueberries, tossed in a light dusting of flour, can be folded in for a sweet, juicy burst in every bite.
And for a savory, aromatic treat, finely chopped fresh rosemary mixed into the dough along with a coarse salt topping is absolutely heavenly. The possibilities are truly endless, and entirely up to you.
Tips
Knead that dough until it's completely smooth and satiny. A shaggy dough here will lead to dense bagels, and we don't want that.
Don't be afraid to adjust with a tablespoon of extra water or flour. Every starter has a different hydration, so your perfect dough might need a tiny tweak.
Control your crust's chew by timing the boil. For a thinner, softer crust, aim for 15 seconds per side. For a classic, chewy bite, go for the full 30 seconds.
Shake off every last drip of water after boiling. Excess moisture on the baking sheet is the main culprit behind sticky-bottomed bagels.
Use a light hand with the egg wash. You just need enough for the toppings to adhere; puddles of egg wash underneath can cause sticking.
Understanding the Float Test
That moment when you slip a bagel into the boiling water and it bobs right back up is pure baking satisfaction. It has a name: passing the float test.
This little float is a crucial signal. It tells you the bagels have proofed just enough, trapping the right amount of air inside for a light, airy crumb.
If a bagel sinks and doesn't want to float, don't worry. It's simply not ready yet. Just lift it out, let all the bagels rest for another 10 minutes under the towel, and try again.
That extra rest gives the yeast a bit more time to work, creating the bubbles needed for lift. Patience here guarantees a perfect texture.
Keeping Your Bagels Fresh
Let's be real, they're best the day they're made, still slightly warm. But they store wonderfully for future breakfasts, too.
Once completely cool, pop them into a plastic bag or airtight container at room temperature. They'll stay lovely for up to three days.
For longer-term keeping, the freezer is your best friend. Wrap each bagel individually and freeze them for up to three months.
When a craving hits, just take one out and warm it straight from frozen in the microwave, or toast it for that just-baked crispness. It’s a little gift from your past self.
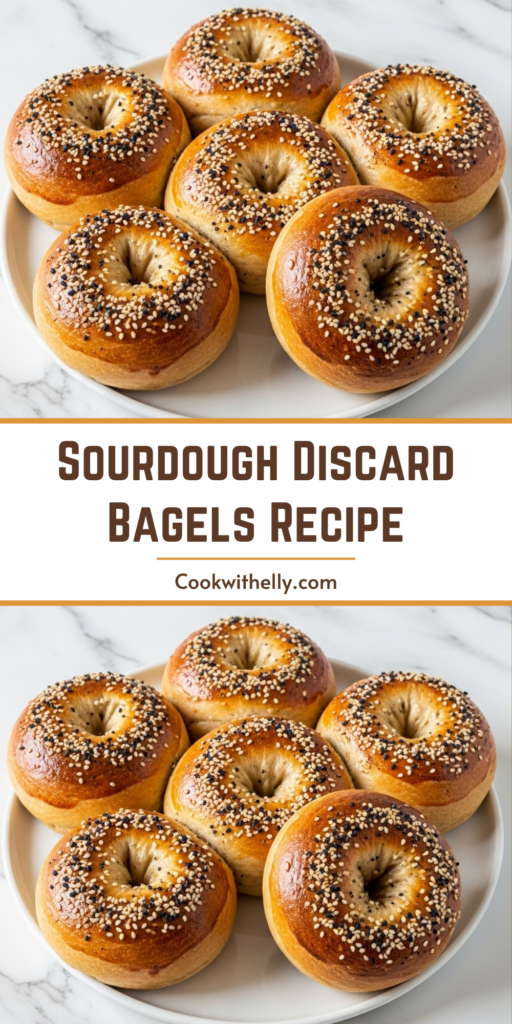
If you're maintaining a sourdough starter, you likely have plenty of sourdough discard—and these Sourdough Discard Bagels are the perfect way to use it up! They're soft, chewy, and customizable with your favorite toppings like sesame seeds, poppy seeds, or everything bagel seasoning. Ready in just a few hours with less than 30 minutes of active prep, this same-day recipe is an easy weekend bake that yields bakery-quality results at home.
ingredients
For the Bagels
4cups bread flour
3Tbsp granulated sugar (divided)
1tsp instant yeast
2tsp kosher salt
200g sourdough discard (unfed, at room temperature, 1:1 ratio)
In the bowl of a stand mixer fitted with a dough hook, combine flour, 1 Tbsp sugar, instant yeast, and salt. Mix on low to combine.
2
Add sourdough discard and warm water. Mix on low until combined, then increase to medium speed and knead for 4–5 minutes until a smooth, non-sticky dough forms. Adjust with 1 Tbsp flour or water if needed.
3
Transfer dough to a lightly oiled bowl, cover with plastic wrap, and let rise for 90 minutes or until doubled.
4
Turn dough onto a clean surface and divide into 8–10 equal pieces. Shape each into a ball, then poke a hole through the center with your thumb and stretch to form a bagel shape.
5
Cover shaped bagels with a kitchen towel and rest for 20 minutes.
6
Preheat oven to 220°C (425°F). Line 2 baking sheets with parchment paper. In a large pot, bring 2 quarts of water and remaining 2 Tbsp sugar to a boil.
7
Boil bagels for 15–30 seconds per side. They should float (“pass the float test”). Use a slotted spoon to transfer to baking sheets.
8
Whisk egg white with 1 Tbsp water. Lightly brush bagels and sprinkle or dip in desired toppings.
9
Bake for 18–22 minutes until golden brown. Cool completely before slicing.
Nutrition Facts
Servings 8
Serving Size 1 bagel
Amount Per Serving
Calories240kcal
% Daily Value *
Total Fat0.5g1%
Sodium580mg25%
Potassium70mg2%
Total Carbohydrate50g17%
Dietary Fiber2g8%
Sugars5g
Protein8g16%
Calcium 20 mg
Iron 2.5 mg
* Percent Daily Values are based on a 2,000 calorie diet. Your daily value may be higher or lower depending on your calorie needs.
Note
Float test tip: If a bagel doesn’t float, let the shaped dough rest 10 more minutes before boiling.
Customize: Try blueberry, cinnamon raisin, pumpkin, or pretzel variations!
Storage: Keep at room temperature for up to 3 days, or freeze for up to 3 months.
No sourdough discard? Use this version without discard.