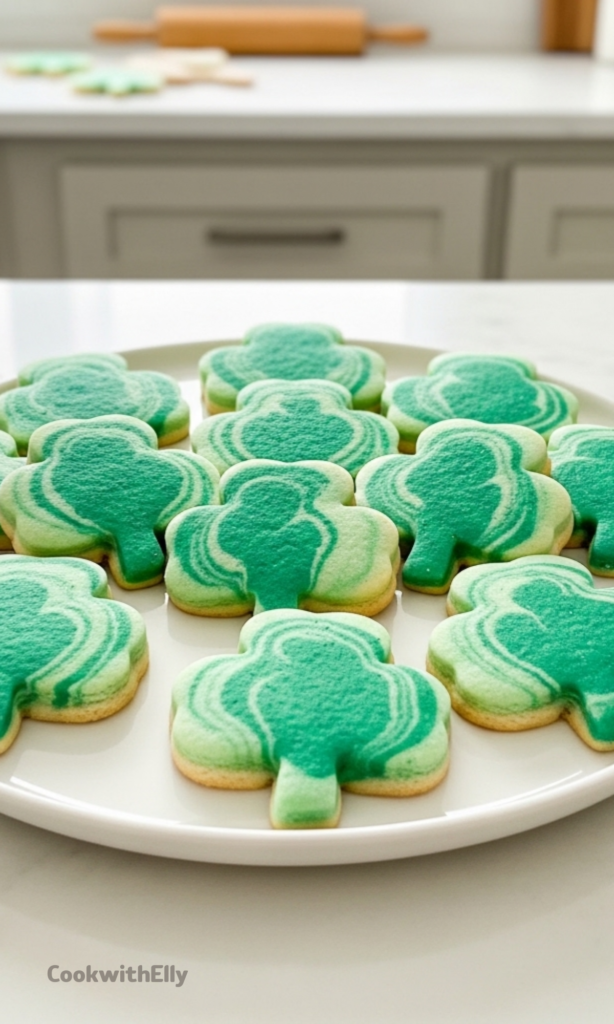
I make these Shamrock Cookies every year when the kitchen starts calling for something cheerful and a little playful. There is just something about green swirls of dough that feels festive without being fussy.
They are simple sugar cookies at heart, but the marbled effect gives them personality. I love recipes that look like I worked harder than I actually did.
This is also one of those bakes that feels relaxed from start to finish. No complicated decorating, no stacks of equipment, just mixing, rolling, and enjoying the process.
And honestly, the dough alone is worth it. Soft, buttery, lightly sweet, and perfect for making ahead when life gets busy.
Why These Cookies Always Make Me Smile
I started making these when I wanted something festive without dealing with icing bags or detailed designs. Sometimes I want cookies to look homemade in the best possible way.
The marbling means every cookie turns out different, and that’s part of the charm. A little uneven, a little swirly, and completely unique.
They’re also a great bake when you want to involve kids or just loosen up in the kitchen. There is no way to mess up rolling two colors together.
Ingredients Needed for the Recipe
Unsalted butter - gives the cookies their rich flavor and soft texture.
White sugar - adds sweetness and helps create that classic sugar cookie structure.
Large egg - binds everything together and keeps the dough tender.
Vanilla extract - brings warmth and rounds out the flavor.
All-purpose flour - forms the base of the dough and provides stability.
Baking powder - gives a slight lift so the cookies are not dense.
Salt - balances the sweetness and enhances flavor.
Green food coloring - creates the lighter shamrock shade.
Teal food coloring - deepens the color for that marbled contrast.
How to make Shamrock Cookies?
Make this recipe yours—just save it to your Pinterest board!”
Step 1 - Cream the Butter and Sugar
I start by beating the butter and sugar together until the mixture looks light and fluffy. This takes about two minutes, and it sets the foundation for a soft cookie.
Don’t rush this part. Proper creaming gives the cookies their delicate texture.
Step 2 - Add Egg and Vanilla
Next, I mix in the egg and vanilla extract. The dough becomes smooth and slightly glossy as everything blends together.
This step adds moisture and that familiar bakery-style flavor.
Step 3 - Combine the Dry Ingredients
In a separate bowl, I whisk together flour, baking powder, and salt. Mixing them first ensures everything distributes evenly.
I gradually add the dry mixture into the butter mixture so the dough stays smooth and easy to handle.
Step 4 - Create the First Color
I add a few drops of green food coloring to the dough and mix until I get a soft shamrock shade. You can adjust the color slowly until it feels just right.
This becomes the lighter half of the marbled look.
Step 5 - Divide and Chill
I remove half of the dough, wrap it, and place it in the refrigerator. Chilling helps the dough firm up and makes rolling easier later.
Even a short chill makes a big difference in how cleanly the cookies cut.
Step 6 - Color the Second Half
To the remaining dough, I add teal coloring to create a deeper green tone. This contrast is what makes the marbling stand out.
That dough gets wrapped and chilled as well for at least an hour.
Step 7 - Prepare for Rolling
Once chilled, I preheat the oven to 350°F and lightly flour my work surface. Cold dough is much easier to work with and holds its shape.
I break both dough colors into small pieces before combining them.
Step 8 - Marble the Dough
I press the pieces together and roll them out with a rolling pin. A few folds and re-rolls create that swirled effect without blending the colors completely.
The goal is ribbons of color, not one solid green.
Step 9 - Cut the Shamrock Shapes
I roll the dough to about half an inch thick, then cut out shapes using a shamrock cutter. Re-rolling scraps is totally fine and keeps the pattern interesting.
No two cookies will look alike, and that’s part of the fun.
Step 10 - Arrange for Baking
I place the cookies on a lined baking sheet, leaving about an inch of space between them. They don’t spread much, but a little room helps them bake evenly.
At this point, the kitchen already smells like vanilla and butter.
Step 11 - Bake Until Just Golden
The cookies bake for 8 to 12 minutes, just until the edges start to turn lightly golden. You don’t want deep color here.
Keeping them pale ensures they stay soft and tender.
Step 12 - Cool Before Moving
I let them rest on the baking sheet for about five minutes before transferring them. They are delicate while warm, so this prevents breaking.
After that, they finish cooling on a rack and firm up perfectly.
Simple Ways to Customize Them
Sometimes I add a drop of almond extract along with the vanilla for a slightly different flavor. It gives the cookies a subtle bakery-style twist.
You can also roll the dough slightly thinner if you prefer a crisper cookie. I like mine thicker because they stay soft longer.
If you want sparkle, a light dusting of sugar before baking adds texture without covering the marbled design.
Tips
Use room temperature butter so it creams smoothly without lumps.
Chill the dough well to prevent sticking and help maintain sharp shapes.
Do not overmix once the flour is added or the cookies may become tough.
Fold the dough gently when marbling to avoid blending the colors too much.
Line baking sheets with parchment for even browning and easy cleanup.
Watch the bake time closely since sugar cookies can overbake quickly.
Let cookies cool slightly before moving them to avoid cracking.
Re-roll scraps only once or twice to keep the marbling visible.
Storing and Making Ahead
I often double the batch and freeze half the dough for another day. It’s such a relief to pull ready-made dough from the freezer when the mood to bake hits.
The dough can be frozen for up to three months if wrapped tightly. I thaw it overnight in the fridge before rolling.
Baked cookies also freeze beautifully, which makes party prep feel much easier. Just let them cool completely before storing.
At room temperature, they keep well in an airtight container for several days. They stay soft and flavorful without any extra effort.
These Shamrock Cookies are one of those recipes that balance fun and simplicity. They look festive, taste classic, and never require perfection.
Every time I bake them, I end up enjoying the process just as much as the finished tray. That’s usually how I know a recipe is worth keeping.
And when the kitchen smells like butter and vanilla and there’s a swirl of green dough on the counter, it really does feel like a small celebration.
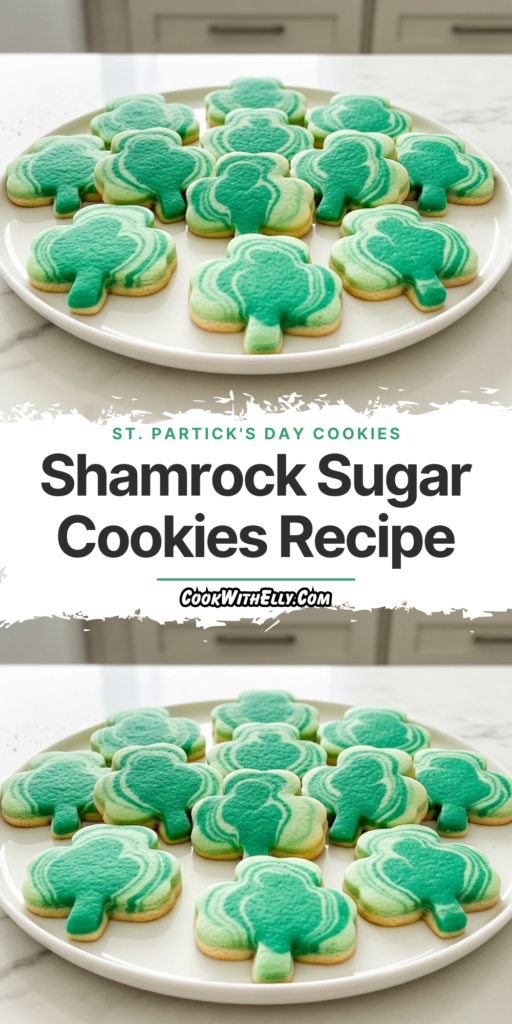
These festive Shamrock Sugar Cookies are a fun and easy twist on classic sugar cookies, perfect for St. Patrick's Day celebrations! Featuring a beautiful marbled green effect created by combining light and teal-green dough, these cookies are tender, buttery, and visually stunning. Kids love helping to roll, cut, and decorate these festive treats, and they make a wonderful addition to holiday parties, lunch boxes, or classroom celebrations.
ingredients
3/4cup unsalted butter (room temperature)
3/4cup white sugar
1large egg (room temperature)
2teaspoons vanilla extract
2 1/4cups all-purpose flour (plus more for rolling)
1/2teaspoon baking powder
1/2teaspoon salt
green food coloring (gel or liquid)
teal food coloring (for deeper green shade)
Instructions
1
Place the butter and sugar in a large bowl and beat until light and fluffy, about 2 minutes.
Use an electric mixer for best results
2
Add the egg and vanilla extract, and beat to incorporate, about 2 minutes.
Scrape down sides of bowl as needed
3
In a small separate bowl, whisk together the flour, baking powder and salt. Add half of the flour mixture to the sugar-butter mixture, combine, and then add the remaining half.
Mix just until combined to avoid tough cookies
4
Dye the cookie dough light green by adding a few drops of green food dye, mixing, and then adjusting until you reach your desired color.
Gel food coloring gives more vibrant color without affecting dough consistency
5
Remove about half of the cookie dough, cover with plastic wrap and refrigerate.
6
Dye the remaining cookie dough a brighter, deeper green with a few drops of teal food coloring. Cover and refrigerate, at least one hour. (You can refrigerate overnight, if desired.)
Chilling helps prevent spreading during baking
7
Preheat oven to 350°F (175°C) and remove the cookie dough from the fridge.
Line baking sheets with parchment paper or silicone mats
8
Flour a cutting board or large surface, then separate the two cookie doughs into smaller pieces and roll together with a rolling pin. Fold and re-roll as needed to create a pretty marbled pattern, with a thickness of about 1/2 inch.
Don't overwork the dough to maintain the marbled effect
9
Cut out the shamrock cookies using your cookie cutter, re-rolling the dough as needed.
Gather scraps gently and re-roll once to avoid tough cookies
10
Place the shamrock cookies on a parchment paper-lined cookie sheet (or silicone mat-lined) at least 1 inch apart.
11
Bake for 8-12 minutes, until just slightly golden on the edges.
Cookies will continue to set as they cool
12
Allow to cool on the cookie sheet for 5 minutes before transferring to cooling racks, to prevent breaking.
13
Store the cookies in an airtight container after they are cooled until you plan to enjoy them. You can also freeze these up to 3 months in advance – or freeze the cookie dough for that time, whichever is easier.
Thaw frozen cookies at room temperature for 30 minutes before serving
Nutrition Facts
Servings 24
Serving Size 1 cookie
Amount Per Serving
Calories122kcal
% Daily Value *
Total Fat6gg10%
Saturated Fat3.5gg18%
Trans Fat0gg
Cholesterol15mgmg5%
Sodium60mgmg3%
Potassium30mgmg1%
Total Carbohydrate16gg6%
Dietary Fiber0.3gg2%
Sugars8gg
Protein1.5gg3%
Calcium 1% mg
Iron 3% mg
* Percent Daily Values are based on a 2,000 calorie diet. Your daily value may be higher or lower depending on your calorie needs.
Note
Make ahead tip: Freeze unbaked cookie dough balls for up to 3 months. Bake straight from frozen, adding 1-2 minutes to baking time.
Color variation: Use only one shade of green for a simpler look, or add yellow food coloring for a three-tone marble effect.
Decorating option: Add a simple glaze (powdered sugar + milk + vanilla) and sprinkle with green sanding sugar for extra festivity.
Cookie cutter tip: Lightly flour your shamrock cutter between cuts to prevent sticking and maintain clean edges.
Keywords:
shamrock cookies, st patricks day cookies, sugar cookies, marbled cookies, green cookies, holiday baking, easy cookie recipe