I think the best desserts are the ones you can hold in your hand. They feel a little more fun, a little less formal, and perfect for sharing. That's exactly what you get with these red velvet whoopie pies. They're soft, cake-like cookies with a tangy cream cheese filling, all in one neat little package.
They have that classic red velvet flavor, which is a subtle chocolate with a hint of tang from buttermilk. The color just makes them feel special, like a little celebration. I love making these around Valentine's Day, but honestly, their cheerful red hue is welcome any time of year when you need a sweet pick-me-up.
The process is simpler than baking a layer cake, but the result is just as impressive. You get these pillowy soft domes that sandwich together with a lush, creamy filling. It's a texture dream, and the flavor balance is spot on. Let's get into how you can make them.
Ingredients Needed for the Recipe
Gathering your ingredients beforehand makes everything flow smoothly. I recommend using room temperature items for a smoother batter and filling. Here's what you'll need for both the whoopie pies and their signature cream cheese filling.
All-Purpose Flour: This forms the base structure of our soft cookie cakes. For accuracy, I like to spoon it into the measuring cup and level it off.
Natural Unsweetened Cocoa Powder: Not Dutch-process. This gives red velvet its signature hint of chocolate and works with the baking soda for a good rise.
Baking Soda & Sea Salt: The baking soda is our leavening agent for lift, and salt balances all the sweetness perfectly.
Unsalted Butter: Room temperature butter creams beautifully with the sugar, creating a light and tender crumb.
Light Brown Sugar: It adds a lovely moisture and a slight caramel note that white sugar just doesn't provide.
Egg & Pure Vanilla Extract: The egg binds everything, and vanilla enhances all the other flavors in the batter and the filling.
Buttermilk: This is the secret for a tender texture and that slight tang. Make sure it's room temperature.
Gel Red Food Coloring: Gel is more concentrated than liquid, so you need less to get a vibrant, true red color.
Block-Style Cream Cheese: This is key for the filling. The brick-style is thicker and sturdier than the spreadable kind in tubs.
Confectioners' Sugar: Also called powdered sugar, it sweetens and thickens our creamy filling beautifully.
My Foolproof Method for Perfect Whoopie Pies
Making these is a straightforward process, but a few small details make a big difference. The main goal is to not over-mix the batter once the dry ingredients go in. We want them soft and cakey, not tough. Here's my step-by-step approach.
Step 1 – Preparing Your Dry Ingredients
Start by preheating your oven to 350°F and lining a baking sheet with parchment paper. In a medium bowl, whisk together the flour, cocoa powder, baking soda, and salt. Whisking does two things, it combines them evenly and aerates the flour a little. Set this bowl aside for now.
Step 2 – Creaming the Butter and Sugar
In a stand mixer fitted with the paddle attachment, or using a hand mixer, beat the room-temperature butter and brown sugar together. Do this on medium-high speed for a good three minutes. You want it to become noticeably lighter in color and fluffy. This step incorporates air, which helps with the texture.
Step 3 – Adding the Wet Ingredients
Scrape down the sides of the bowl. Add the egg, vanilla extract, and the gel red food coloring. Mix until everything is fully incorporated and you have a uniformly red mixture. It will look a bit glossy. Now, with the mixer on low, pour in the room-temperature buttermilk. It's okay if the mixture looks slightly curdled at this point, it will come together.
Step 4 – Combining Wet and Dry
With the mixer still on low, gradually add the bowl of dry ingredients. Mix just until the last streaks of flour disappear. Stop the mixer and use a spatula to give one final fold, scraping from the bottom. Over-mixing is the enemy of tender whoopie pies, so be gentle here.
Step 5 – Scooping and Baking
Use a medium cookie scoop or a tablespoon to drop rounded mounds of batter onto your prepared sheet. Leave about two inches between them as they will spread. Bake for 10 to 12 minutes. They're done when the tops are set and spring back lightly when touched. Let them cool on the sheet for a few minutes before transferring to a wire rack to cool completely.
Step 6 – Making the Cream Cheese Filling
While the pies cool, make the filling. In a clean mixer bowl, beat the room-temperature cream cheese and butter together until completely smooth and creamy. Add the sifted confectioners' sugar and mix on low until combined, then beat on medium for a minute. Finish by mixing in the vanilla and a tiny pinch of salt.
Step 7 – Assembling the Sandwiches
Match up the cooled whoopie pie cakes into pairs of similar size. You can spoon the filling, but I like to pipe it for control and a pretty look. Transfer the filling to a piping bag fitted with a round or star tip. Pipe a generous dollop onto the flat bottom of one cake, then gently press its partner on top. Repeat with all the pairs.
Tips for the Best Results
A few little tricks I've learned along the way can really elevate your whoopie pies from good to exceptional. They're simple habits that ensure consistency every single time you bake.
Use a kitchen scale for your flour and sugar. Measuring by weight is the most accurate way to bake and guarantees the right texture.
Do not use Dutch-process cocoa powder. The natural cocoa is acidic and reacts with the baking soda to give you a better rise.
If you don't have buttermilk, make a quick substitute. Put two teaspoons of white vinegar in a measuring cup, then add enough milk to reach the 3/4 cup line. Let it sit for 10 minutes before using.
Let the cookies cool entirely before filling them. If they're even slightly warm, the cream cheese filling will soften and melt.
For a stunning Valentine's twist, you can pipe the batter into heart shapes. It takes a steady hand, but the effect is lovely.
Creative Variations to Try
Once you've mastered the classic, it's fun to play around with different flavors. This recipe is a wonderful base that welcomes a bit of personalization. Here are a few ideas I enjoy when I'm feeling creative in the kitchen.
For a different filling, a simple vanilla buttercream or even a marshmallow fluff frosting would be delightful. A chocolate buttercream would double down on the chocolate notes for true cocoa lovers. You can also make mini whoopie pies for a party using a small cookie scoop.
Just remember to adjust the baking time down to about 8 minutes for minis. If you're not a fan of food coloring, you can absolutely leave it out. You'll have delicious "velvet" whoopie pies with a rich, reddish-brown color from the cocoa. They taste just as wonderful.
How to Store Your Finished Pies
Because of the cream cheese filling, these whoopie pies need to be stored in the refrigerator. Place them in a single layer in an airtight container. If you need to stack them, put a piece of parchment paper between the layers to keep them from sticking together.
They will keep well for up to one week. For the best texture and flavor, let them sit out at room temperature for about 15 to 20 minutes before serving. The cold filling will soften slightly, and the cookie cakes will lose their chill.
You can also freeze them for longer storage. Wrap each whoopie pie individually in plastic wrap, then place them all in a freezer bag or container. They'll keep for up to two months. Thaw overnight in the refrigerator before serving.
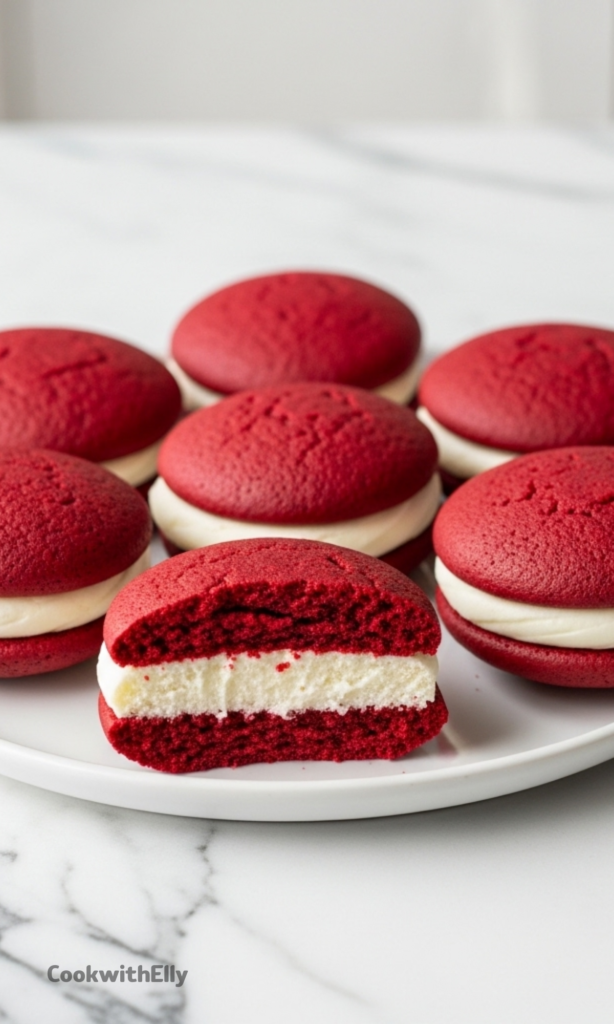
Pillowy soft and perfectly moist, homemade red velvet whoopie pies are the ideal dessert for Valentine’s Day! These little cake-like cookies are sandwiched with cream cheese filling. They taste just like red velvet cupcakes!
ingredients
Whoopie Pies
2cups all-purpose flour ((250 g))
1/4cup natural unsweetened cocoa powder ((25 g), not Dutch-process)
1tsp baking soda
1/2tsp sea salt
1/2cup unsalted butter ((113 g or 1 stick), room temperature)
1cup light brown sugar ((200 g))
1 large egg (room temperature)
1tsp pure vanilla extract
3/4cup buttermilk ((180 ml), room temperature)
1tsp gel red food coloring (or 2 tsp liquid dye)
Cream Cheese Filling
1cup block-style cream cheese ((225 g or 8 oz), room temperature)
1/4cup unsalted butter ((57 g), room temperature)
2cups confectioners’ sugar ((240 g), sifted)
1/2tsp pure vanilla extract
1pinch salt
Instructions
1
Preheat oven to 350°F (177°C). Line a baking sheet with parchment paper and set aside.
2
In a large bowl, whisk together flour, cocoa powder, baking soda, and salt. Set aside.
3
In the bowl of a stand mixer (or using a hand mixer), beat butter and brown sugar on medium-high speed until light and fluffy, about 3 minutes. Add egg, vanilla, and red food gel. Mix in the buttermilk (it’s okay if it looks slightly curdled). Scrape down the sides as needed.
4
Add the dry ingredients to wet ingredients and mix just until combined.
5
Use a medium cookie scoop to transfer batter to prepared pan, leaving 2 inches between each scoop. Bake for 10–12 minutes until soft and slightly springy. Cool completely on a wire rack.
6
In a clean bowl, beat cream cheese and butter until creamy. Add confectioners’ sugar and mix until combined. Mix in vanilla and a pinch of salt.
7
Transfer frosting to a piping bag fitted with desired tip. Pair similar-sized cookies. Pipe frosting onto the bottom of one cookie and gently press its match on top to form a sandwich. Repeat with remaining cookies.
Nutrition Facts
Servings 12
Serving Size 1
Amount Per Serving
Calories411kcal
% Daily Value *
Total Fat19g30%
Saturated Fat12g60%
Trans Fat0.5g
Cholesterol65mg22%
Sodium276mg12%
Potassium129mg4%
Total Carbohydrate57g19%
Dietary Fiber1g4%
Sugars39g
Protein5g10%
Calcium 62 mg
Iron 1 mg
* Percent Daily Values are based on a 2,000 calorie diet. Your daily value may be higher or lower depending on your calorie needs.
Note
Red food dye: Gel dye is best because it’s more concentrated. If using liquid dye, increase to 2 tsp or more until desired color is reached.
Storage: Keep in an airtight container in the refrigerator for up to 1 week. Use parchment between layers to prevent sticking.
Make ahead: Dough can be refrigerated for up to 48 hours; frosting can be made up to 1 week ahead.
Keywords:
red velvet whoopie pies, cream cheese filling, valentine's day dessert, whoopie pies, red velvet cookies