That little jar of sourdough discard on your fridge shelf holds more potential than you might think.
It's not just waste, waiting to be fed or tossed, but a secret ingredient for the coziest, quickest breakfast you can make on a sleepy morning.
Why This Recipe Earns a Permanent Spot
These pancakes are my quiet victory over the "I have no time" breakfast dilemma.
They transform that tangy discard into something golden and glorious in less time than it takes for the coffee to brew, truly.
Ingredients Needed for the Recipe
Sourdough Starter Discard: The star of the show, straight from the fridge, giving that wonderful tangy depth.
Unbleached All-Purpose Flour: The reliable base that builds the fluffy structure we all love.
Milk (or Water): Loosens the batter to just the right, pourable consistency for perfect rounds.
Large Eggs: They bind everything together and add a lovely richness to the crumb.
Butter: Melted right into the batter for flavor, and more for the skillet to create those crispy, lacy edges.
Honey: A gentle, natural sweetness that complements the sourdough notes so beautifully.
Salt: The essential flavor enhancer that makes every other ingredient pop.
Baking Soda: Our quick-acting leavener, responsible for those irresistible, airy bubbles.
How to make Quick Sourdough Discard Pancakes?
Make this recipe yours—just save it to your Pinterest board!”
Step 1- Prep Your Butter and Dry Mix
Start by melting that half-stick of butter, then let it cool off for a minute so it doesn't scramble the eggs.
While it cools, whisk the flour, salt, and baking soda together in a large bowl—this simple step ensures the leavener is evenly distributed, no clumps.
Step 2- Combine Everything, Gently
Pour the slightly cooled butter, your sourdough discard, milk, eggs, and honey right into the bowl with the dry ingredients.
Now, take your whisk and stir until you no longer see dry streaks of flour, but please, stop right there.
Step 3- Heat the Stage
Place your skillet or griddle over medium heat and give it a few minutes to get properly, evenly warm.
This patience is key; a properly heated pan means golden-brown, not pale, pancakes.
Step 4- Butter and Pour
Add a small pat of butter to the hot skillet and let it sizzle and melt, swirling it around.
Ladle about a third of a cup of that lumpy, perfect batter right onto the buttery spot, watching it immediately begin to settle.
Step 5- Watch for the Bubbles
Now, the hardest part: wait. Let the pancake cook until the top surface is dotted with little popped bubbles and the edges look matte and set.
Slide your spatula underneath with confidence, and flip it in one smooth motion.
Step 6- Finish and Serve Warm
Cook for just another minute or two on the second side, until it's gorgeously golden brown.
Slide it onto a plate and serve immediately, because a warm pancake is a happy pancake.
Simple Swaps and Twists
Out of milk? Water works perfectly fine here, it really does.
For a dairy-free version, use a milk alternative and swap the butter for coconut oil, both in the batter and for frying.
Honey not your thing? Pure maple syrup or even a couple tablespoons of granulated sugar will sweeten the deal just fine.
And if you want to get fancy, a handful of chocolate chips or fresh berries scattered onto the wet batter right after you pour it is a wonderful idea.
Tips
Control Your Heat: If your pancakes are browning too fast on the outside while staying raw inside, just nudge the heat down to medium-low. Every stove is different.
Embrace the Lumps: Over-mixing is the true enemy of fluffiness. A few lumps in the batter are not just okay, they're a sign you handled it correctly.
Keep Them Cozy: To serve a stack to everyone at once, heat your oven to 200°F and keep finished pancakes warm on a baking sheet inside, loosely covered with foil.
Go Savory: Try topping these with a fried egg and some crispy bacon for a spectacular, sweet-and-tangy brunch twist.
Your Starter's Journey Beyond Bread
When I first created my sourdough starter, I saw it as a one-trick pony, destined only for loaves of bread.
I was so delightfully wrong, discovering its magic in cookies, crepes, and even granola over the years.
This recipe is a celebration of that versatility, a true testament to a starter's full life.
It takes the "discard" from a chore and makes it the cherished start of something delicious.
Getting the Perfect Flip
The first pancake is often a test, a sacrifice to the kitchen gods, and that's completely normal.
Use it to adjust your heat and get a feel for the timing, then the rest will be smooth sailing.
Wait for those bubbles to pop and stay open, and for the edges to look fully cooked.
Then, don't hesitate—a quick, firm flip is better than a slow, unsure one, trust me on this.
Serving Up Something Special
While classic butter and maple syrup is a flawless choice, don't stop there.
A dollop of homemade yogurt, a spoonful of whipped cream, or a pile of seasonal fruit elevates the whole plate.
These pancakes have this incredible way of feeling both wonderfully everyday and perfectly celebratory.
They turn a regular Saturday morning into a small, syrupy event, and that's their real magic.
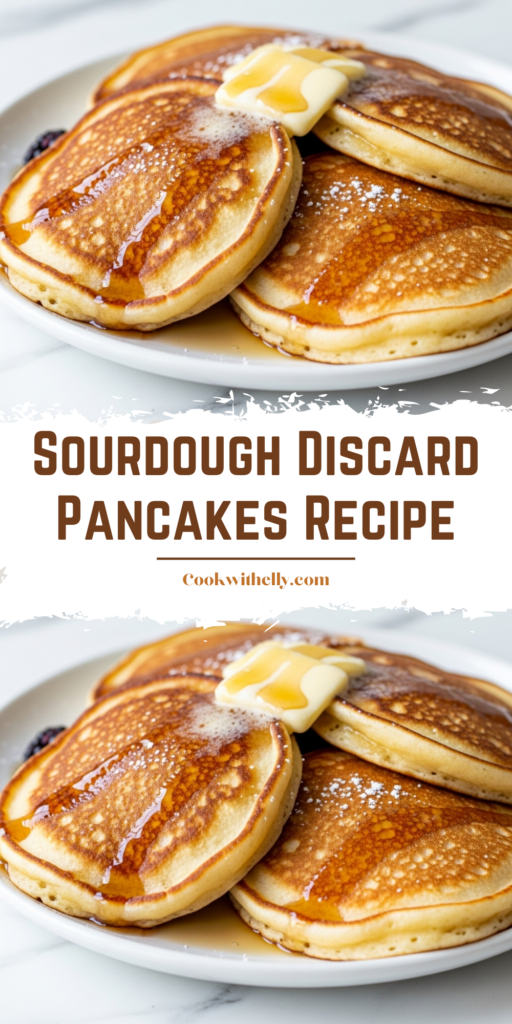
These fluffy sourdough discard pancakes are so simple and come together in under 15 minutes. Make any breakfast special with these buttery, golden brown pancakes, best served with a little extra butter and maple syrup.
ingredients
1/4cup sourdough discard (active starter will also work)
1 1/2cups milk (or water)
1 3/4cups unbleached all-purpose flour
2 large eggs
1/4cup butter, melted
2tablespoons honey (or maple syrup)
1/2teaspoon salt
1teaspoon baking soda
Instructions
1
Melt 1/4 cup (half of a stick) of butter. Set aside to cool slightly. In a large bowl, combine flour, salt, and baking soda.
2
Add sourdough discard, milk, eggs, cooled melted butter, and honey to the dry ingredients.
3
Whisk until just combined. It’s okay if your batter is still a little lumpy.
4
Heat a skillet (preferably cast iron) over medium heat.
5
Add a small amount of butter to the hot skillet, then ladle about 1/3 cup of batter onto the melted butter.
6
Cook until the edges begin to set and bubbles appear across the surface—this may take 2–3 minutes. Flip and cook for 1–2 more minutes on the other side.
7
Serve warm with your favorite toppings like fresh berries, yogurt, extra butter, or maple syrup.
Nutrition Facts
Servings 4
Serving Size 1 pancake (approx. 1/12 of recipe)
Amount Per Serving
Calories220kcal
% Daily Value *
Total Fat9g14%
Saturated Fat5g25%
Cholesterol95mg32%
Sodium320mg14%
Potassium180mg6%
Total Carbohydrate29g10%
Dietary Fiber1g4%
Sugars8g
Protein7g15%
Calcium 8 mg
Iron 10 mg
* Percent Daily Values are based on a 2,000 calorie diet. Your daily value may be higher or lower depending on your calorie needs.
Note
Heat control matters: You may need to reduce the heat to medium-low if pancakes are browning too quickly.
Don’t overmix: A few lumps in the batter are fine—overmixing can lead to dense or flat pancakes.
Keep them warm: Place cooked pancakes on a baking sheet in a 200°F oven, covered with foil, while finishing the batch.
Make it dairy-free: Substitute butter with coconut oil and milk with a plant-based alternative or water.