Every spring I wait for asparagus season like it’s a tiny holiday. The bundles show up, bright green and snappy, and suddenly I want to put asparagus into everything I cook. But the season never lasts long enough.
That’s exactly why I started pickling it years ago. Fresh asparagus is wonderful, sure, but pickled asparagus lets me hold onto that flavor long after the markets move on to something else.
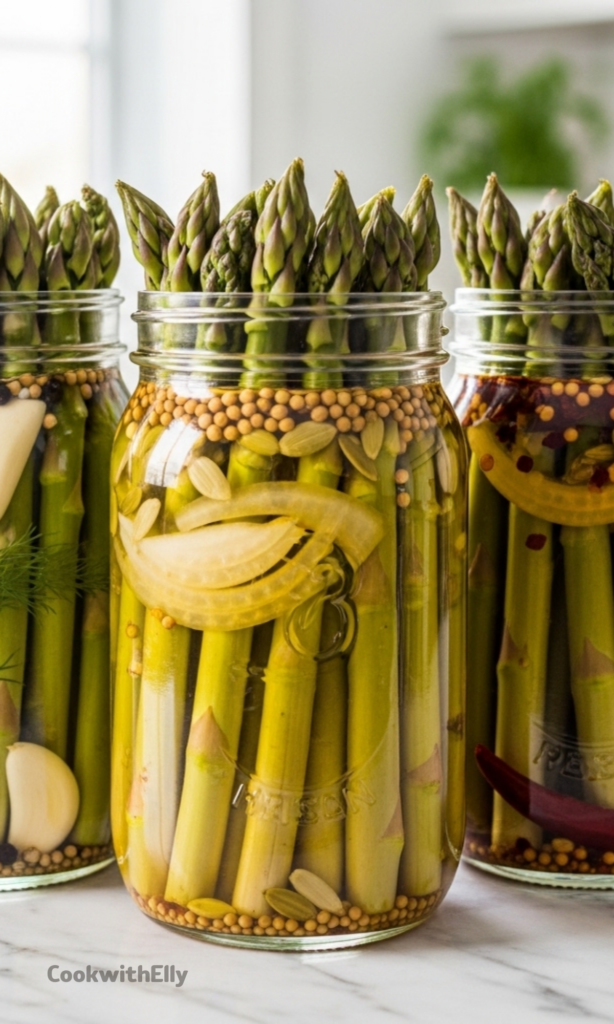
And here’s the thing people don’t expect. Pickled asparagus stays crisp. It doesn’t go limp or soggy the way some vegetables do, which makes it one of my favorite things to preserve.
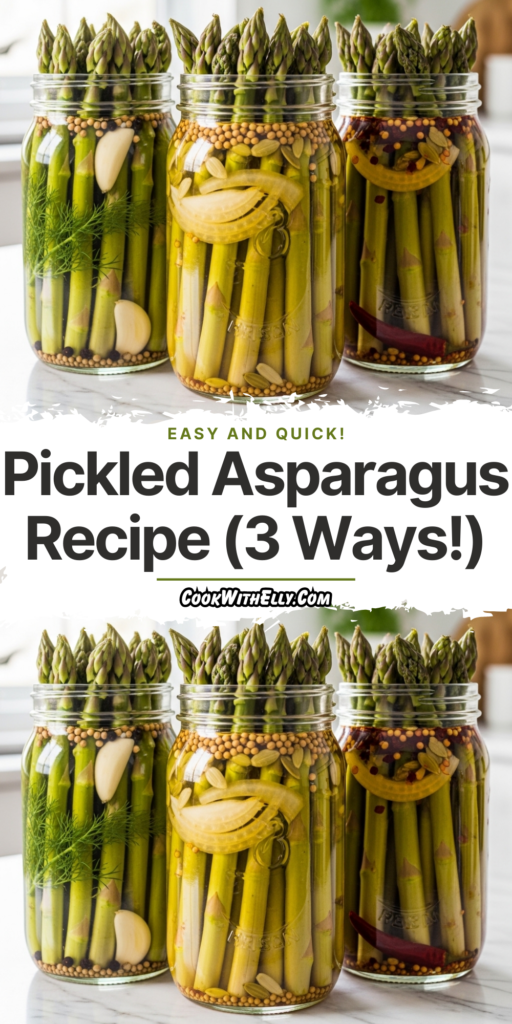
I make it three different ways depending on my mood. A clean and classic version, a sweet-tangy bread and butter style, and a spicy batch when I want a little kick.
Choosing the Best Asparagus
Good pickles start with good vegetables, and asparagus is no exception. I always look for firm spears with tight tips and a bright, fresh color.
Thin or medium spears work best because they absorb the brine quickly without turning soft. If the bottoms feel woody, I trim generously so only the tender part goes into the jar.
Fresh asparagus makes a difference here. When it’s recently harvested, the texture holds beautifully through pickling and keeps that satisfying snap.
Ingredients Needed for the Recipe
Fresh asparagus - the star of the show, trimmed so only tender spears remain.
White vinegar (5% acidity) - provides the tang and preserves the asparagus safely.
Cider vinegar (for the bread and butter version) - adds a slightly fruity depth.
Water - balances the vinegar so the flavor is bright but not overpowering.
Pickling and canning salt - enhances flavor and helps maintain a firm texture.
Sugar (used in select versions) - creates balance, especially in sweet or spicy styles.
Onion, thinly sliced - adds a mellow savory note to the jars.
Garlic cloves - bring warmth and depth that builds over time.
Mustard seeds - give a gentle pop of flavor and classic pickle character.
Black peppercorns - add subtle spice without overwhelming the asparagus.
Coriander seeds - contribute a light citrusy background.
Celery seeds (bread and butter version) - add an old-fashioned pickle flavor.
Turmeric (bread and butter version) - gives color and earthy warmth.
Crushed red pepper flakes (spicy version) - bring heat and complexity.
How to make Pickled Asparagus (3 Ways!)?
Step 1 - Prepare the Asparagus
I start by washing the spears well and snapping or cutting off the woody ends. This is important because tough ends never soften properly in the jar.
Then I trim the spears so they fit neatly inside the jars while still leaving about 1 inch of headspace. Keeping them whole makes for a prettier result, but chunks work too.
Step 2 - Pack the Jars Tightly
I stand the asparagus upright in wide-mouth jars, packing them in snugly. They shrink slightly once the hot brine hits, so a tight pack now prevents half-empty jars later.
At this stage I add onions, garlic, and the whole spices directly into each jar. This helps distribute the flavor evenly instead of relying on the brine alone.
Step 3 - Prepare the Brine
In a saucepan, I combine the vinegar, water if using, salt, and any sugar or ground spices required for the version I’m making. The mixture needs to come to a full rolling boil.
The boiling step dissolves everything and blends the flavors so the asparagus pickles consistently. It also ensures the jars get properly heated when filled.
Step 4 - Pour the Hot Brine Over the Spears
I carefully ladle the hot liquid over the asparagus, making sure every spear is fully submerged. Leaving that 1 inch of headspace helps with sealing if I’m canning.
A quick tap of the jar releases any trapped air bubbles. This small step makes a big difference in texture and storage quality.
Step 5 - Seal the Jars
Once filled, I wipe the rims clean and apply the lids. If I’m making refrigerator pickles, the jars simply get sealed and set aside to cool.
If I want shelf-stable pickles, I move straight into water bath processing. Both methods work beautifully depending on how long I want to store them.
Step 6 - Process for Long-Term Storage (Optional)
For pantry storage, I process the jars in a water bath canner for about 15 minutes. This step makes them safe to keep for many months.
After processing, I let the jars cool undisturbed on a towel. That quiet cooling time helps the seals form properly.
Step 7 - Let the Flavors Develop
Patience matters here. I try to wait at least a week before opening a jar so the brine can fully infuse the asparagus.
The difference between day one and day seven is huge. The flavor deepens, the garlic mellows, and everything comes together.
The Three Flavor Variations
All three versions follow the same method, but the personality of each one is completely different. I like to make a mix so there’s always something for whatever mood strikes.
Basic Pickled Asparagus
This version is clean, savory, and lets the vegetable shine. The 50-50 mix of vinegar and water keeps it balanced without being too sharp.
I skip sugar here because I want a straightforward pickle that pairs with almost anything. It’s the batch I reach for most often.
Bread and Butter Pickled Asparagus
This one leans sweet and tangy, with cider vinegar and sugar creating that familiar bread and butter flavor. The turmeric gives it a warm golden color.
It’s surprisingly good alongside sandwiches or cheese boards. The sweetness plays nicely against salty foods.
Spicy Pickled Asparagus
When I want something bold, I add crushed red pepper flakes and a touch of sugar to round out the heat. The result is lively but not overwhelming.
You can adjust the spice level easily. I sometimes toss in sliced chilies if I’m feeling adventurous.
Tips
Use vinegar with at least 5% acidity to ensure proper preservation.
Pack jars tightly so the asparagus doesn’t float after brining.
Wide-mouth jars make it easier to arrange spears neatly.
Always pour brine while it’s still very hot for best texture.
Let pickles rest at least a week before eating for fuller flavor.
Trim woody ends generously to avoid tough bites.
Store opened jars in the refrigerator to maintain crunch.
Label jars with the date so you can track freshness.
Storage and Serving Ideas
Properly canned pickled asparagus keeps well in the pantry for 12 to 18 months. Once opened, I move it to the fridge where it stays crisp for weeks.
Refrigerator-only batches should be eaten within about a month. They rarely last that long in my house anyway.
I love serving these straight from the jar as a snack, but they also work beautifully chopped into salads. The acidity brightens rich dishes in a way that feels effortless.
They’re also fantastic alongside grilled meats, tucked into sandwiches, or added to appetizer boards. A single spear can wake up an entire plate.
Sometimes I even use the leftover brine in dressings or marinades. It carries all that seasoning, and it feels like getting a bonus ingredient.
However you serve them, these pickles bring a little reminder of asparagus season back to the table. And that’s exactly why I keep making them year after year.
Homemade pickled asparagus is a crisp, flavorful treat that captures the fresh taste of spring in a jar. Whether you prefer classic dill-style, sweet bread-and-butter, or spicy kick, these three easy brine variations deliver restaurant-quality pickles with minimal effort. Perfect for snacking, charcuterie boards, or gifting—and they keep for months!
1/2cup pickling and canning salt (do not substitute table salt)
6tsp mustard seeds
6tsp black peppercorns
6tsp coriander seeds
Bread and Butter Pickled Asparagus Brine
7cups cider vinegar (5% acidity)
1/2cup pickling and canning salt
1 1/2cups granulated sugar
1tbsp ground turmeric (for color and warmth)
6tsp mustard seeds
6tsp celery seeds
Spicy Pickled Asparagus Brine
5cups white vinegar (5% acidity)
3cups water
1/2cup pickling and canning salt
1/2cup granulated sugar (balances heat)
6tsp dried crushed red pepper (adjust to taste, up to 6 tbsp for extra heat)
6tsp mustard seeds
6tsp coriander seeds
Instructions
1
Prepare Jars and AsparagusWash and trim asparagus spears, removing woody ends. Cut to fit your jars, leaving 1-inch headspace. Use wide-mouth jars without shoulders for best presentation.
Wide-mouth pint-and-a-half jars work beautifully for tall spears
2
Pack JarsTightly pack asparagus spears vertically into clean jars. Add sliced onion, garlic cloves, and whole spices directly to each jar (approximately 1 tsp of each whole spice per pint jar).
Pack tightly—spears will shrink slightly when hot brine is added
3
Prepare BrineIn a large non-reactive saucepan, combine vinegar, water (if using), salt, sugar (if using), and any ground spices. Bring to a full rolling boil over high heat, stirring to dissolve salt and sugar.
Always use vinegar with 5% acidity for safe canning
4
Fill JarsCarefully pour hot brine over asparagus in jars, completely covering spears and maintaining 1-inch headspace. Remove air bubbles with a non-metallic utensil if needed.
Wipe jar rims clean before applying lids
5
Seal and ProcessApply two-part canning lids and fingertip-tighten bands. For shelf-stable pickles: process in a boiling water bath canner for 15 minutes (adjust for altitude). For refrigerator pickles: skip canning, cool to room temperature, then refrigerate.
Refrigerator pickles keep 1 month; canned pickles keep 12-18 months in a cool, dark place
6
Rest and EnjoyAllow pickles to rest at least 24 hours before eating for flavors to develop. For best texture and flavor, wait 1-2 weeks before enjoying canned pickles.
Flavors meld and improve over time
Nutrition Facts
Servings 48
Serving Size 3-4 spears (approx. 85g)
Amount Per Serving
Calories20kcal
% Daily Value *
Total Fat0gg0%
Saturated Fat0gg0%
Trans Fat0gg
Cholesterol0mgmg0%
Sodium290mgmg13%
Potassium150mgmg5%
Total Carbohydrate4gg2%
Dietary Fiber2gg8%
Sugars1gg
Protein2gg4%
Calcium 25mg mg
Iron 1mg mg
* Percent Daily Values are based on a 2,000 calorie diet. Your daily value may be higher or lower depending on your calorie needs.
Note
Trimming tip: Snap off woody ends by bending the spear near the base—it will break naturally at the tender point.
Vinegar safety: Always verify your vinegar is 5% acidity for safe water-bath canning. Rice vinegar or diluted vinegars are not safe for canning unless acidified.
Low-carb friendly: The Basic and Spicy versions contain no added sugar, making them suitable for keto, paleo, and diabetic diets.
Flavor boost: Add fresh dill, jalapeño slices, or lemon zest to customize your brine.
Refrigerator method: Skip the water bath for quick pickles—just cool jars and refrigerate. Enjoy within 1 month.