There’s something quietly magical about a tray of snowy white cookies during the holidays. I always end up reaching for peppermint snowball cookies first, mostly because they look simple but taste incredibly rich and buttery. The powdered sugar coating alone makes them feel festive before you even take a bite.
I’ve baked a lot of cookies over the years, but this one stays on my list because it’s surprisingly easy. Just one bowl, a handful of ingredients, and the dough practically makes itself. And once the crushed candy canes start melting into the cookies while baking, the whole kitchen smells fresh and minty.
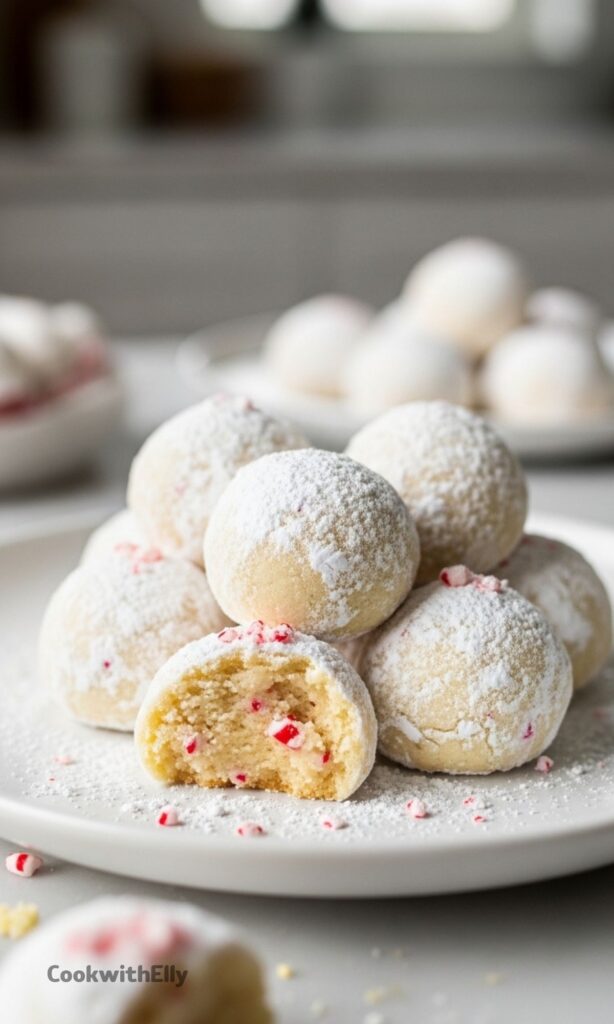
The texture is the real star though. These cookies are dense, soft, and crumbly in the best way possible. When you bite into one, it kind of melts and leaves behind that cool peppermint sweetness. It’s cozy, nostalgic, and perfect for holiday baking.
I like making them for cookie swaps, family gatherings, or honestly just a quiet afternoon with tea. They look fancy but the process is very forgiving, which makes them a favorite in my kitchen every winter.
Ingredients Needed for the Recipe
Unsalted butter (1 cup) - This is the base of the cookies. Creamed butter creates that rich, shortbread-like texture that snowball cookies are known for.
Confectioners’ sugar (3/4 cup for dough) - Powdered sugar sweetens the dough and helps give the cookies their delicate crumb.
Vanilla extract (1 teaspoon) - Adds a warm background flavor that balances the peppermint nicely.
Peppermint extract (1 teaspoon) - Brings the cool mint flavor that makes these cookies feel festive.
All-purpose flour (2 1/4 cups) - Provides the structure that holds the dough together.
Salt (1/8 teaspoon) - Just a small amount to balance the sweetness and enhance the flavor.
Crushed candy canes (1/3 cup) - These tiny peppermint bits melt slightly while baking and add bursts of minty sweetness.
Confectioners’ sugar (1 1/4 cups for coating) - Used to roll the cookies in after baking, creating that classic snowy look.
Why These Peppermint Snowball Cookies Work So Well
Snowball cookies have been around forever, and honestly, I get why. The formula is simple but reliable. Butter, flour, and powdered sugar come together to create a cookie that feels almost delicate even though the dough itself is pretty thick.
For this version, the peppermint really lifts the flavor. Instead of nuts, which many classic snowball cookies use, crushed candy canes take their place. That tiny twist gives the cookies a festive flavor without making the dough complicated.
I also love how approachable this recipe feels. No eggs, no complicated techniques, and very little prep work. If someone asked me for a beginner-friendly holiday cookie, this would absolutely be on my list.
How to make Peppermint Snowball Cookies?
Step 1 - Cream the Butter
Start by placing the softened butter in a large mixing bowl. Using a handheld mixer or stand mixer, beat the butter for about a minute on medium speed until it becomes smooth and creamy.
This step matters more than people think. Properly creamed butter helps the dough come together evenly and gives the cookies that signature melt-in-your-mouth texture.
Step 2 - Add the Sugar and Extracts
Add the confectioners’ sugar to the butter and beat on low speed first so it doesn’t fly everywhere. Then increase to medium-high speed until the mixture becomes light and creamy.
Next, mix in the vanilla extract and peppermint extract. The smell at this point is already amazing, kind of sweet and minty at the same time.
Step 3 - Mix in the Dry Ingredients
Add the flour and salt to the bowl and mix on low speed. At first the dough will look dry and crumbly, which can make you think something went wrong.
Keep mixing. Once the flour is fully incorporated, turn the mixer up to high speed briefly and you’ll see the dough finally pull together.
Step 4 - Fold in the Candy Cane Pieces
Now add the crushed candy canes. Mix them into the dough until they’re evenly distributed. Small pieces work best because they soften while baking.
Too large and they stay hard, so I usually crush them fairly finely. It also spreads the peppermint flavor through every cookie.
Step 5 - Chill the Dough
Cover the bowl tightly and place it in the refrigerator for about 30 minutes. This step helps the butter firm up again so the cookies hold their shape during baking.
If the dough skips this chilling time, the cookies tend to spread too much and turn more into flat puddles than snowballs.
Step 6 - Shape the Cookie Dough
Preheat the oven to 350°F and line two baking sheets with parchment paper. Scoop about one tablespoon of dough for each cookie.
Roll each portion between your palms to create small balls and place them on the prepared baking sheets with space between them.
Step 7 - Bake the Cookies
Bake the cookies for about 15 minutes. The bottoms will turn lightly golden while the tops remain pale.
That pale color is exactly what you want. It helps the powdered sugar coating stand out and gives the cookies their snowy appearance.
Step 8 - First Sugar Coating
Let the cookies sit on the baking sheet for about five minutes. While they’re still slightly warm, roll each cookie in a bowl of confectioners’ sugar.
The sugar will melt a bit into the warm cookies. That’s perfectly normal and actually helps create the final coating later.
Step 9 - Second Sugar Coating
Once the cookies have cooled completely, roll them in confectioners’ sugar again. This second coating is what gives them that soft, powdery finish.
By the end, they really do look like tiny snowballs ready for a holiday cookie tray.
Tips
Use room temperature butter so it creams smoothly and forms a proper base for the dough.
Measure flour carefully using the spoon-and-level method to avoid dense cookies.
Crush candy canes finely so they soften properly while baking.
Chill the dough for at least 30 minutes to keep the cookies round.
Roll cookies gently in powdered sugar while they are warm for the first coating.
Always coat them a second time after cooling for the classic snowball look.
Leave space between dough balls on the baking sheet so heat circulates evenly.
Use parchment paper or silicone baking mats to prevent sticking.
Storage and Make Ahead Options
These cookies store surprisingly well, which makes them perfect for holiday baking ahead of time. Once completely cooled, I usually keep them in an airtight container at room temperature.
They stay fresh for about a week this way, and honestly the flavor gets even better after a day or two. The peppermint settles into the buttery cookie and everything tastes more balanced.
If you want to prepare them even earlier, freezing works great. Baked cookies can be frozen for up to three months and thaw quickly at room temperature.
The dough also freezes beautifully. I like rolling the dough into balls first, freezing them on a tray, and then storing them in a freezer bag for easy baking later.
Serving Ideas for Holiday Cookie Trays
Peppermint snowball cookies are almost made for holiday cookie platters. Their snowy coating stands out among darker cookies and adds a nice visual contrast.
I usually place them near chocolate cookies or gingerbread because the flavors balance each other nicely. A cool peppermint cookie after something rich feels refreshing.
They’re also wonderful alongside hot drinks. A mug of cocoa, coffee, or even peppermint tea pairs beautifully with the buttery texture.
And if I’m packaging cookies as gifts, these always go into the box. They travel well, look festive, and everyone seems to recognize them immediately.
These festive Peppermint Snowball Cookies are an easy, egg-free holiday treat with a buttery, melt-in-your-mouth shortbread texture. Crushed candy canes add sweet minty flavor throughout, while a double-dusting of confectioners' sugar creates that iconic snow-dusted exterior. Perfect for cookie exchanges, gift trays, or enjoying with hot cocoa!
ingredients
Dough
1cup unsalted butter (226g, softened to room temperature)
1/3cup crushed candy canes (40g, about 3-4 regular candy canes)
Coating
1 1/4cups confectioners' sugar (150g, for rolling)
Instructions
1
In a large bowl using a handheld mixer or stand mixer fitted with a paddle attachment, beat the butter for 1 minute on medium speed until completely smooth and creamy.
2
Add 3/4 cup (90g) confectioners' sugar and beat on low speed until incorporated, then increase to medium-high speed and beat until combined and creamy. Scrape down sides and bottom of bowl as needed.
3
Beat in vanilla and peppermint extracts on medium-high speed until combined. Add flour and salt; beat on low speed. Once flour is incorporated, increase to high speed until dough comes together. Beat in crushed candy canes.
4
Cover dough tightly and chill in refrigerator for at least 30 minutes (up to 3 days). If chilling longer than 3 hours, let dough sit at room temperature 30 minutes before rolling.
5
Preheat oven to 350°F (177°C). Line 2 large baking sheets with parchment paper or silicone mats. Pour coating confectioners' sugar into a shallow bowl.
6
Scoop 1 Tablespoon (20g) dough per cookie, roll into balls, and place on baking sheets 2 inches apart. Bake 15 minutes until edges are golden and tops are lightly browned.
7
CoatingLet cookies cool 5 minutes on baking sheet, then gently roll in confectioners' sugar to coat. Transfer to wire racks to cool completely. Once fully cooled, roll in confectioners' sugar a second time for the signature snowy finish.
The first coating may melt slightly as cookies cool—this is expected!
8
Store cookies covered at room temperature for up to 1 week.
Nutrition Facts
Servings 36
Serving Size 1 cookie
Amount Per Serving
Calories104kcal
% Daily Value *
Total Fat5.2gg8%
Saturated Fat3.2gg16%
Trans Fat0gg
Cholesterol14mgmg5%
Sodium9mgmg1%
Potassium25mgmg1%
Total Carbohydrate13.7gg5%
Dietary Fiber0.2gg1%
Sugars7.7gg
Protein0.8gg2%
Calcium 10mg mg
Iron 0.3mg mg
* Percent Daily Values are based on a 2,000 calorie diet. Your daily value may be higher or lower depending on your calorie needs.
Note
Butter temperature matters: Use properly softened room temperature butter—not melted or too cold—for the best texture and shape retention.
Don't skip the chill: Chilling the dough ensures cookies stay round and don't spread into "snow puddles" while baking.
Double-dust for perfect snow: Roll cookies in confectioners' sugar twice—once while warm, once after cooling—for that iconic snowy coating that stays put.
Make ahead friendly: Dough can be chilled up to 3 days or frozen up to 3 months. Baked cookies also freeze well for up to 3 months.
Candy cane tip: Crush candy canes in a sealed bag with a rolling pin for easy, festive bits. Look for pre-crushed baking bits during the holidays!