The butter hits the pan before I’ve even fully decided I’m hungry. It sizzles fast, a little louder than expected, and I realize the heat is slightly too high. I pull the pan off for a second, because burnt butter is not the mood today.
There’s something about grilled cheese that doesn’t tolerate shortcuts. It’s simple, yes. But simple means every tiny thing matters. Bread, butter, cheese, heat - all of it shows up in the final bite.
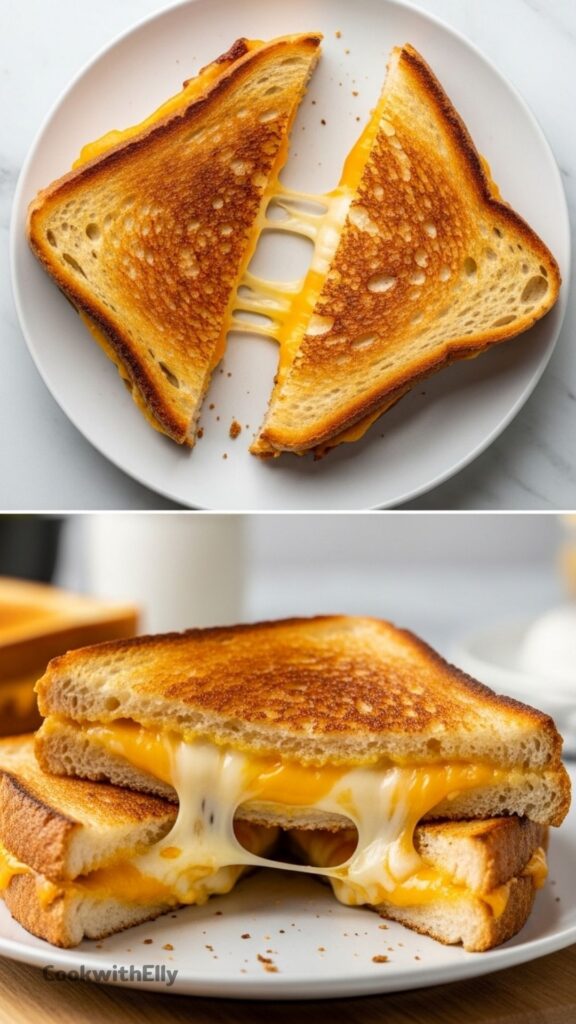
I don’t make this often. Not because I don’t want to, but because when I do, I want it to feel worth it. Crispy, salty, deeply golden outside. Inside? Melted, stretchy, almost ridiculous cheese.
And if I’m doing it, I’m doing it right. No half measures. No sad sandwiches.
A small moment before the pan even heats up
I always stand there for a second, staring at the bread. Too thick? The cheese won’t melt in time. Too thin? It’ll collapse and go limp. There’s a very narrow sweet spot that I’ve learned to trust.
Also, I never rush grating the cheese anymore. I used to. Thought pre-shredded was fine. It’s not. It melts differently, slightly clumpy, and once you notice it, you can’t un-notice it.
So I take the extra minute. Grate it fresh. It feels small, but it changes everything.
Ingredients Needed for the Recipe
2 slices sourdough bread (about 1.3-1.5 cm thick) - sturdy base with good texture
30g salted butter - for that rich, crispy crust
1/3 cup vintage cheddar or gruyere, freshly grated - deep flavor
1/3 cup mozzarella, freshly grated - melt and stretch
How to make My Best Grilled Cheese Sandwich?
Step 1 - Butter everything
I spread butter on both sides of each slice. Yes, all four sides. It feels excessive the first time, but once you taste it, there’s no going back.
I don’t skimp either. Thin butter just disappears. I want it to coat the bread properly so it crisps evenly later.
Step 2 - Light toast first
I place both slices in a dry pan over medium-low heat. No extra butter here. Just let the bread warm and lightly toast for about a minute.
This step used to feel unnecessary. It’s not. It gives the bread a head start and makes the inside melt better later.
Step 3 - Flip and load the cheese
I flip one slice and pile the cheese right on top. Cheddar first, then mozzarella. Or the other way around. Honestly, I don’t stress the order too much.
The second slice goes on top, toasted side facing the cheese. That detail matters more than you’d think.
Step 4 - Slow cook, no rushing
I press lightly with a spatula and let it cook for about three minutes. The key is patience. If it browns too fast, I pull the pan off and lower the heat.
I’ve rushed this before. Ended up with burnt bread and cold cheese. Not worth it.
Step 5 - Flip and finish
I flip carefully. Sometimes a bit of cheese tries to escape, and I just push it back in. It’s not perfect, and that’s fine.
Another three minutes, same gentle heat, until the second side is golden and crisp and the inside feels properly melted.
Step 6 - Cut and pause for a second
I move it to a board and cut straight through. No hesitation. That’s when the cheese pulls, stretches, almost too much.
I always pause here. Just a second. Because this is the moment that makes it all worth it.
What almost went wrong (and usually does once)
There’s always one moment where I think, maybe I should turn up the heat a little. Just to speed things up. That thought has betrayed me more than once.
Too much heat and the outside gets ahead of everything else. You get that dark crust too quickly, and the inside stays stubborn. I’ve pressed down harder to compensate before. Didn’t help.
Now I just accept it. This sandwich takes a few minutes. That’s part of the deal.
Tips
Use two cheeses - one for melt, one for flavor
Always grate your cheese fresh if possible
Butter both sides of the bread for maximum crispness
Keep heat medium-low to avoid burning before melting
Don’t press too hard or you’ll flatten the sandwich
Use sourdough for better texture and structure
If cheese leaks out, just tuck it back in - no stress
Let the sandwich rest for a few seconds before cutting
Texture, flavor, and why this works
The outside is what hits first. Crisp, salty, slightly crackly when you bite in. That butter does more than just cook the bread, it builds that deep golden crust.
Inside, it’s completely different. Soft, molten, stretchy from the mozzarella, but not bland because the cheddar or gruyere steps in with real flavor.
That contrast is everything. Crunch and melt. Salt and richness. It’s simple, but it feels complete.
I’ve tried making it in a sandwich press. It works, sure. But it squishes the bread too much. You lose that airy crispness, and the cheese never feels quite as generous.
In a pan, it stays in control. You decide the heat, the timing, the texture. It feels more like cooking, less like assembling.
Even the small imperfections help. A slightly darker edge. A bit of cheese that crisped on the side. Those are the best bites sometimes.
And when it’s done right, you don’t need anything else. No extras. No sauces. Just the sandwich, still warm, slightly messy, completely satisfying.
A grilled cheese sandwich is not diet food. So when I have one, it has to be great! Crispy, salty, buttery exterior and oozy, molten cheese inside. Are you ready to meet the ultimate cheese toastie? This recipe uses two types of cheese for the perfect balance of stretch and flavor, cooked in a pan for a superior golden crust that a sandwich press just can't match.
2tbsp salted butter (30g, for spreading on bread (or unsalted + pinch of salt))
1/3cup vintage cheddar cheese or gruyere (heaped, freshly grated)
1/3cup mozzarella (30g, freshly grated)
Instructions
1
Butter Bread – Slather both sides of each piece of bread with the butter (yes, all 4 sides!).
2
Light Toast – Heat a heavy-based skillet or frying pan over medium low heat (no oil or butter). Place both pieces of bread in the skillet and lightly toast for 1 minute to warm it through and create a light crust. (When we flip, this gives the cheese a head start).
3
Pile on Cheese – Flip one slice of bread, then pile on the cheddar cheese followed by the mozzarella. Place the other slice of bread on top, with the hot toasted side in contact with the cheese.
4
Cook 3 Minutes – Cook for 3 minutes or until the bread is evenly golden and crisp, pressing down lightly with a spatula every now and then. If it's browning too quickly, remove from the stove to cool down a bit and lower heat.
5
Flip, 3 Minutes – Turn the sandwich over, and cook the other side for 3 minutes or until the bread is golden and the cheese is melted.
6
Devour – Transfer to cutting board. Cut in half in one swift motion. Admire cheese pull. Devour.
Nutrition Facts
Servings 1
Serving Size 1 sandwich
Amount Per Serving
Calories520kcal
% Daily Value *
Total Fat31g48%
Saturated Fat19g95%
Trans Fat1g
Cholesterol85mg29%
Sodium980mg41%
Potassium210mg6%
Total Carbohydrate38g13%
Dietary Fiber2g8%
Sugars4g
Protein22g44%
* Percent Daily Values are based on a 2,000 calorie diet. Your daily value may be higher or lower depending on your calorie needs.
Note
For the best results, grate your own cheese. Pre-shredded cheese contains anti-caking agents that prevent smooth melting. Sourdough provides a sturdy structure and tangy flavor that complements the rich cheese.