Every year when the calendar starts hinting at spring, I get the urge to bake something cheerful. Not fancy, not complicated, just something fun that makes people smile the second they see it. These gold coin butter cookies do exactly that.
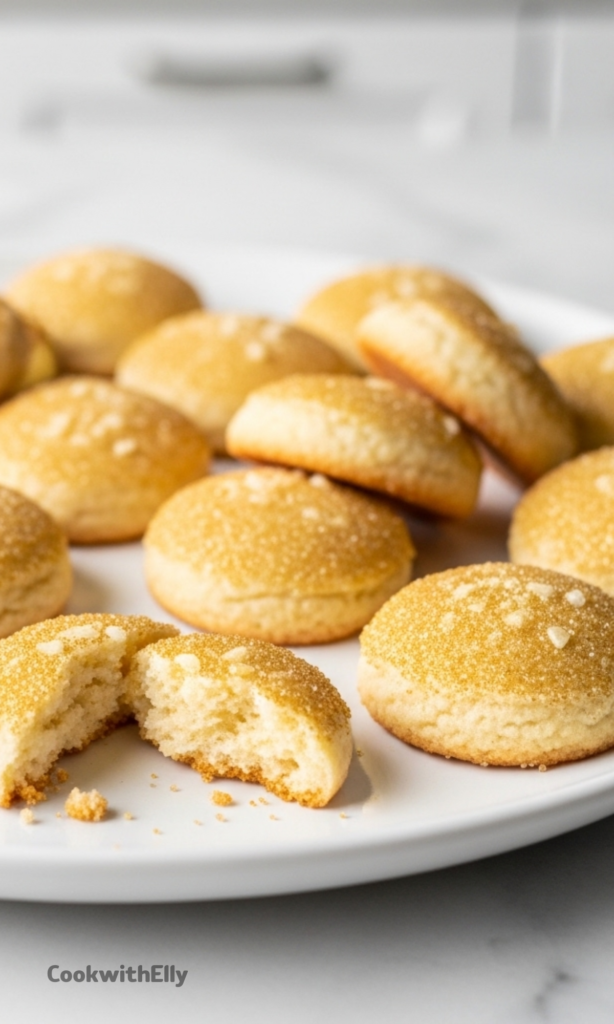
They are bright, sparkly, and just playful enough to feel a little magical. I love setting them out on a plate and watching people reach for one before they even ask what they are. That golden sugar catches the light and suddenly everyone is curious.
What really keeps me coming back to this recipe, though, is the texture. These are crisp, buttery cookies with a delicate sweetness that does not overwhelm. They are simple in the best possible way.
I have always preferred cookies with a bit of snap rather than soft centers. These deliver that satisfying bite, along with a rich butter flavor that feels comforting and classic. They taste like something you would find in a little bakery window.
Why These Cookies Are So Much Fun to Make
There is something relaxing about shaping dough into small rounds and rolling them in sparkling sugar. It feels more like a hands-on project than a baking chore. I usually put on music and take my time with it.
The process is easy enough to do with kids, but still enjoyable to do alone. No complicated decorating, no icing bags, no stress. Just roll, press, sprinkle, bake.
And because they are meant to look like little coins, perfection is not required. Slightly uneven edges actually make them look more charming and homemade.
Ingredients Needed for the Recipe
Butter (softened) - This is the heart of the cookie, giving it rich flavor and that classic buttery crispness. Do not substitute.
Powdered Sugar - Adds gentle sweetness and helps create a tender, melt-in-your-mouth texture.
Egg Whites - Bind the dough together while keeping the cookies light rather than dense.
Vanilla Extract - Adds warmth and depth to the flavor without overpowering the butter.
Baking Powder - Gives just enough lift so the cookies are not heavy.
Baking Soda - Helps create that delicate crisp texture during baking.
Flour - Provides structure and turns the mixture into a workable dough.
Gold Sanding Sugar - Coats the dough balls and gives them their shiny, coin-like appearance.
Gold Sugar Crystals - Sprinkled on top for extra sparkle and a light crunch.
How to make Gold Coin Butter Cookies?
Make this recipe yours—just save it to your Pinterest board!”
Step 1 - Cream the Butter and Sugar
Start by creaming the softened butter and powdered sugar together until smooth. I like to mix until it looks pale and fluffy, which usually takes a few minutes.
This step builds the base flavor, so do not rush it. Properly creamed butter gives the cookies that delicate texture.
Step 2 - Add Egg Whites and Vanilla
Mix in the egg whites and vanilla extract until fully combined. The dough will look silky and slightly glossy at this stage.
Scrape down the sides of the bowl so everything blends evenly. That little extra attention makes a difference later.
Step 3 - Incorporate the Dry Ingredients
Stir in the baking powder, baking soda, and flour until a soft dough forms. It should be smooth and easy to handle, not sticky.
Once combined, cover the dough and refrigerate it for about 30 minutes. Chilling helps the cookies hold their shape.
Step 4 - Prepare for Baking
Preheat your oven to 350 degrees and line baking sheets with parchment paper. This keeps the bottoms from browning too quickly.
While the oven heats, take the dough out so it softens slightly if it feels too firm to scoop.
Step 5 - Shape the Dough
Scoop the dough into small portions, about half a tablespoon each. If you are not using a scoop, roll them into balls roughly the size of a gumball.
If you shape them all at once, cover them with a damp paper towel so they do not dry out before coating.
Step 6 - Roll in Gold Sanding Sugar
Roll each dough ball in the gold sanding sugar until completely coated. This is where the transformation begins.
The sugar not only adds sparkle but also creates a light crunch once baked.
Step 7 - Flatten Slightly
Place the coated dough balls onto the prepared baking sheets and gently flatten them with the bottom of a glass.
You want a thick coin shape, not a thin disc. They should still look soft and rounded at the edges.
Step 8 - Add the Finishing Touch
Sprinkle gold sugar crystals on top and press them lightly into the surface. This adds texture and makes the cookies shimmer.
I always add a little extra because more sparkle never hurts.
Step 9 - Bake
Bake the cookies at 350 degrees for about 8 minutes. They should be set but not browned.
Let them cool on a wire rack so they firm up and develop their signature crispness.
Tips
Use real butter only. The flavor depends entirely on it.
Do not skip chilling the dough or the cookies will spread too much.
Keep dough covered while working so it stays soft and easy to shape.
Flatten gently. Pressing too hard makes them thin instead of coin-like.
Watch baking time closely. These cookies should stay light in color.
Let them cool completely before serving so the texture becomes crisp.
If baking multiple trays, rotate them halfway through for even results.
Serving Ideas for a Festive Touch
These cookies are perfect piled into a bowl or stacked like little treasures on a platter. I sometimes scatter a few chocolate coins around them just to lean into the theme.
They also make wonderful party favors. Slip a few into a small bag, tie it with ribbon, and suddenly you have a cheerful homemade gift.
If you are hosting a gathering, pair them with coffee, tea, or even a simple glass of milk. Their buttery flavor works with just about anything.
Storing and Making Ahead
One of the things I love most about these cookies is how well they keep. Once cooled, store them in an airtight container at room temperature.
They stay crisp for several days, which makes them great for baking ahead before an event. In fact, I think the flavor gets even better the next day.
You can also prepare the dough in advance and refrigerate it overnight. Just let it sit out for a few minutes before shaping so it is easy to handle.
If you want to freeze them, freeze the shaped dough balls before rolling in sugar. When ready to bake, thaw slightly, coat in sugar, and bake as usual.
Having dough ready to go feels like a secret weapon. Fresh cookies without starting from scratch is always a win.
These gold coin butter cookies may look whimsical, but they are grounded in simple ingredients and classic baking. That balance of playful appearance and comforting flavor is what makes them special.
Every time I bake them, they disappear faster than I expect. Someone always reaches for just one more, and then another.
That is when I know a recipe has earned a permanent place in my kitchen. Not because it is fancy, but because it makes people happy.
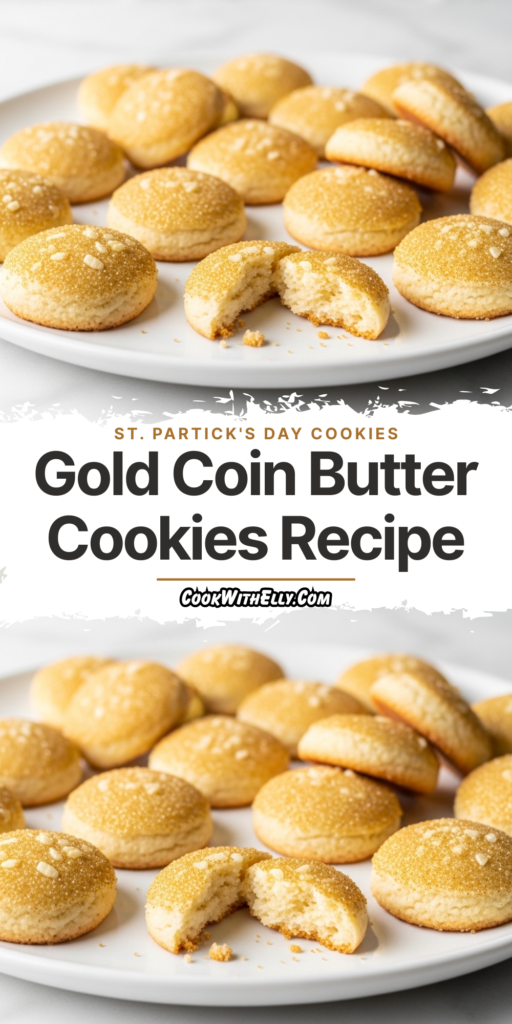
Looking for a fun St. Patrick's Day dessert? Try these gold coin butter cookies! They are easy, sweet, and just might bring you good luck! These butter cookies feature a nice buttery flavor, are not overly sweet, and have a delightful crisp texture that cookie lovers adore. Perfect for holiday celebrations, pirate parties, or anytime you want a touch of golden sweetness.
ingredients
1cup butter (softened, no substitutes)
1 ½cups powdered sugar
2 egg whites
1teaspoon vanilla extract
½teaspoon baking powder
½teaspoon baking soda
2 ½cups all-purpose flour
gold sanding sugar (for coating)
gold sugar crystals (for topping)
Instructions
1
Cream the butter and powdered sugar together until light and fluffy. Add the egg whites and vanilla extract; mix until combined.
2
Stir in the baking powder, baking soda, and flour until a soft dough forms. Cover and refrigerate the dough for 30 minutes to firm up.
Dough can chill longer; let warm slightly before scooping if needed.
3
Preheat oven to 350°F (175°C). Line baking sheets with parchment paper or lightly spray with non-stick cooking spray.
4
Scoop dough by ½ tablespoonfuls. Roll into gumball-sized balls if not using a cookie scoop.
If scooping all dough ahead, cover balls with a damp paper towel to prevent drying.
5
Roll each dough ball completely through gold sanding sugar until evenly coated. Place on prepared baking sheets, spacing 2 inches apart.
6
Gently flatten each cookie ball slightly using the bottom of a small drinking glass.
7
Sprinkle the flattened tops with gold sugar crystals and gently press them into the dough to help them adhere.
8
Bake at 350°F (175°C) for 8 minutes, or until edges are just lightly golden. Cool completely on a wire rack before serving.
Do not overbake; cookies should remain crisp and pale golden.
Nutrition Facts
Servings 66
Serving Size 1 cookie
Amount Per Serving
Calories59kcal
% Daily Value *
Total Fat2.8gg5%
Saturated Fat1.8gg9%
Trans Fat0gg
Cholesterol9mgmg3%
Sodium53mgmg3%
Potassium6mgmg1%
Total Carbohydrate7.8gg3%
Dietary Fiber0.1gg1%
Sugars4.2gg
Protein0.6gg2%
Calcium 10mg mg
Iron 0.5mg mg
* Percent Daily Values are based on a 2,000 calorie diet. Your daily value may be higher or lower depending on your calorie needs.
Note
Keep dough moist: If rolling all dough balls ahead of time, cover with a damp paper towel to prevent drying before coating in sugar.
No margarine! These cookies rely on real butter for flavor and texture—margarine will alter the taste and consistency.
Storage tip: Store cooled cookies in an airtight container at room temperature for up to 1 week.
Make ahead: Dough can be prepared and chilled up to 3 days in advance. Bring to room temperature slightly before shaping.
Keywords:
gold coin butter cookies, St. Patrick's Day dessert, butter cookies, crispy cookies, pirate party treats, easy cookie recipe