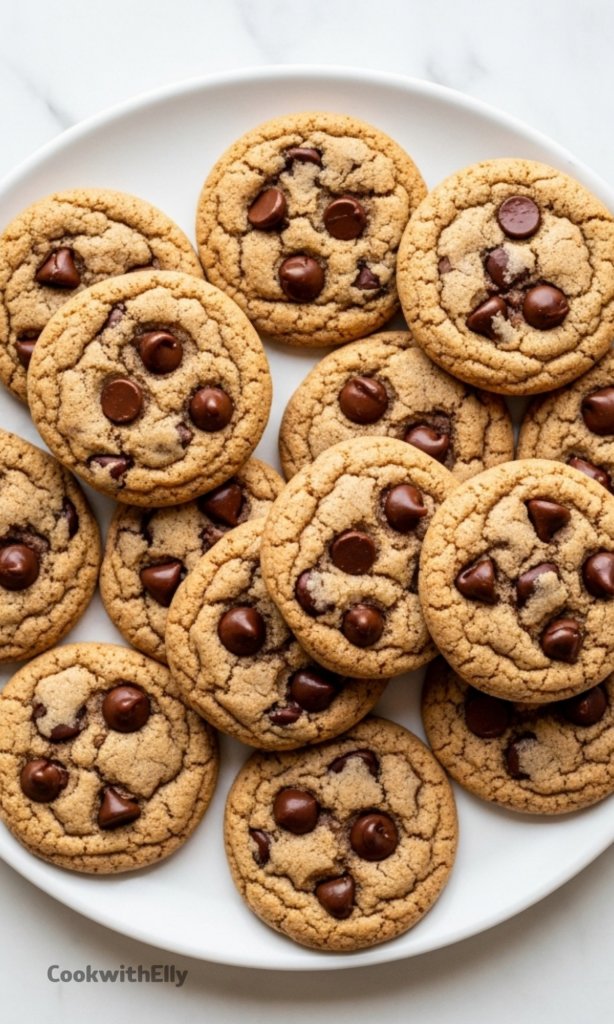
There's something deeply comforting about a perfect chocolate chip cookie, isn't there.
That classic combination of crisp edge, chewy center, and pockets of melted chocolate is a universal language of joy.
My Journey to the Perfect Bite
For a long time, I thought that specific magic was lost to me after going gluten-free.
Every recipe I tried felt like a compromise, a "good for gluten-free" treat that never hit the real, nostalgic spot.
Store-bought options were often dry or sandy, and my own kitchen experiments yielded cookies that spread too thin or crumbled apart.
I was chasing the memory of those iconic, bakery-style cookies, and I just wouldn't give up until I found it.
Ingredients Needed for the Recipe
Gathering the right components is the first secret to success, trust me on this.
Each one plays a specific role in creating that ideal texture and flavor we're after.
All-Purpose Gluten-Free Flour with Xanthan Gum: This is your foundation. I use Pillsbury because the xanthan gum is already blended in, which is crucial for structure.
Unsalted Butter (softened): It creates that rich, buttery flavor and tender crumb. For dairy-free, a good vegan butter works beautifully.
Granulated Sugar & Brown Sugar: The white sugar gives crispness, while the brown sugar, packed with moisture, delivers that signature chew.
Molasses: Just a teaspoon! It deepens the flavor and adds a hint of complexity, mimicking the taste of traditional cookies.
Pure Vanilla Extract: The warm, aromatic backbone that makes the whole kitchen smell like happiness.
Egg: Our binder, giving the dough structure and lift. A gluten-free egg replacer works perfectly for a vegan version.
Baking Soda & Gluten-Free Baking Powder: Our leavening team. They work together to give just the right amount of rise and spread.
Salt: Never skip it. Salt makes all the sweet, buttery flavors pop and keeps the cookies from tasting flat.
Chocolate Chips: The star of the show. Use your favorite—semi-sweet is classic, but dairy-free or mini chips work wonderfully too.
The Heart of a Great Gluten-Free Flour
Not all gluten-free flours will behave the same way, and that's the honest truth.
A good "cup-for-cup" or "all-purpose" blend that includes starches and xanthan gum is what you need here.
Blends like the one I use are specifically formulated to mimic wheat flour's behavior.
Using a single flour, like almond or coconut flour, will give you a completely different, and likely disappointing, result.
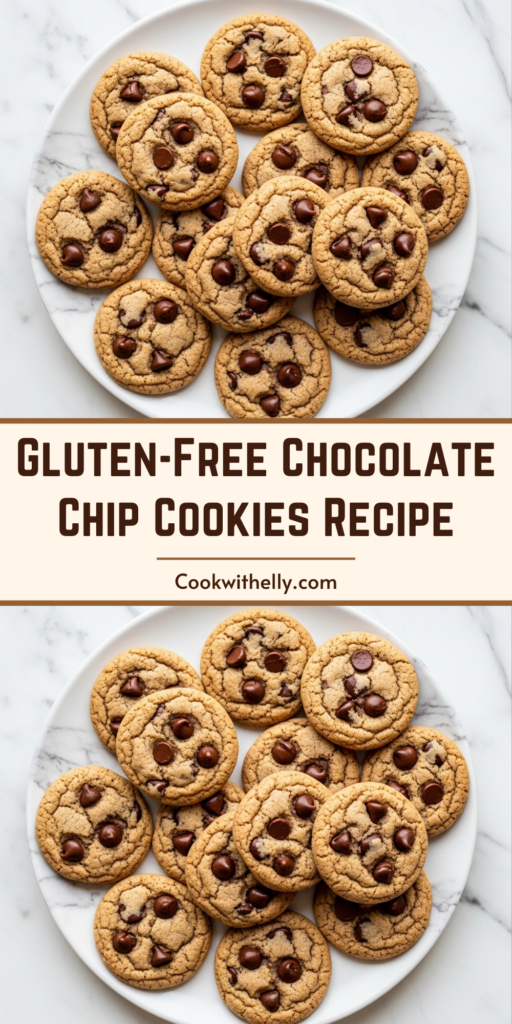
How to make Gluten-Free Chocolate Chip Cookies?
Ready? This is where the simple magic happens, all in one bowl.
Make this recipe yours—just save it to your Pinterest board!”
Just follow these steps, and you'll be minutes away from cookie paradise.
Step 1 - Prep and Cream
Start by preheating your oven to 375°F (190°C). This ensures it's perfectly hot and ready when your dough is.
In a large bowl, beat the softened butter with both sugars until the mixture is light, creamy, and fluffy. This step incorporates air, which is key.
Step 2 - Add the Wet Team
Beat in the egg (or replacer), molasses, and vanilla extract until everything is smooth and uniformly combined.
You'll see the color change slightly, and the smell will already be incredible.
Step 3 - Bring in the Dry Ingredients
Now, add your gluten-free flour, baking soda, baking powder, and salt right into the same bowl.
Mix on a low speed just until the dry ingredients disappear into the dough. Over-mixing can lead to toughness.
Step 4 - The Chocolate Finale
This is the fun part. Use a sturdy spoon or a mixer on the lowest setting to fold in all those glorious chocolate chips.
You want them evenly distributed so every single bite gets its share of melty goodness.
Step 5 - Scoop and Space
Line your baking sheets with parchment paper. Using a greased tablespoon or cookie scoop, drop rounds of dough about 2 inches apart.
This spacing is non-negotiable—it gives the cookies room to spread and bake evenly without merging into one giant cookie.
Step 6 - Bake to Perfection
Bake for 8 to 10 minutes. Look for golden-brown edges while the centers still look soft and slightly underdone.
They will finish setting up as they cool on the sheet, which is the secret to a chewy middle.
Step 7 - Cool and Enjoy
Let the cookies rest on the baking sheet for about 5 minutes before moving them to a wire rack.
This patience prevents breakage and allows the flavors to settle. Then, dig in.
Mastering the Art of Make-Ahead Dough
Sometimes, you just need a cookie on demand, and I have the perfect solution for that.
This dough freezes spectacularly well, ready for any sudden cookie craving.
Simply scoop the dough balls onto a tray and pop them in the freezer for a quick "flash freeze."
After about an hour, transfer the frozen dough balls to a bag, and they'll keep for up to three months.
You can bake them straight from frozen, adding just a minute or two to the baking time.
It’s like having a personal bakery tucked in your freezer, ready to warm up your day.
Tips
A few little nuggets of wisdom can take your cookies from good to absolutely legendary.
These are the things I learned through all my trial and error.
Truly soften your butter. Let it sit out for 15-30 minutes until it's cool but yields to a gentle press. Microwave melting will change the texture.
Measure your flour with the "spoon and level" method. Spoon it into your measuring cup and level it off with a knife. Scooping packs in too much flour and leads to dry cookies.
Watch your oven closely. All ovens have their own personalities. The 8-10 minute range is a guide; your perfect cookie might be ready at 8 or need a full 10.
For a gooier cookie, lean toward the lower end of the bake time. For a slightly cakier, fluffier texture, chill the shaped dough for 30 minutes before baking.
Always let the cookies cool on the hot baking sheet. They're still cooking from residual heat, which sets that wonderful chewy texture.
Playing with Sweetness and Flavor
This recipe is wonderfully adaptable if you're curious about tweaking the sugars or mix-ins.
While I developed it with classic sugars, many readers have had success with alternatives.
Monk fruit sweeteners or brown sugar substitutes can be used, but know they might change the texture and spread slightly.
For mix-ins, try swapping half the chocolate chips for chopped nuts, toasted coconut, or even a handful of gluten-free oats.
Serving and Storing Your Creations
A warm cookie with a cold glass of milk is a timeless pairing, but let's think beyond that.
These cookies are sturdy enough to be used in ice cream sandwiches, or crumbled over a bowl of vanilla ice cream.
To keep them fresh, store cooled cookies in an airtight container at room temperature.
They'll stay soft and delicious for about a week, if they last that long around your house.
You can also freeze the baked cookies. Layer them between parchment paper in a freezer-safe container.
A quick 10-second zap in the microwave brings back that fresh-from-the-oven warmth and gooey chocolate.
These gluten-free chocolate chip cookies are soft and chewy with slightly crisp edges—just like the classic Toll House cookies you remember! Loaded with gooey chocolate chips and made in one bowl with no chilling required, they’re a family favorite and perfect for satisfying sweet cravings. Plus, dairy-free and vegan options are included so everyone can enjoy them!
Ingredients
1cup unsalted butter, softened (For dairy-free, use Smart Balance or vegan butter)
3/4cup granulated sugar
3/4cup brown sugar, packed
1tsp molasses (Grandma’s® Original; optional but recommended)
1tsp pure vanilla extract
1large egg (For vegan/egg-free, use Bob’s Red Mill Gluten-Free Egg Replacer)
1/2tsp baking soda
1/2tsp gluten-free baking powder
1/2tsp salt
2 1/2cups all-purpose gluten-free flour with xanthan gum (Pillsbury gluten-free recommended; results may vary with other blends)
2cups chocolate chips (For dairy-free/vegan, use Nestle Simply Delicious or Enjoy Life mini chocolate chips)
Instructions
1
Preheat oven to 375°F (190°C). Line baking sheets with parchment paper.
2
In a large bowl, beat softened butter, granulated sugar, and brown sugar until creamy.
3
Add egg (or egg replacer), molasses, and vanilla extract. Mix until fully combined.
4
Add gluten-free flour, baking soda, baking powder, and salt. Mix until just combined.
5
Stir in chocolate chips using a spoon or low-speed mixer.
6
Use a greased 1½-tablespoon cookie scoop to drop dough balls 2 inches apart on prepared baking sheets.
7
Bake for 8–10 minutes until edges are golden brown but centers are still soft.
8
Cool on baking sheet for 2–3 minutes, then transfer to wire rack to cool completely.
Nutrition Facts
Servings 48
Serving Size 1 cookie
Amount Per Serving
Calories150kcal
% Daily Value *
Total Fat8gg13%
Saturated Fat5gg25%
Trans Fat0gg
Cholesterol25mgmg9%
Sodium85mgmg4%
Potassium60mgmg2%
Total Carbohydrate19gg7%
Dietary Fiber1gg4%
Sugars12gg
Protein2gg4%
Calcium 20 mg
Iron 1 mg
* Percent Daily Values are based on a 2,000 calorie diet. Your daily value may be higher or lower depending on your calorie needs.
Note
Flour tip: Use Pillsbury gluten-free flour for best results. Do not substitute with almond or coconut flour.
Measuring tip: Use the “spoon & level” method to measure flour accurately.
For gooier cookies: Bake for only 8 minutes.
Freezing dough: Freeze portioned dough balls for up to 3 months. Bake frozen—add 1–2 minutes to bake time.
Storage: Keep in an airtight container at room temperature for up to 1 week or freeze baked cookies for up to 3 months.
Mama says: Always check your labels to ensure all ingredients are gluten-free and safe for your dietary needs.