I used to think making a glazed ham was one of those things you leave to professionals or at least someone way more experienced. Turns out, it’s not complicated at all. Once I tried this brown sugar ham glaze, it kind of changed everything for me.
The magic really sits in how a handful of pantry ingredients come together and slowly turn into this glossy, sticky coating. It smells incredible while baking, and by the end, the ham looks like something you’d proudly set in the middle of a big holiday table.
If you’ve been nervous about trying a glazed ham, this is honestly a good place to start. It’s forgiving, simple, and it delivers that deep caramelized finish that everyone goes quiet over for a second before digging in.
Ingredients Needed for the Recipe
Bone-in ham (4-6 kg) - the main centerpiece, bone keeps it juicy and full of flavor
Water - added to the pan to prevent burning and keep the environment moist
Brown sugar - the base of the glaze, gives that rich caramel sweetness
Honey (or maple) - adds shine and a deeper sticky texture
Dijon mustard - balances the sweetness with a slight tang and helps thicken
Apple cider vinegar - cuts through the sugar and keeps the glaze from tasting too heavy
Black pepper - a subtle kick that rounds everything out
Cinnamon - brings warmth and that holiday feel
All spice - adds depth, just a little goes a long way
Mustard powder - enhances the mustard flavor without overpowering
Rosemary or herbs (optional) - for presentation and a fresh aroma
Ribbon (optional) - purely for making it look festive and fun
Before You Start – Getting the Ham Ready
One thing I learned quickly is that prep matters more than people think. The ham itself is already cooked, so what we’re really doing is warming it through and building flavor on the outside.
Taking it out of the fridge about an hour early helps a lot. It cooks more evenly, and you don’t end up with a cold center and overdone edges. It’s a small step, but it makes a noticeable difference.
Also, don’t skip removing the rind. It might feel intimidating, but it practically peels off once you start. Just take your time, and don’t stress if it tears a bit.
How to make Brown Sugar Ham Glaze?
Step 1 – Bring the ham to room temperature
I take the ham out of the fridge and let it sit for about an hour. It feels like a waiting game, but this helps everything cook evenly later on.
While it rests, I usually get everything else ready so I’m not rushing once I start. It just makes the whole process smoother.
Step 2 – Preheat the oven
I set the oven to a lower temperature than most recipes suggest, around 160°C. This helps the glaze caramelize slowly instead of burning too fast.
It’s tempting to crank up the heat, but trust me, slower is better here. You’ll get a more even, golden finish.
Step 3 – Remove the rind and score the fat
I cut around the handle first, leaving that section intact so it holds its shape. Then I gently peel off the rind, working my fingers under it.
Once it’s off, I score the fat in a diamond pattern. Just the fat, not the meat. This helps the glaze seep in and creates that classic look.
Step 4 – Make the brown sugar glaze
In a saucepan, I combine brown sugar, honey, mustard, vinegar, pepper, and spices. I heat it gently while stirring until everything dissolves.
It doesn’t take long, and you’ll notice it turning smooth and glossy. That’s when I know it’s ready to go.
Step 5 – Set up the roasting pan
I place the ham on a rack inside a baking pan and pour water into the base. This step is easy to overlook, but it prevents the drippings from burning.
Sometimes I use juice or a splash of wine instead of water. It adds a bit of extra flavor to the pan juices later.
Step 6 – Coat the ham generously
This is where I don’t hold back. I brush the glaze all over the ham, getting into every scored line and even underneath.
I keep some glaze aside for later. You’ll need it for basting, and that’s what really builds the flavor layer by layer.
Step 7 – Bake and baste repeatedly
The ham goes into the oven for about 1.5 hours. Every 20 minutes, I pull it out and baste it with more glaze and pan juices.
It might feel repetitive, but this step is what gives that deep, sticky coating. Each layer adds more shine and color.
Step 8 – Manage browning with foil
If I notice certain spots browning too quickly, I just cover them loosely with foil. No need to overthink it.
This keeps everything even and avoids burnt patches. It’s a simple fix that works every time.
Step 9 – Rest and finish with glaze
After baking, I let the ham rest for about 20 minutes. Then I go in with the pan juices and brush it all over again.
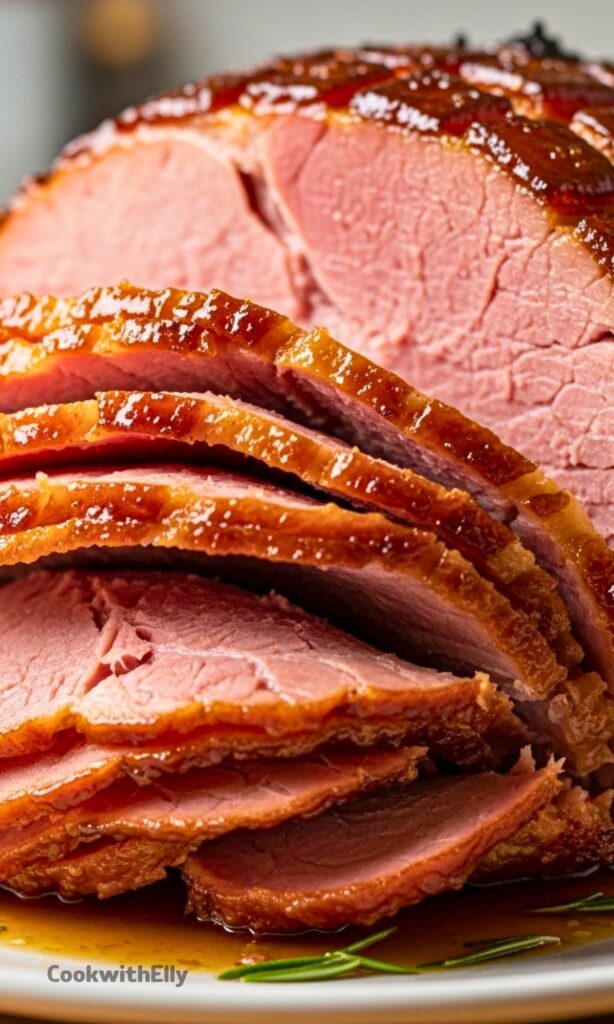
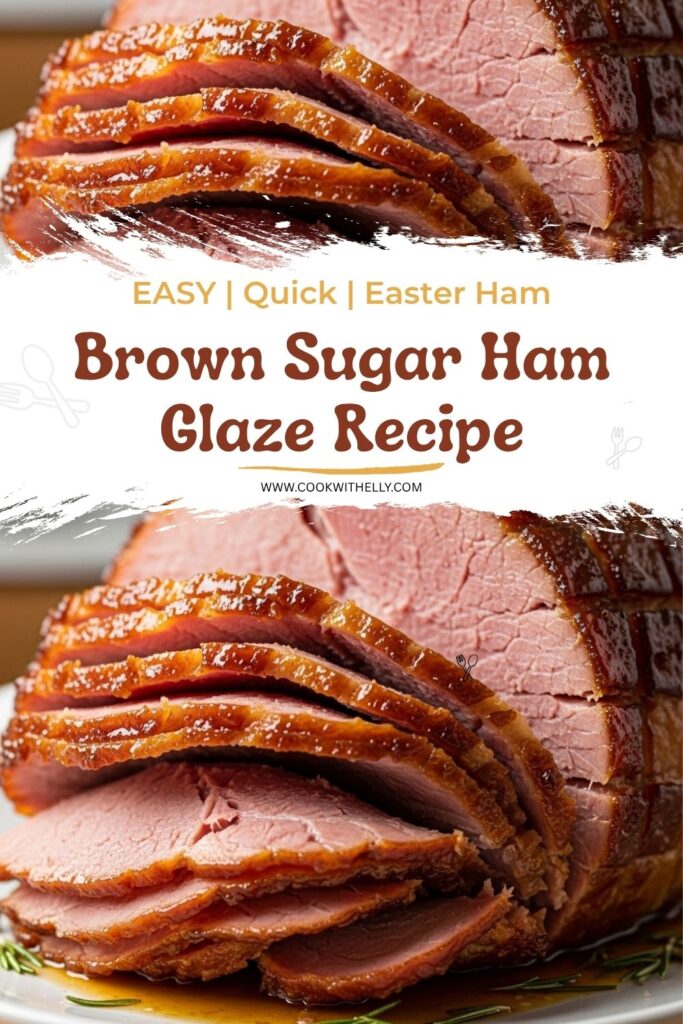
This final coating thickens as it sits, giving that glossy, almost lacquered look. It’s honestly my favorite part.
Choosing the Right Ham
Not all hams are the same, and I’ve learned that the hard way. A good bone-in ham makes a big difference, especially when it comes to moisture and flavor.
Bone-out versions are easier to slice, sure, but they tend to lose some of that richness. I usually go for a half leg with the handle, it just feels more traditional and easier to manage.
Also, look for a natural smoked, ready-to-eat ham. That’s important. You’re not cooking it from raw, just enhancing what’s already there.
Tips
Prop the ham with foil if needed to level the surface for even caramelization
Always add liquid to the pan to prevent burning
Use a lower oven temperature to avoid scorching the glaze
Baste frequently, every 20 minutes works well
Don’t hesitate to cover fast-browning areas with foil
Leave some fat on the ham for the best caramelized texture
Brush extra glaze after baking for a deeper finish
Let the ham rest before slicing so juices settle properly
Serving and Presentation Ideas
I like to dress it up just a little when serving. Wrapping the handle with baking paper and tying a ribbon around it adds a nice touch without much effort.
A few sprigs of rosemary tucked around the base make it look fresh and festive. It’s a small detail, but it brings everything together visually.
When it’s time to serve, I usually place it right in the center of the table. There’s something satisfying about letting everyone admire it before carving starts.
Using the Pan Juices as Sauce
One thing I never skip anymore is turning the pan drippings into a sauce. They’re packed with flavor from both the glaze and the ham itself.
Sometimes they’re a bit thick, so I just add a splash of water and stir. That’s it. You get this rich, slightly sweet sauce that pairs perfectly with each slice.
You can also serve it alongside mustard or something tangy if you like contrast. But honestly, the glaze usually steals the show.
Storing and Using Leftovers
If there’s any ham left, I wrap it well and keep it in the fridge. It stays good for several days, and the flavor somehow gets even better.
I’ve used leftovers in sandwiches, quick breakfasts, even tossed into simple rice dishes. It’s one of those things that keeps giving.
And don’t throw away the bone. It makes an incredible base for soups later on. I always save it, no question.
This Brown Sugar Ham Glaze is the ultimate 5-ingredient magic that transforms your Christmas ham into a sticky, caramelised centrepiece! Perfectly balanced with sweet brown sugar and honey, tangy mustard and vinegar, plus warm holiday spices. Follow my simple tricks for an evenly golden, glossy ham that looks like it came straight from a glossy magazine. Christmas made easy!
ingredients
Main
4-6kg bone-in ham, rind and fat on (wood-smoked, ready-to-eat (Note 1))
2cups water (for pan to prevent burning (Note 2))
Brown Sugar Ham Glaze
3/4cup brown sugar (packed)
1/4cup honey (or maple syrup)
1/4cup Dijon mustard
1/4cup apple cider vinegar (or white wine vinegar (Note 3))
1/2tsp black pepper (freshly ground)
Optional Holiday Spices (Note 4)
3/4tsp cinnamon
1/2tsp allspice
3/4tsp mustard powder (ordinary, not hot)
Presentation (Optional)
ribbon (for wrapping handle)
fresh rosemary sprigs (or other herbs for garnish)
Instructions
Prep
1
Bring ham to room tempTake ham out of the fridge 1 hour prior to cooking.
2
Preheat ovenPreheat oven to 160°C/320°F (standard) or 140°C/285°F (fan). Arrange shelf in lower third so ham sits in centre of oven.
Lower temp prevents glaze from burning
Remove Rind & Score
3
Remove rindCut skin around handle, then slit down each side. Run knife between rind and fat, slip fingers in gap, and gently pull rind back. Leave fat on ham.
Rind wants to come off - it's easy! Keep skin on handle for easier carving.
4
Score the fatCut 2.5cm/1" diamond pattern into the fat only (don't cut into flesh).
Scoring helps glaze penetrate and creates beautiful presentation
Make the Glaze
5
Combine glaze ingredientsPlace brown sugar, honey, mustard, cider vinegar, pepper, and optional spices in a saucepan over medium-high heat.
6
Simmer glazeSimmer and stir until sugar is completely dissolved. Remove from heat.
Glaze will thicken slightly as it cools
Baste & Cook
7
Set up roasting panPlace rack in a baking pan. Add water to bottom of pan. Place ham on rack, propping with scrunched foil to level surface for even caramelisation.
Water prevents drippings from burning; leveling ensures even browning
8
First basteBaste ham all over with glaze (except handle), including underside and cut face. Reserve remaining glaze for basting.
Be generous - more glaze = better results!
9
Bake hamBake for 1.5 hours, basting every 20 minutes with reserved glaze and pan juices, until caramelised and internal temperature reaches 60°C/140°F.
Use a meat thermometer for accuracy
10
Foil patch if neededIf any areas brown too quickly, stick small pieces of foil on them. You can also lower oven temp slightly.
Foil will stick to glaze - peel off carefully when done
Rest & Finish
11
Rest and final basteRest ham for 15-30 minutes, basting generously with pan drippings like paint to create a thick, glossy, deep golden glaze.
This is the magic step for that magazine-worthy finish!
12
Make sauceWhisk a little water into pan juices until it reaches a thick, honey-like pouring consistency for serving.
Flavour is intense - a little goes a long way
13
Present and serveWrap handle with baking paper and ribbon. Tuck in rosemary sprigs. Place as centrepiece with sauce on side. Slice thinly to serve.
Serve warm or at room temperature
Nutrition Facts
Servings 14
Serving Size 1 slice (approx. 350g)
Amount Per Serving
Calories920kcal
% Daily Value *
Total Fat42gg65%
Saturated Fat15gg75%
Trans Fat0gg
Cholesterol95mgmg32%
Sodium1850mgmg78%
Potassium450mgmg13%
Total Carbohydrate18gg6%
Dietary Fiber0gg0%
Sugars17gg
Protein55gg111%
Calcium 3% mg
Iron 8% mg
* Percent Daily Values are based on a 2,000 calorie diet. Your daily value may be higher or lower depending on your calorie needs.
Note
Ham selection: Choose bone-in, wood-smoked, ready-to-eat ham. Bone-in stays juicier! Avoid raw gammon.
Level the ham: Prop with scrunched foil for even caramelisation - same trick for perfect pork crackling!
Water in pan is essential: Prevents sugary drippings from burning, which ruins basting liquid and sauce.
Lower oven temp: 160°C/320°F (not 180°C) prevents glaze from burning before ham is heated through.
Baste generously at the end: The resting period is when pan juices thicken - use them like paint for that glossy finish!
Get ahead: Prep ham and make glaze the day before. Or cook ham ahead and reheat gently before serving.
Save the bone! Perfect for soups, beans, or the 3-ingredient Chinese Ham Bone Rice Soup.
Storage: Keep leftovers in a vinegar-water soaked ham bag or pillowcase in fridge for up to 1 week, or freeze.
Keywords:
brown sugar ham glaze, glazed ham, christmas ham, holiday ham, sticky ham, baked ham, easy ham recipe