Let's talk about the Rice Krispie treat, the simple no-bake bar that feels like a warm hug. That recipe on the cereal box is a classic for a reason, but have you ever felt it could be a little...better?
Maybe you wanted it a touch sweeter, or a bit richer, or with more of that signature gooey pull. After countless batches, shared with kids and friends who became my taste-testers, I landed on a version I can confidently call the best.
It’s not about reinventing the wheel. It's about a few smart, simple upgrades that transform a childhood staple into something truly special. We're talking deeper flavor, irresistible texture, and that feeling of making something you're genuinely proud to share.
The Simple Upgrades That Make All The Difference
The magic here comes from just a handful of tweaks. First, we use more butter, and we take a moment to brown it. This creates a nutty, almost caramel-like depth that plain melted butter just can't match.
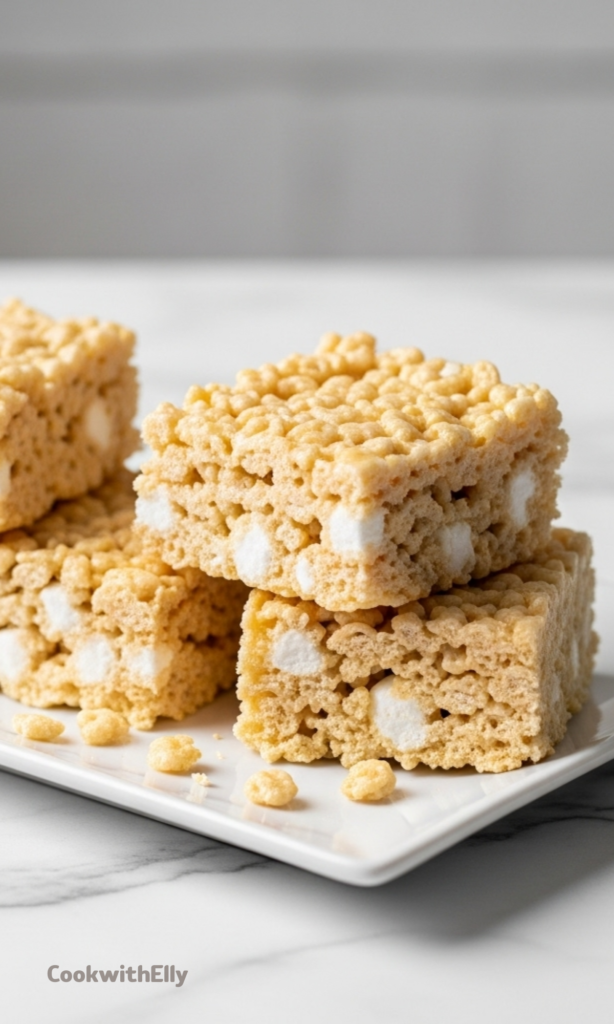
We also add a few extra marshmallows, and we stir some in at the very end. This creates delicious pockets of soft, melted marshmallow throughout the bars. A splash of vanilla and a pinch of salt round everything out perfectly.
That little bit of salt is the secret weapon, it makes the buttery, sweet flavors pop in the best possible way. The result is a treat that’s perfectly balanced, wonderfully chewy, and impossible to eat just one of.
Ingredients Needed for the Recipe
Gathering your ingredients is the first step. Here’s what you’ll need and why each one matters for creating the ultimate treat.
Unsalted Butter: We use a full stick and a half. Browning it is the key flavor upgrade, giving a rich, toasty note that elevates the entire batch.
Mini Marshmallows: Two bags, divided. Most get melted for that sticky binder, but some are saved for folding in at the end to create gooey pockets.
Vanilla Extract: Just a bit adds a warm, aromatic background flavor that makes the treats taste more homemade and complex.
Salt: A half teaspoon balances the intense sweetness and makes all the other ingredients taste more like themselves.
Rice Krispies Cereal: The classic crisped rice gives the treats their name and their delightful, crispy texture that contrasts the sticky marshmallow.
How to make Best Rice Krispie Treats?
The process is wonderfully straightforward, but paying attention to a few details will give you the best results. Let's walk through it step by step.
Make this recipe yours—just save it to your Pinterest board!”
Step 1 – Prepare Your Pan and Brown the Butter
Start by lining a 9x13 inch pan with foil or parchment paper and giving it a very light grease with butter. This makes removal and cleanup a breeze. Now, take your butter and melt it in a large pot or Dutch oven over medium heat.
A light-colored pot is helpful here so you can see the butter's color change. As it melts, it will foam and sizzle. Swirl the pan occasionally, and watch as it turns from yellow to a deep, golden brown.
You'll know it's ready when it smells wonderfully nutty. This browning step is what builds that incredible flavor foundation. If the little brown bits at the bottom look dark, you can strain the butter, but usually they're just fine.
Step 2 – Melt the Marshmallow Base
Once your butter is beautifully browned, take the pot off the heat for a moment. Add all but two cups of your marshmallows, along with the vanilla and salt. Now, return the pot to medium-low heat.
Stir constantly with a wooden spoon or sturdy spatula until the marshmallows are completely melted, smooth, and incorporated with the butter. This creates a luxurious, fragrant base. It should look cohesive and glossy.
Step 3 – Combine with Cereal and Extra Marshmallows
Remove the pot from the heat again. Immediately pour in all of the Rice Krispies cereal. Gently but thoroughly stir and fold until every single piece of cereal is coated in the marshmallow mixture. It will be thick and sticky.
Now, add those reserved two cups of marshmallows. Fold them in just until they start to soften and melt slightly from the residual heat. Don't overmix, you want to see those streaks and pockets of extra goo.
Step 4 – Press and Cool
Quickly transfer the warm mixture into your prepared pan. For easy pressing without sticking, use the butter wrapper from your stick of butter or lightly dampen your fingers.
Press the mixture firmly into an even layer, but don't compact it too hard, or the treats can become dense. Let the pan sit at room temperature for at least a full hour to set up completely before you even think about cutting.
Step 5 – Cut and Serve
Once fully set, use the foil or parchment to lift the whole slab of treats out of the pan onto a cutting board. For the cleanest cuts, use a serrated knife and a gentle sawing motion.
Wiping the knife between cuts helps too. Then, just stack them on a plate and watch them disappear. The contrast of the crisp cereal, rich brown butter, and soft marshmallow is absolutely perfect.
My Top Tips for Guaranteed Success
A few lessons from my kitchen to yours can make your batch even better. These are the little things that professional bakers do without thinking.
Use mini marshmallows. They melt much more evenly and quickly than large ones, giving you a smoother base and preventing scorching.
Don't skip the browning, but watch carefully. Butter can go from perfectly nutty to burnt in seconds. The moment you smell that toasted, nutty aroma, it's done.
Grease your spatula or hands. The mixture is incredibly sticky. A light coat of butter or a quick rinse of your hands in cold water makes pressing it into the pan much easier.
Let them cool completely. I know it's tempting, but cutting into warm Rice Krispie treats leads to a squished, messy bar. Patience rewards you with perfect squares.
For a festive twist, stir in a cup of festive sprinkles, mini chocolate chips, or even crushed pretzels with the cereal for a sweet and salty kick.
Storing and Serving Your Treats
Proper storage keeps your treats tasting fresh and chewy for days. At room temperature, just store them in an airtight container, with layers separated by parchment if you stack them.
They’ll stay perfect for up to five days this way. If you want to keep them longer, they freeze beautifully. Wrap individual squares or the whole block tightly in plastic wrap, then place in a freezer bag.
They’ll keep for up to six weeks. Thaw at room temperature for about an hour before serving. These treats are fantastic on their own, but they also make a wonderful base for other desserts.
You can drizzle them with melted chocolate, crumble them over ice cream, or even use them as a fun, crunchy layer in a parfait. They’re endlessly versatile.
Delicious Variations to Try
Once you've mastered this base recipe, the world of variations is your oyster. It's such a fun recipe to play with and personalize for different occasions.
For a decadent twist, stir a half cup of creamy peanut butter into the browned butter before adding the marshmallows. It creates a rich, salty-sweet bar that's always a crowd-pleaser.
During the holidays, fold in a cup of crushed candy canes or holiday sprinkles for a festive look. You can also add a few drops of food coloring to the marshmallow mixture for a pop of color.
For a s'mores-inspired version, use golden grahams cereal in place of half the Rice Krispies, and fold in a cup of chocolate chips with the final marshmallows. The possibilities are truly endless, and half the fun is creating your own signature version.
At the end of the day, that's what cooking is all about. Taking something familiar and making it your own, sharing it with people you care about, and enjoying that simple, sweet satisfaction. I hope this recipe becomes a new favorite in your home, just like it is in mine.
A childhood favorite you never outgrow—this Rice Krispie Treat recipe gets a few irresistible upgrades for even more gooey, buttery goodness! Using browned butter, extra marshmallows stirred in at the end, a touch of vanilla, and a pinch of salt transforms the classic into something truly special.
Ingredients
12tablespoons unsalted butter ((1½ sticks), plus extra for greasing pan)
2bags (10 oz each) mini marshmallows (divided)
3/4teaspoon vanilla extract
1/2teaspoon salt
8.5cups Rice Krispies or crispy rice cereal (ensure gluten-free if needed)
Instructions
1
Line a 9x13-inch baking pan with heavy-duty aluminum foil and lightly grease with softened butter. Set aside 2 cups (about 110g) of mini marshmallows.
2
In a large pot or Dutch oven, melt the butter over medium heat. Swirl occasionally until it foams, then turns golden brown and smells nutty—about 5–7 minutes. Remove from heat immediately to avoid burning.
3
If any dark sediment forms, strain the browned butter through a fine sieve back into the pot. Return to low heat if needed.
4
Off the heat, add the remaining marshmallows (not the reserved 2 cups), vanilla, and salt to the browned butter.
5
Place the pot back over medium heat and stir constantly with a wooden spoon until marshmallows are fully melted and smooth.
6
Remove from heat and stir in the crispy rice cereal until evenly coated.
7
Gently fold in the reserved 2 cups of mini marshmallows just until softened but not fully melted—this creates gooey pockets.
8
Transfer mixture to the prepared pan. Use the saved butter wrappers or damp fingers to press gently into an even layer.
9
Let cool at room temperature for at least 1 hour before lifting out using foil overhang and cutting into squares with a serrated knife.
Nutrition Facts
Servings 24
Serving Size 1 square
Amount Per Serving
Calories162kcal
% Daily Value *
Total Fat6g10%
Saturated Fat4g20%
Cholesterol15mg5%
Sodium93mg4%
Potassium25mg1%
Total Carbohydrate27g9%
Sugars15g
Protein1g2%
Calcium 5 mg
Iron 0.5 mg
* Percent Daily Values are based on a 2,000 calorie diet. Your daily value may be higher or lower depending on your calorie needs.
Note
Gluten-Free Note: Kellogg's Rice Krispies are not gluten-free due to malt flavoring (from barley). Use a certified gluten-free crispy rice cereal if needed.
Storage: Keep in an airtight container at room temperature for up to 5 days.
Freezing: Layer between wax paper in an airtight container and freeze for up to 6 weeks. Thaw at room temperature before serving.