There’s a certain kind of magic that happens in the oven, you know?
It’s the scent of apples, cinnamon, and brown sugar slowly warming and mingling together, promising something wonderful.
This apple crisp is that promise kept.
It’s the cozy, classic dessert you dream of all autumn, incredibly simple to make, and impossibly hard to resist.
Why This Recipe Is Different
Over the years, I’ve tinkered with plenty of fruit desserts, from crumbles to cobblers. This version is my stripped-down, no-fuss favorite, and it’s become a go-to for good reason.
First, you skip the step of pre-cooking the apples entirely.
That means less time at the stove and fewer dishes to wash—an immediate win in my book. The topping is pure, nostalgic streusel: oats, flour, brown sugar, and cold butter.
No nuts, no fancy grains, just that iconic, crumbly texture we all love so much.
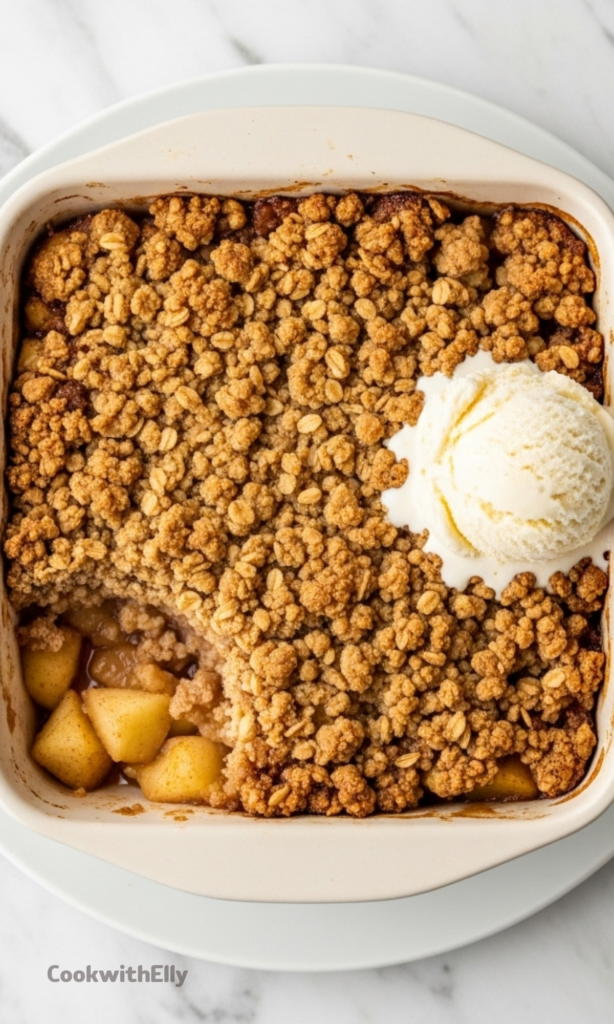
The result is a dessert that feels both special and completely approachable. It’s rich, comforting, and tastes like a hug in a bowl, especially with that melting scoop of vanilla ice cream on top.
Ingredients Needed for the Recipe
Every ingredient here has a purpose, working together to create that perfect balance of tender fruit and crisp topping.
Let's look at what you'll need.
Apples: The star of the show. You’ll need about six large, firm ones that hold their shape during baking.
Whole Rolled Oats: These are the backbone of the crisp topping, providing that essential chewy-crisp texture.
All-Purpose Flour: A little thickens the juicy apple filling, and more binds the crumble topping together.
Brown Sugar: It adds a deep, molasses-like sweetness to both the apples and the topping. Dark brown sugar is my secret for extra caramel flavor.
Unsalted Butter: Cold and cubed, it’s what transforms the dry topping ingredients into those irresistible buttery clumps.
Lemon Juice: A bright, tangy note that cuts through the sweetness and keeps the apples from tasting flat.
Vanilla, Cinnamon, and Nutmeg: The warm, aromatic trio that makes the filling smell and taste like fall itself.
Sea Salt: Never underestimate it. Salt makes all the other flavors pop and prevents the dessert from being one-dimensionally sweet.
Picking Your Perfect Apple
Choosing the right apple is the only real decision you have to make, and it’s a fun one. The best baking apples are firm and won’t turn to mush in the heat of the oven.
You can go with a single variety for a consistent flavor, or mix and match for complexity.
Here are my top choices, all reliable and delicious.
Honeycrisp: Sweet, juicy, and reliably crisp. They make a fantastic solo act.
Granny Smith: Tart and firm. Mixing them with a sweeter apple creates a wonderful flavor balance.
Fuji or Gala: Naturally sweet and aromatic, they bring a lovely perfume to the dish.
Pink Lady or Golden Delicious: Both hold their shape beautifully and offer a gentle, well-rounded sweetness.
How to make Apple Crisp?
The process is wonderfully straightforward, with most of the work being a simple mix-and-sprinkle.
Make this recipe yours—just save it to your Pinterest board!”
Just follow these steps, and you’ll be rewarded handsomely.
Step 1 - Prep the Apples
Start by peeling, coring, and chopping your apples into roughly 3/4-inch pieces.
I know, peeling is a bit of a chore, but trust me on this one—it’s worth it.
Apple peels don’t soften much during baking, and their texture can be a bit tough in the soft, juicy filling.
Aim for pieces that are all about the same size so they cook at the same rate.
Step 2 - Flavor the Filling
Dump all those beautiful apple chunks into a large mixing bowl.
Add the flour, brown sugar, lemon juice, vanilla, cinnamon, nutmeg, and salt right on top.
Now, just toss everything together until the apples are evenly coated in the spiced, sugary mixture.
You’ll see the pieces start to glisten slightly—that’s the magic beginning.
Step 3 - Assemble the Base
Grab an 8x8-inch baking dish and give it a light coating of butter.
Transfer the coated apples into the dish, spreading them into a nice, even layer.
A little press with your hands is fine to make sure there aren’t big gaps.
Now, set this aside while you make the best part—the topping.
Step 4 - Make the Crumble Topping
In a separate bowl, whisk together the oats, flour, brown sugar, cinnamon, and salt.
Scatter the cubes of cold butter over this dry mixture.
Here’s where you get to use your hands, a pastry cutter, or two forks.
Work the butter into the oats and flour until the mixture looks like coarse, moist sand with plenty of pea-sized clumps.
Step 5 - Top and Bake
Sprinkle the crumble mixture evenly over the waiting apples.
Don’t press it down; let it stay nice and loose and craggy.
Cover the dish tightly with aluminum foil and bake at 375°F for 35 to 40 minutes.
This initial covered bake steams the apples, making them tender and juicy.
Step 6 - Crisp and Serve
After that time, carefully remove the foil. The apples should be bubbling around the edges.
Return the dish to the oven, uncovered, for another 10 to 15 minutes.
This final bake is what turns the topping golden brown and gives it that signature crisp texture.
Let it cool for at least 10 minutes before serving—it’s molten hot!
Creative Variations to Try
Once you’ve mastered the classic, playing with variations is half the fun.
This recipe is a wonderful canvas for your own personal touches.
For a deeper flavor, try adding a tablespoon of bourbon or dark rum to the apple filling along with the vanilla.
It adds a wonderful warmth that pairs beautifully with the cinnamon.
Love nuts? Fold a half-cup of chopped pecans or walnuts into the crumble topping.
They’ll toast up in the oven and add a fantastic crunch.
Feeling adventurous? Add a cup of fresh cranberries to the apple mixture.
Their tart pop creates a stunning flavor contrast and a gorgeous ruby hue.
Tips
These little bits of advice are what turn a good crisp into a great one.
They’re simple but make all the difference.
Keep Your Butter Cold: This is non-negotiable for a perfect crumbly topping. I even cube my butter and pop it back in the fridge for a few minutes while I prep the apples.
Don’t Skimp on Cooling Time: Letting the crisp rest for 10-15 minutes allows the bubbling juices to thicken slightly. This prevents a soupy filling and saves your tongue from a serious scald.
Check for Doneness with a Knife: The best way to know if the apples are tender is to insert a small knife or skewer into the center of the dish. It should slide into an apple piece with just a little resistance.
Serving & Storing Your Masterpiece
Presentation is easy, because the crisp itself is so gorgeous.
Scoop it warm into bowls, letting those crispy topping bits spill over the edges.
The classic pairing is, of course, a generous scoop of high-quality vanilla ice cream.
The way the cold cream melts into the warm apples is pure bliss.
Whipped cream or even a drizzle of cold heavy cream are also excellent, simpler choices.
For a brunch twist, a dollop of Greek yogurt works surprisingly well.
If you have leftovers, let them cool completely before covering and refrigerating.
They’ll keep for about two days. Reheat individual portions in the microwave, or warm the whole dish, covered, in a 350°F oven.
The Ultimate Make-Ahead Dessert
This is my secret weapon for stress-free entertaining.
You can prep everything well before your guests arrive.
Simply toss the chopped apples with the filling ingredients and spread them in the buttered baking dish.
Cover it tightly and refrigerate for up to two hours.
Make the crumble topping, stash it in a separate container or zip-top bag, and keep it in the fridge, too.
When you’re ready, just sprinkle the cold topping over the apples and bake.
It bakes up perfectly, and your kitchen will fill with that incredible aroma right when you want it to.
Honestly, it might be the best hosting trick I know.
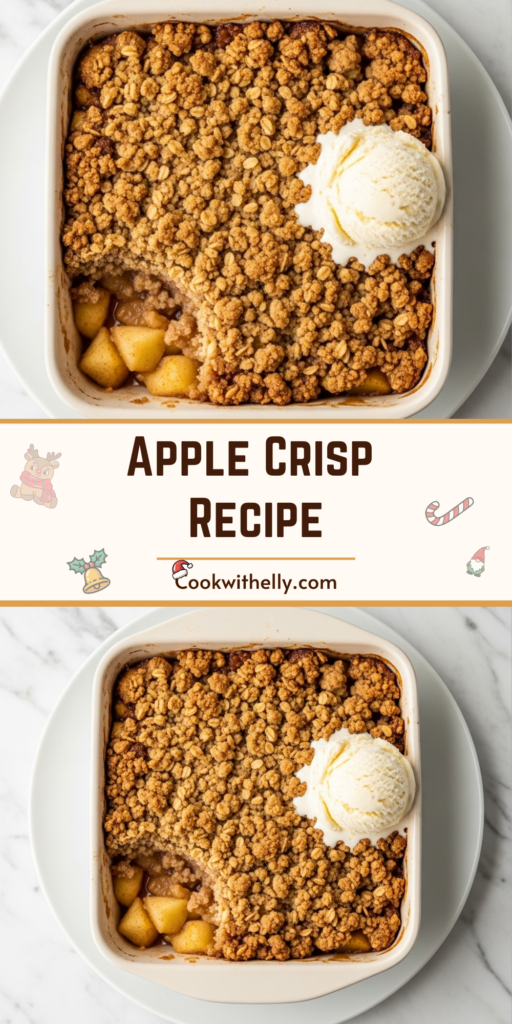
This apple crisp recipe is a delicious fall dessert featuring juicy cinnamon-spiced apples and a buttery brown sugar oat topping. Serve warm with a scoop of vanilla ice cream for a comforting treat that fills your kitchen with the cozy aromas of the season!
ingredients
For the Apples
6large apples (2½ pounds, peeled, cored, and chopped into ¾-inch pieces (e.g., Honeycrisp, Granny Smith, or Gala))
2tablespoons all-purpose flour
2tablespoons brown sugar
2teaspoons fresh lemon juice
1teaspoon vanilla extract
1teaspoon cinnamon
0.5teaspoon nutmeg
0.25teaspoon sea salt
Crumble Topping
0.75cup whole rolled oats
0.5cup all-purpose flour (spooned and leveled)
0.5cup brown sugar
0.5teaspoon cinnamon
0.25teaspoon sea salt
0.5cup cold unsalted butter (1 stick, cubed)
Instructions
1
Preheat the oven to 375°F and grease an 8x8-inch baking dish.
2
In a large bowl, combine the chopped apples, 2 tablespoons flour, 2 tablespoons brown sugar, lemon juice, vanilla extract, 1 teaspoon cinnamon, nutmeg, and ¼ teaspoon salt. Toss until evenly coated.
3
Spread the apple mixture evenly in the prepared baking dish.
4
In a medium bowl, whisk together oats, ½ cup flour, ½ cup brown sugar, ½ teaspoon cinnamon, and ¼ teaspoon salt. Add cubed cold butter and use a pastry cutter, two forks, or your hands to mix until crumbly.
5
Sprinkle the crumble topping evenly over the apples.
6
Cover the baking dish with aluminum foil and bake for 35–40 minutes, or until the apples are bubbling. Remove foil and bake 10–15 more minutes until topping is golden brown and crisp.
7
Let cool for at least 10 minutes before serving. Serve warm with vanilla ice cream if desired.
Nutrition Facts
Servings 6
Serving Size 1 serving
Amount Per Serving
Calories280kcal
% Daily Value *
Total Fat12 gg19%
Saturated Fat7 gg35%
Trans Fat0 gg
Cholesterol30 mgmg10%
Sodium120 mgmg5%
Potassium180 mgmg6%
Total Carbohydrate43 gg15%
Dietary Fiber4 gg16%
Sugars28 gg
Protein2 gg4%
Calcium 40 mg
Iron 1 mg
* Percent Daily Values are based on a 2,000 calorie diet. Your daily value may be higher or lower depending on your calorie needs.
Note
Best apples: Use firm baking apples like Honeycrisp, Granny Smith, Gala, or a mix for balanced sweet-tart flavor.
Make ahead: Prep filling and topping separately up to 2 hours in advance; assemble and bake when ready.
Storage: Cover and refrigerate leftovers up to 2 days. Reheat in microwave or 350°F oven.
Serving tip: Always best served warm with a scoop of homemade vanilla ice cream!
Keywords:
apple crisp, fall dessert, cinnamon apples, oat topping, easy apple dessert, baked apples, homemade crisp